Using Shapes
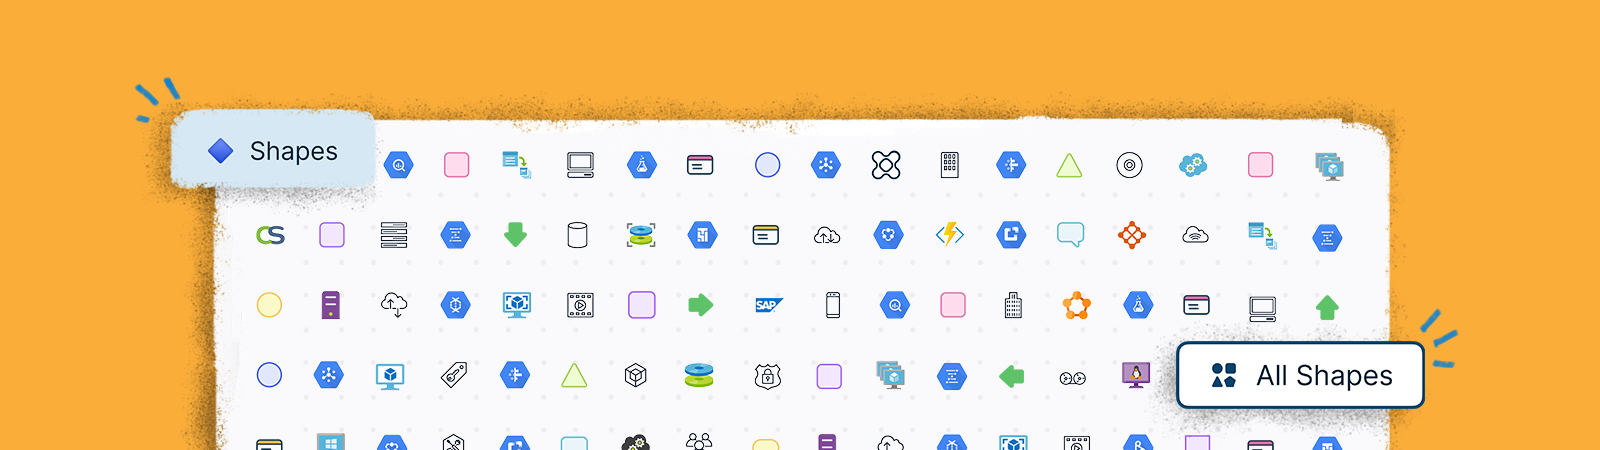
We have a powerful set of diagraming features that allows you to visualize things quickly and easily. Our extensive shape libraries span across multiple uses cases and industries. You can easily access all our shapes using the shape library.
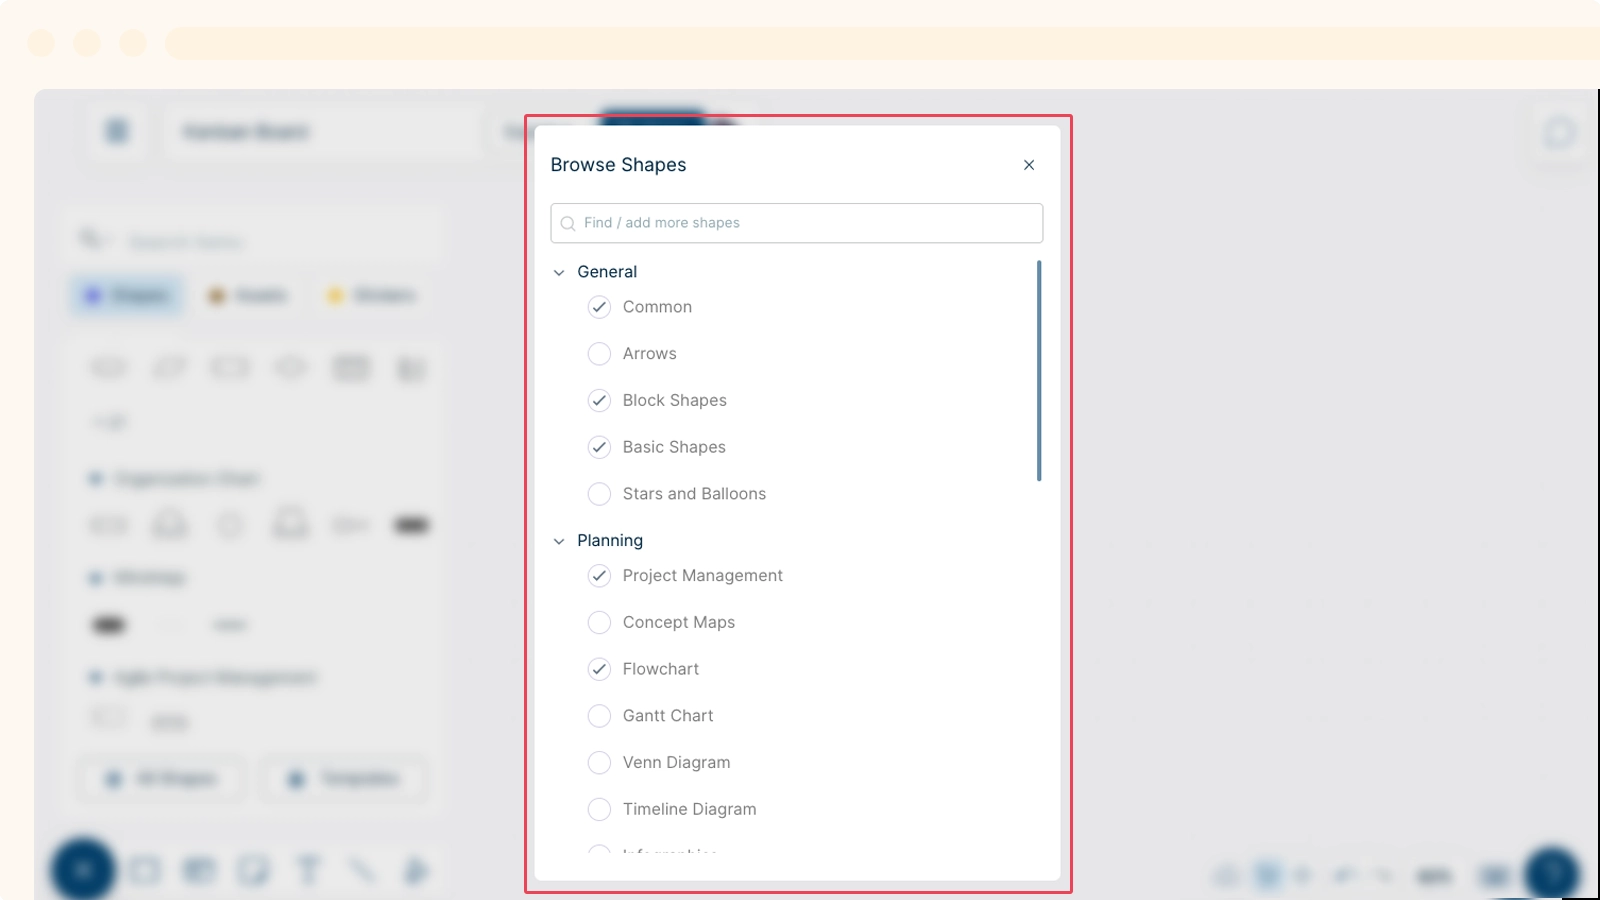
Using Shape Library
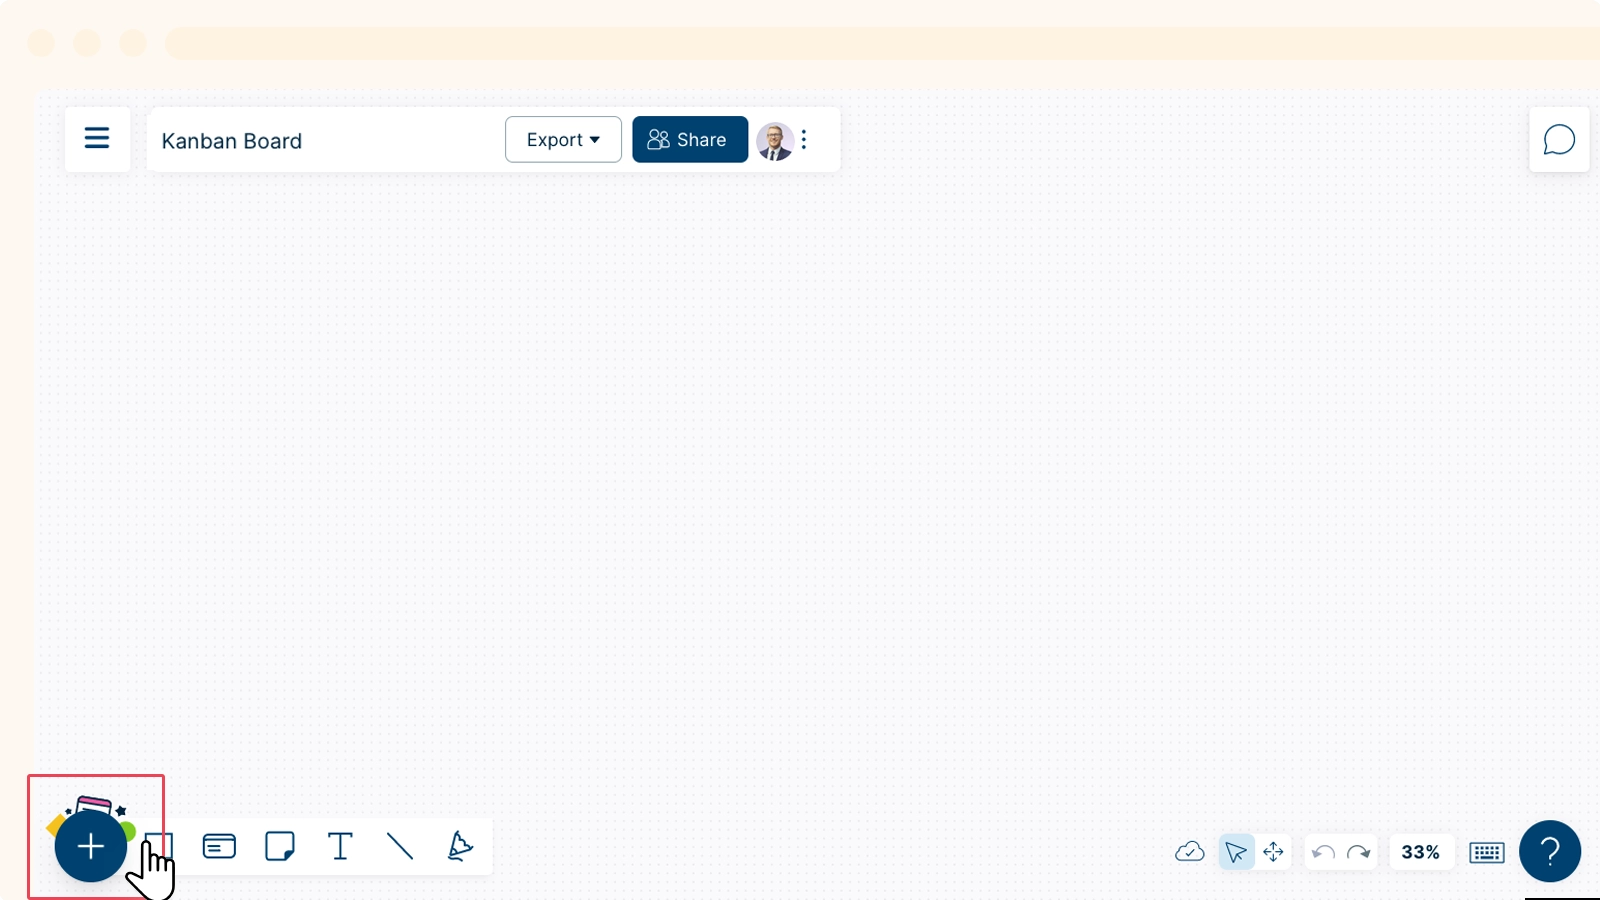
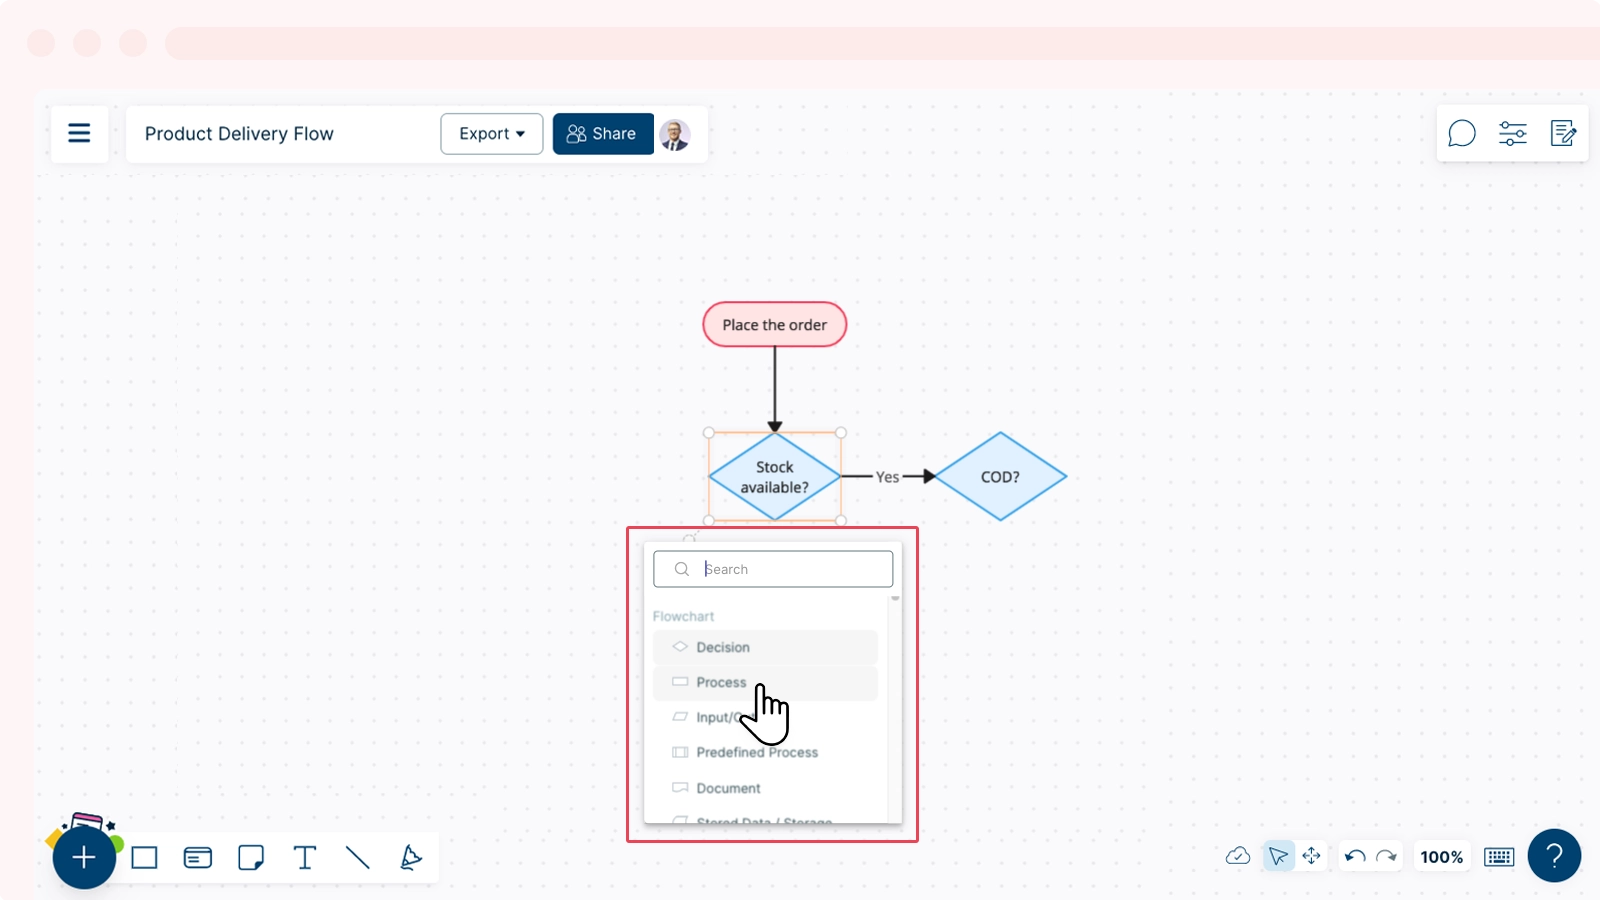
Select ![]() Plus Button and click on
Plus Button and click on ![]() to access the Creately’s shape library. These shapes are based on the most used shapes in Creately.
to access the Creately’s shape library. These shapes are based on the most used shapes in Creately.

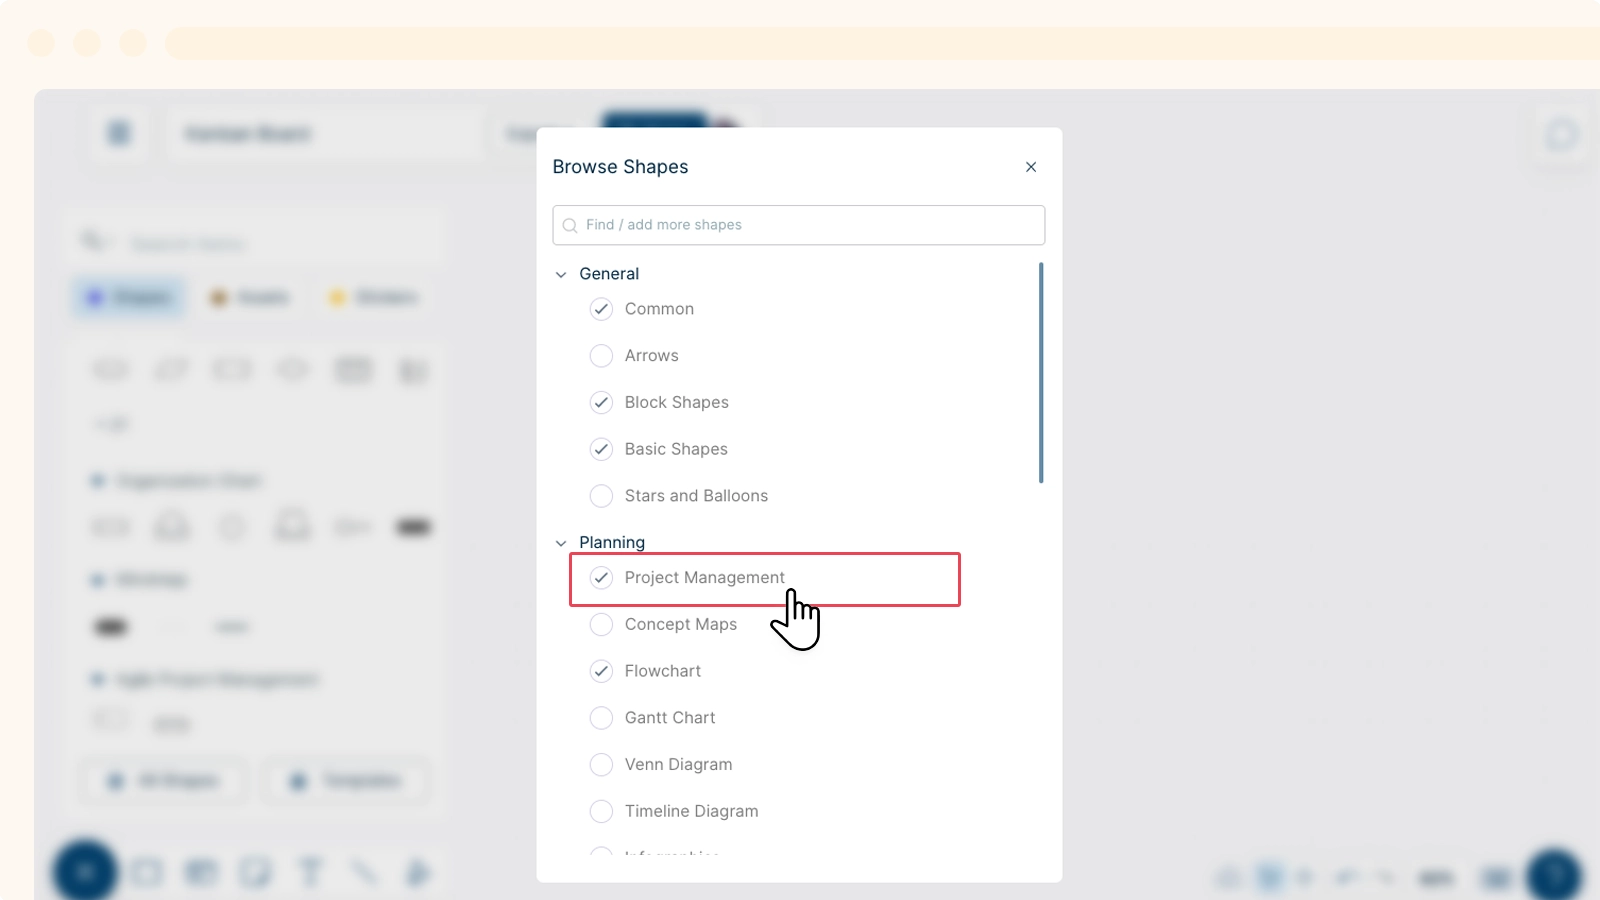
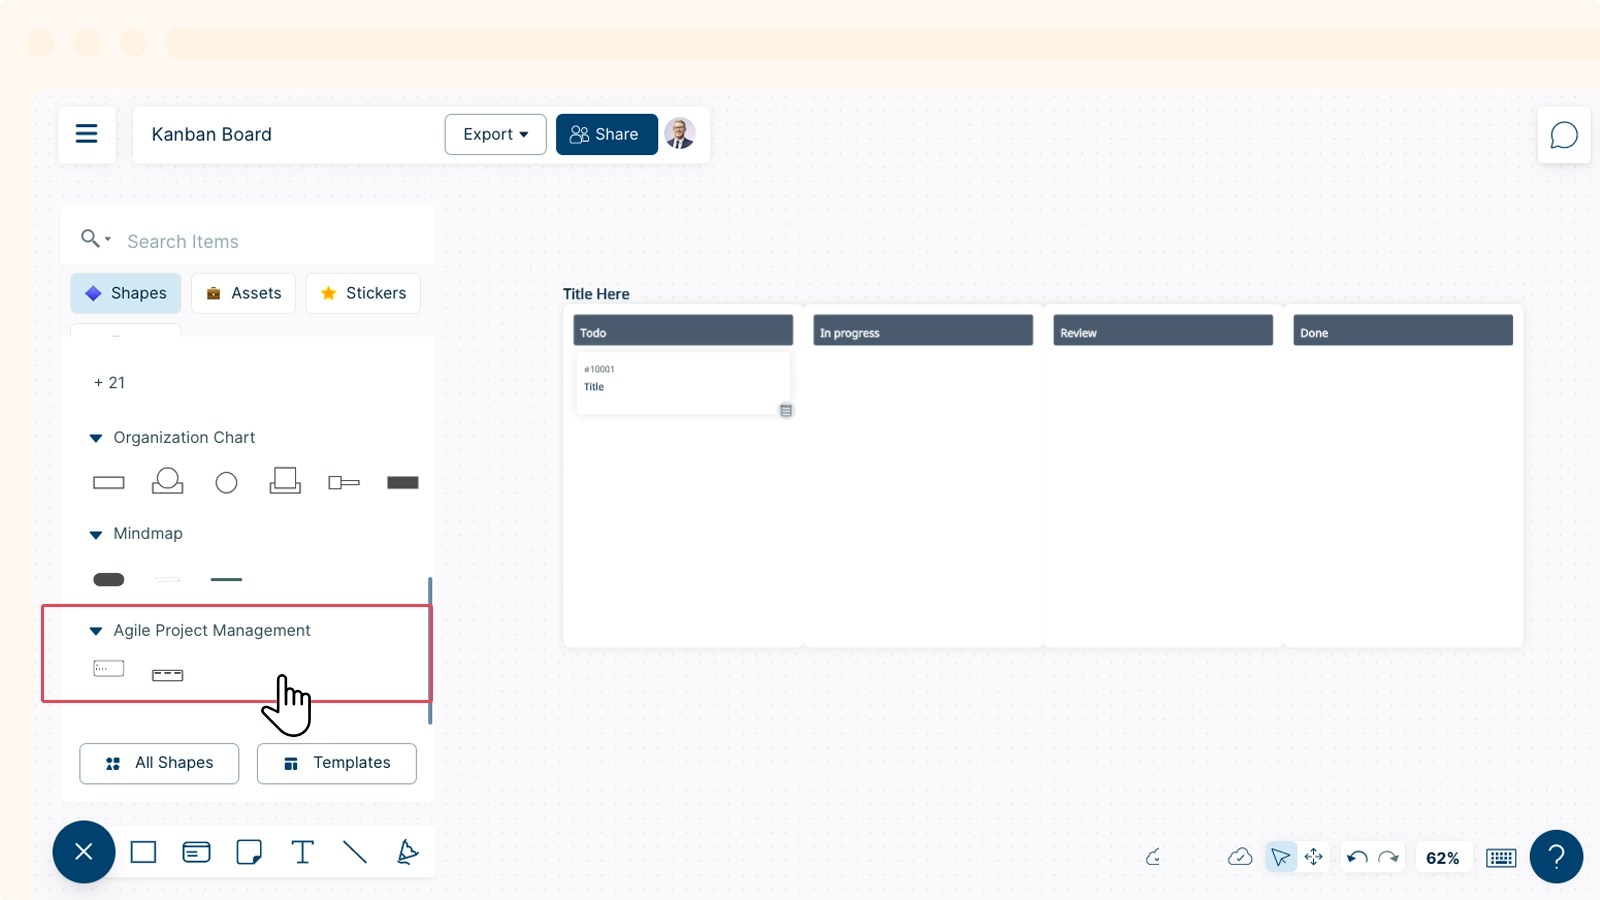
Using Project Management Shapes
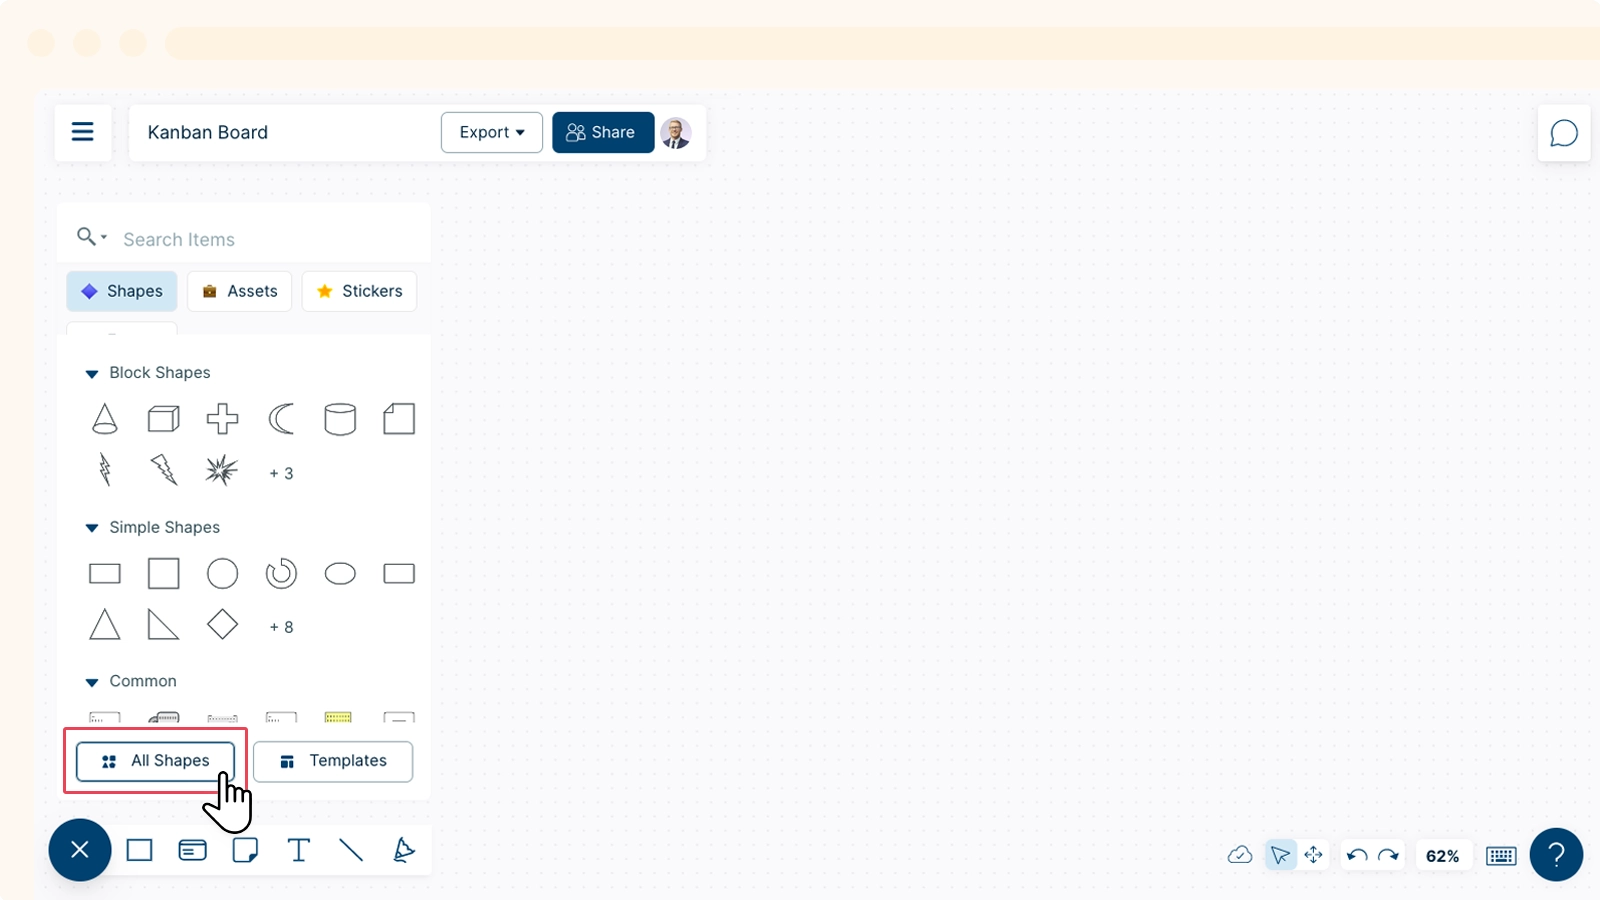
With its infinite canvas and smart decision capabilities, Creately has redefined project management. This new improvement provides ease of access to Creately users who are planning, organizing, and overseeing tasks and resources to achieve a specific goal in their teams and organizations. Go to ![]() Plus Button → All Shapes → Project Management and you can access Kanban board and the card shape that are readily available with default datafields in them, which are also highly customizable. Rather than searching for the kanban board and card in the Shapes library, one can easily drag and drop these shapes onto the canvas and enter details for your tasks right away.
Plus Button → All Shapes → Project Management and you can access Kanban board and the card shape that are readily available with default datafields in them, which are also highly customizable. Rather than searching for the kanban board and card in the Shapes library, one can easily drag and drop these shapes onto the canvas and enter details for your tasks right away.
Tip!
The card shape consists of a set of default data fields that help you easily create a task. You can add an assignee, estimation, and effort for a task instantly. As you add an assignee, a task gets created automatically in the relevant user’s tasks panel, which they can view in an extended preview or open the containing workspace. The card shape also auto adjusts the status on the card according to the column you dragged and dropped it into. You can also change the status from the notes panel, so the card adjusts itself on the board.


Customizing Shape Library
You can customize the shape library to instantly access particular shapes or shape categories according to your preference.
- To add specific shapes to the shapes tab for easy access, simply select the shape categories from the library.
- Once you close the dialog box, your new shape library will be loaded in the shape tab, under its category name.
- You can even search for a specific shape library using the search bar.


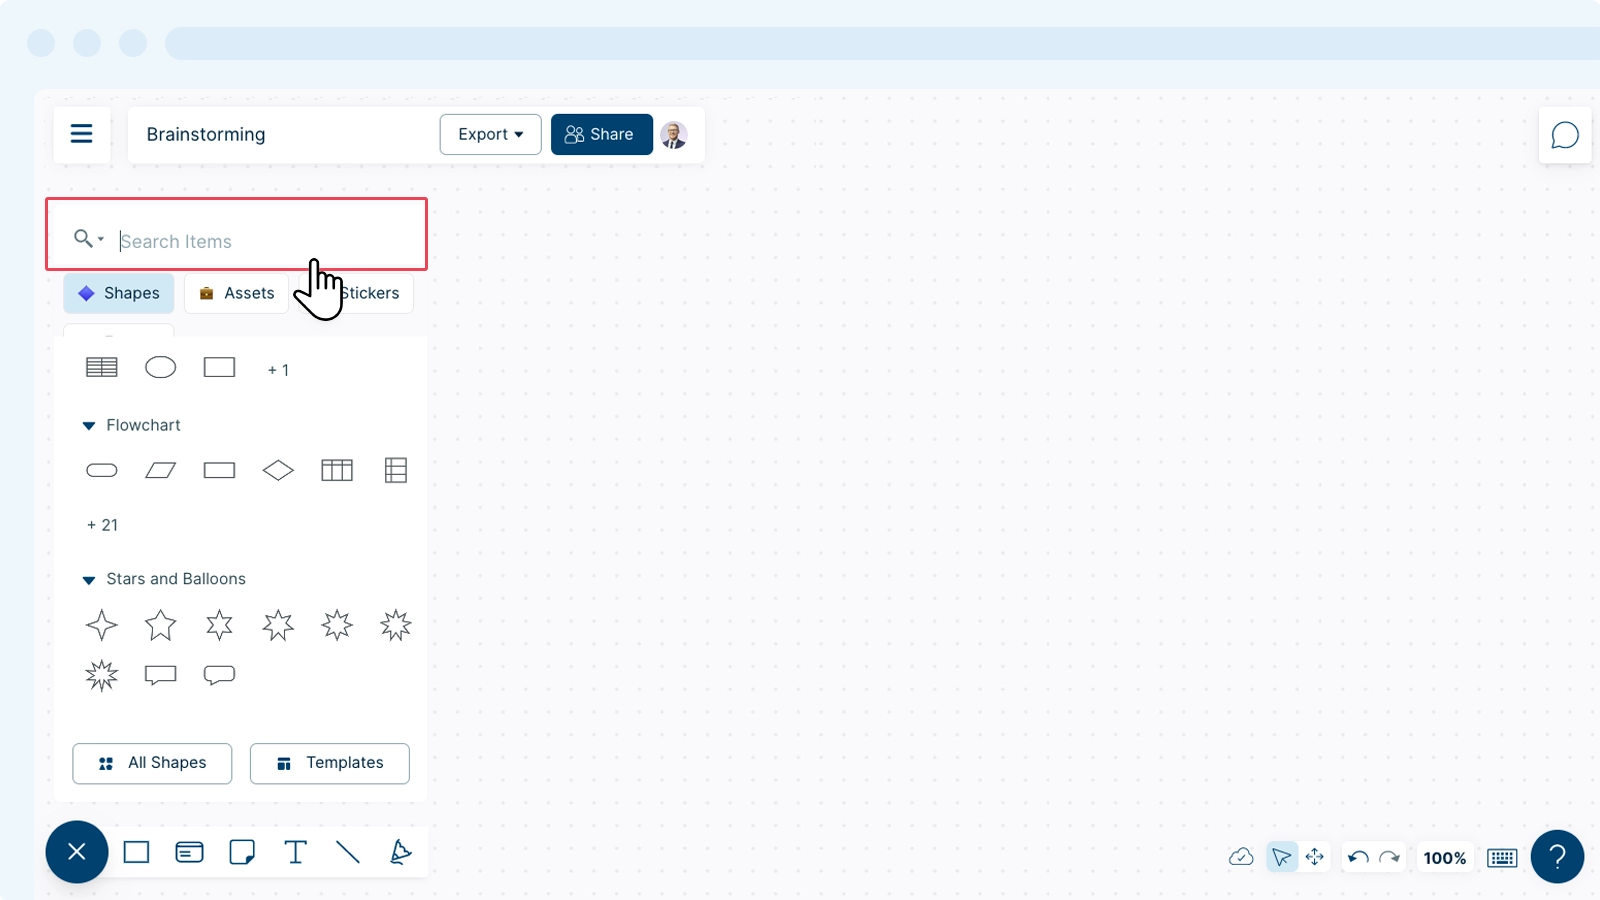
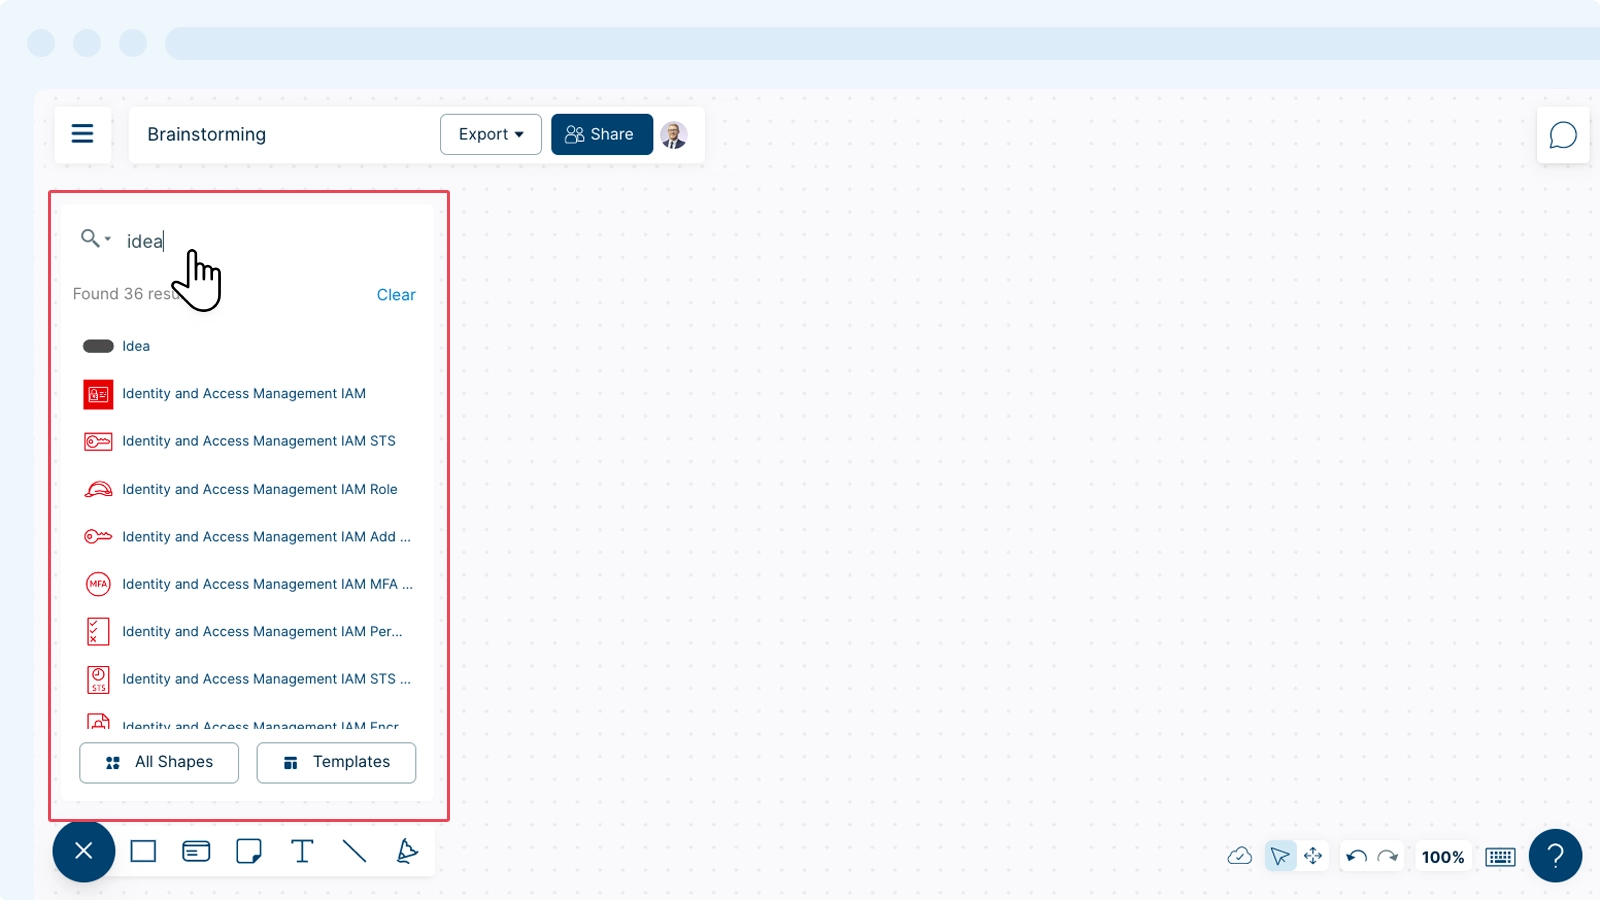
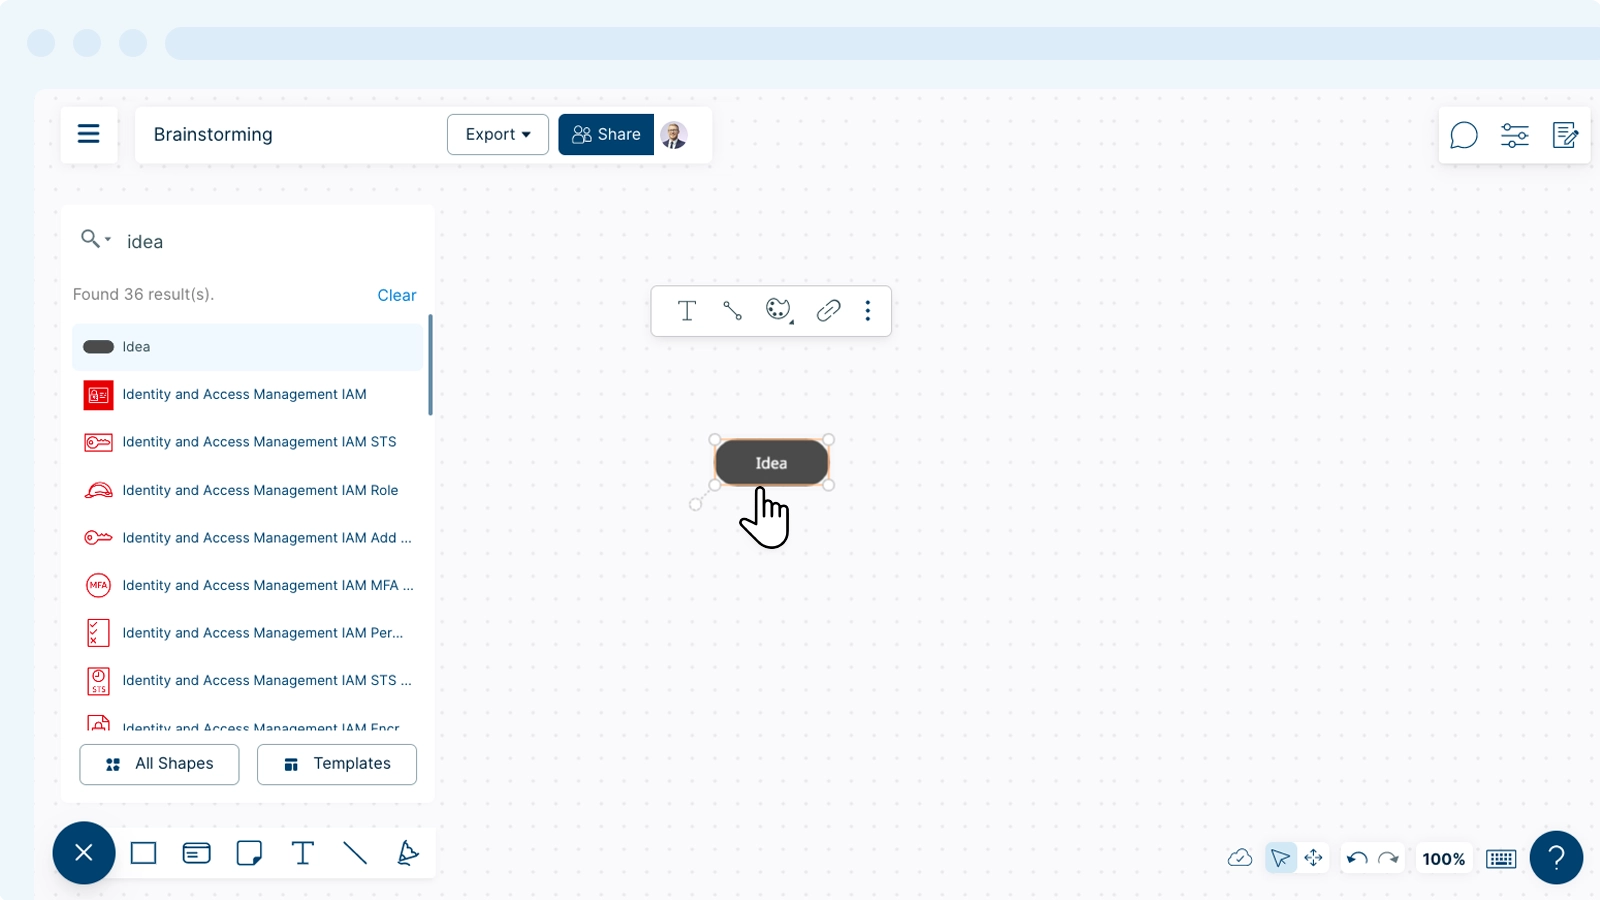
Searching for Shapes
You can instantly find a specific shape you are looking for by simply entering the shape name on the search bar. Select the shape and will be be added to the canvas.
Using Plus Create
Plus Create helps you select the next shape in a sequence when you create diagrams. For example, let’s say you are creating a flow chart. In a typical diagramming solution, you have to drag & drop the shapes or duplicate an existing shape. But on Creately, you can tap on the ![]() Plus Create icon that appears next to the shape as follows:
Plus Create icon that appears next to the shape as follows:
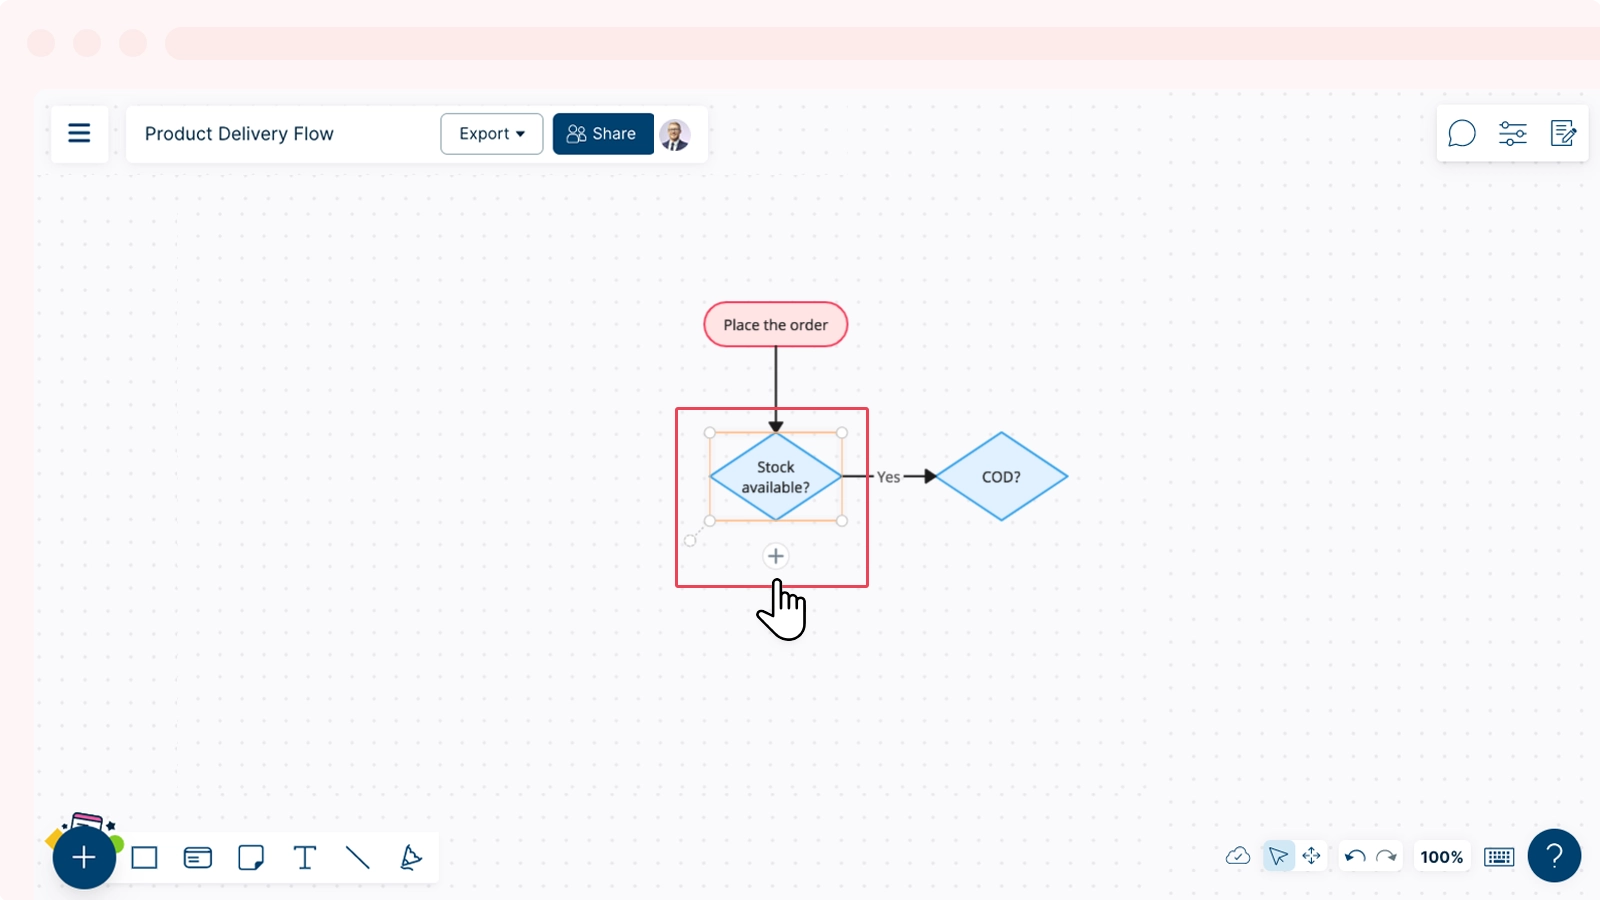
When you select ![]() Plus Create, you can view all the shapes relevant to the diagram you create.
Plus Create, you can view all the shapes relevant to the diagram you create.
Tip!
You can also press the Tab button on any shape to get a list of shapes to add to the canvas. You can also use the search bar to find a specific shape you want to add. To duplicate a shape, select a shape and press enter.
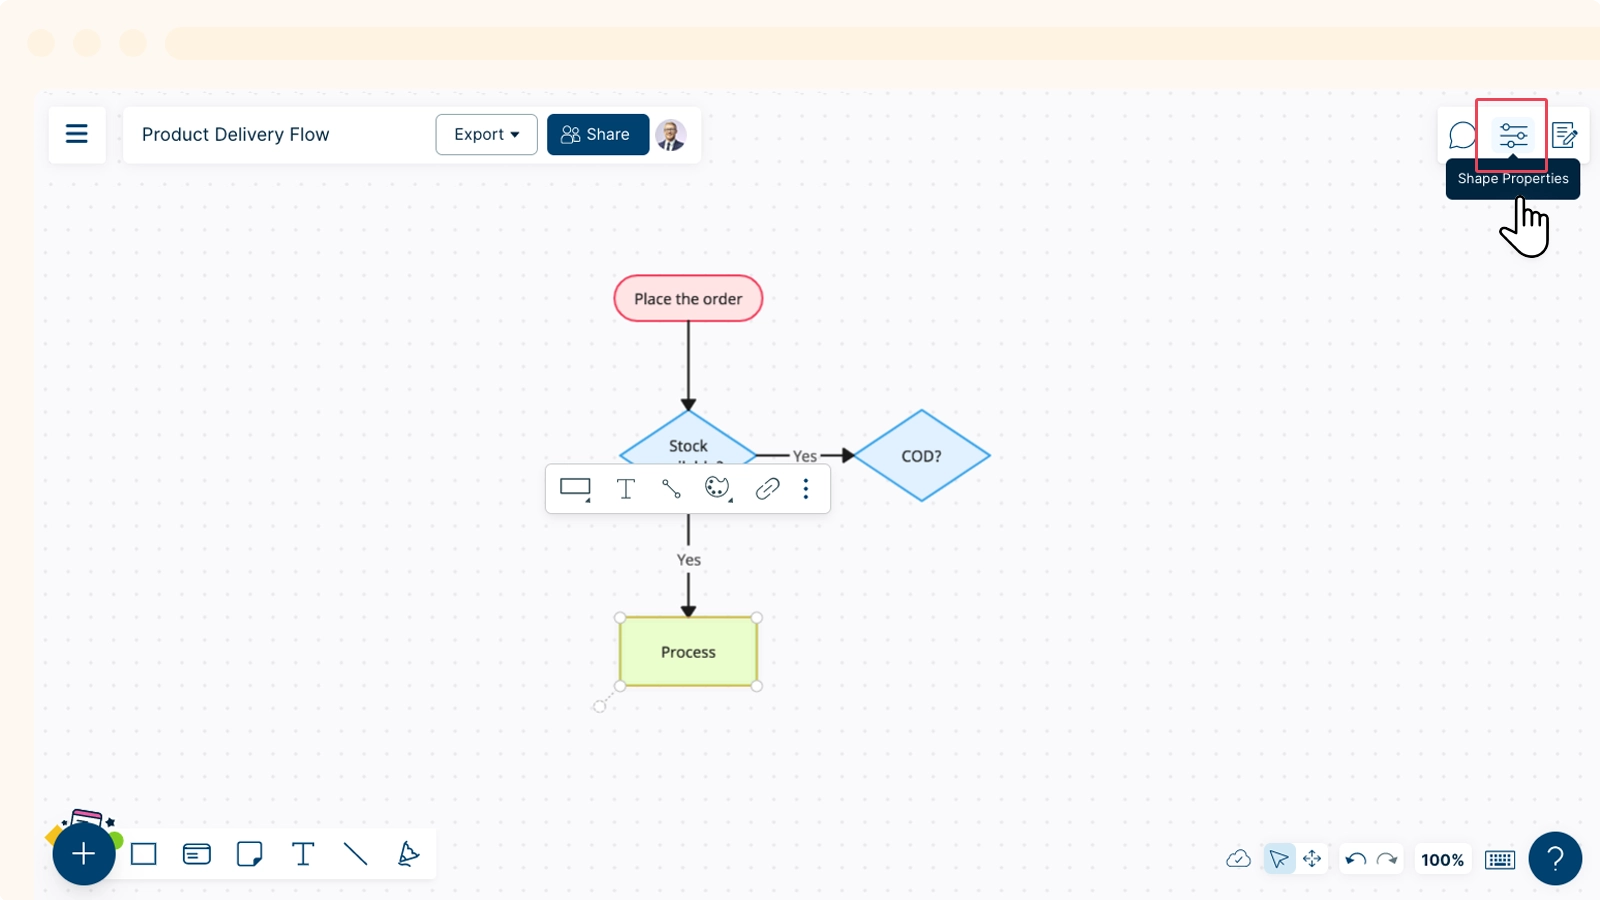
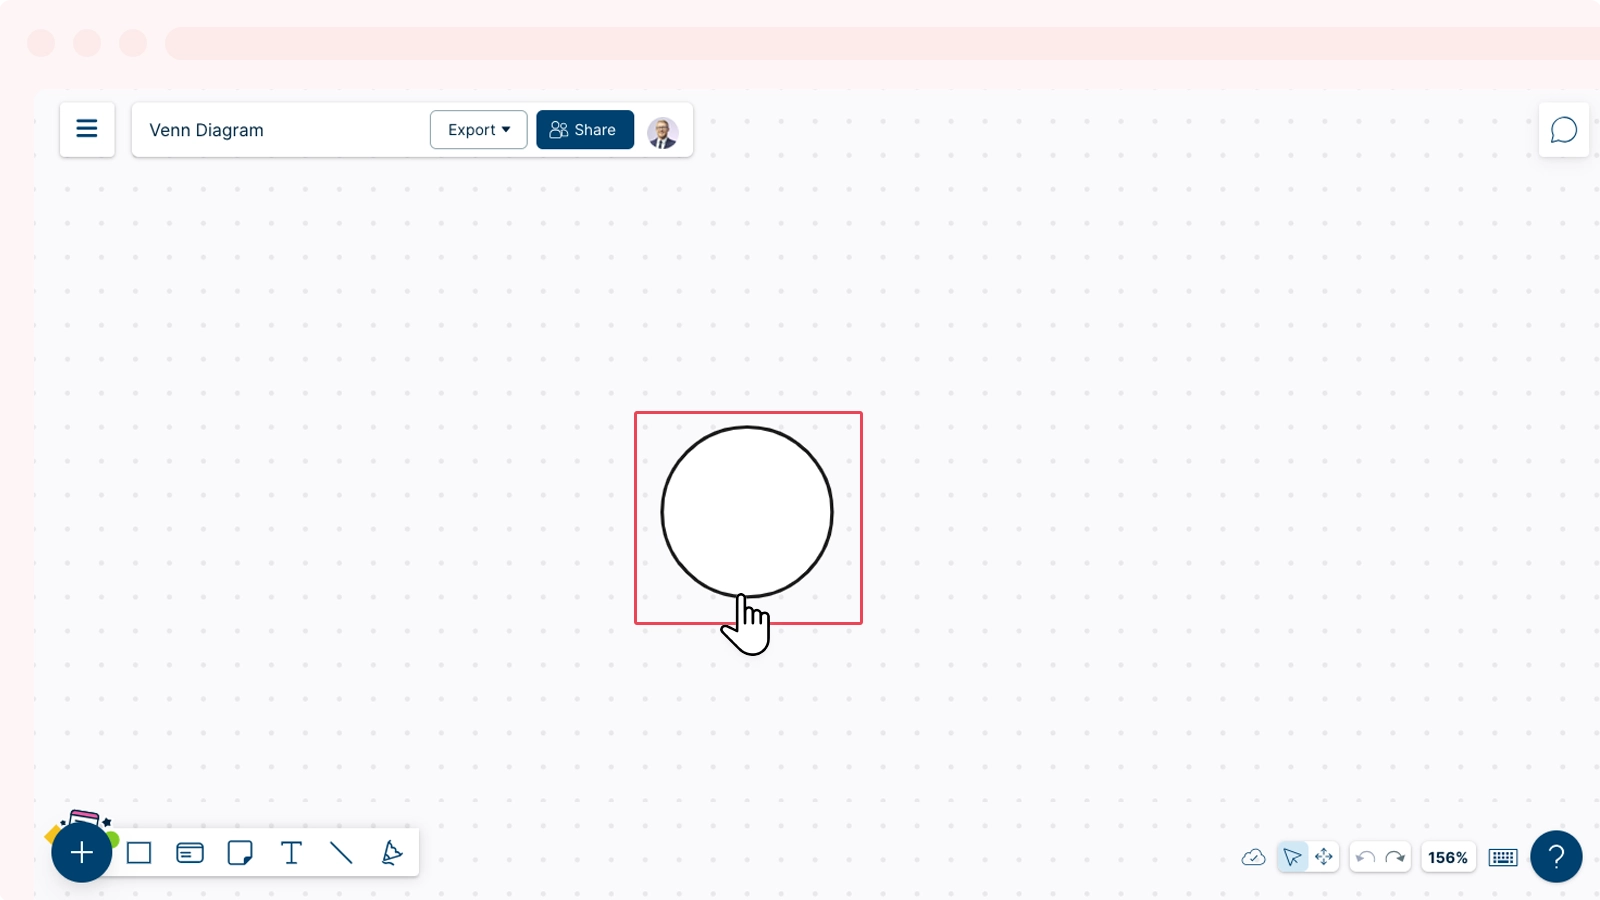
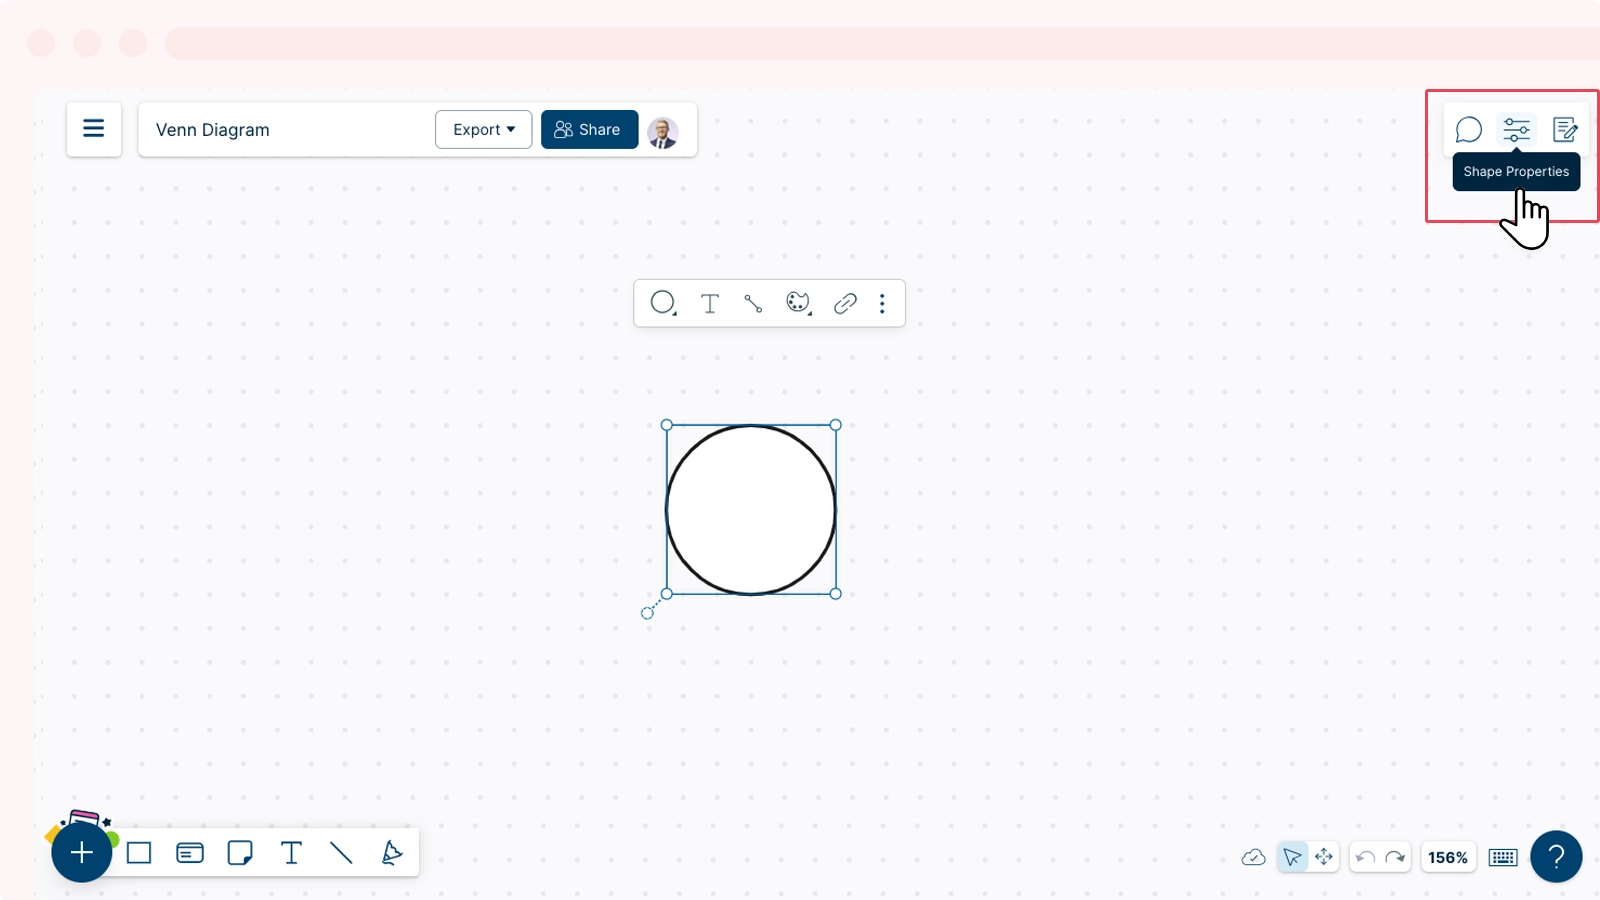
Editing Text
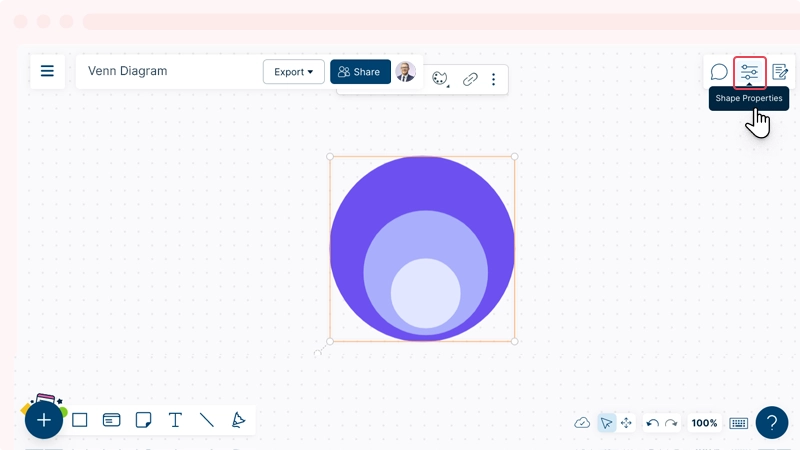
Editing text on your workspace can be done in a few ways. You can use the contextual toolbar that appears after you select a shape, or the Shape Properties panel located at the top-right corner of the canvas.
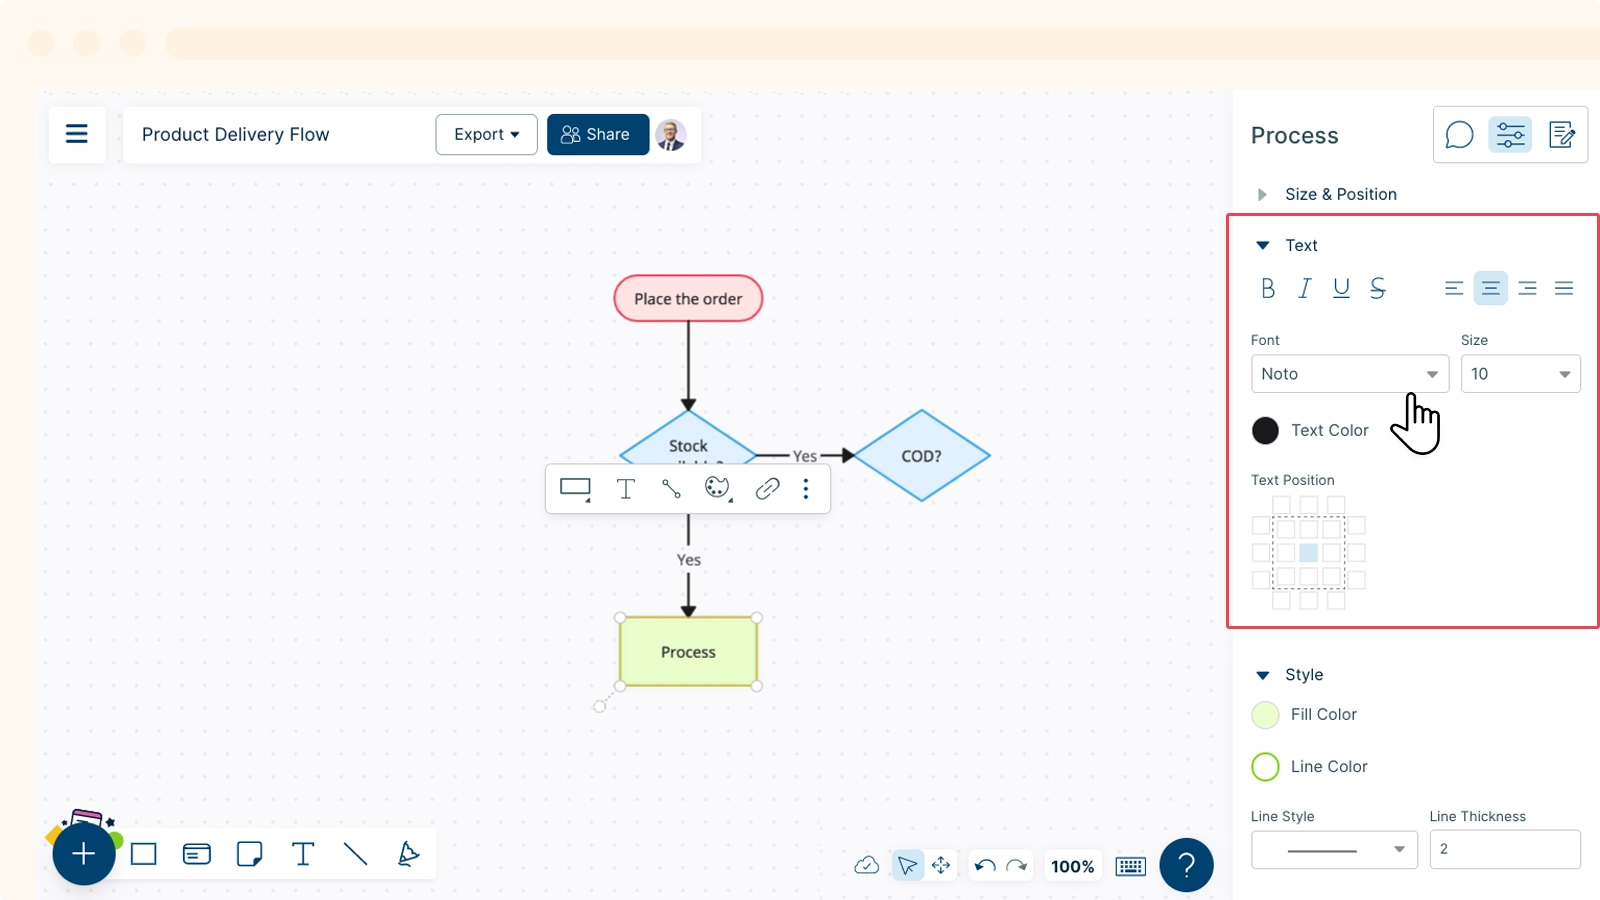
Editing Text Using Shapes Properties
Select the text you want to edit.
Go to
 Shape Properties on the top-right corner.
You can apply the following customizations to the shape text:
- Text effects: Bold, Italic, Underline, and Strikethrough.
- Text alignment: Left, Center, Right, Justify.
- Font and its size.
- Font color.
- Text position.
Editing Text Using the Contextual Toolbar
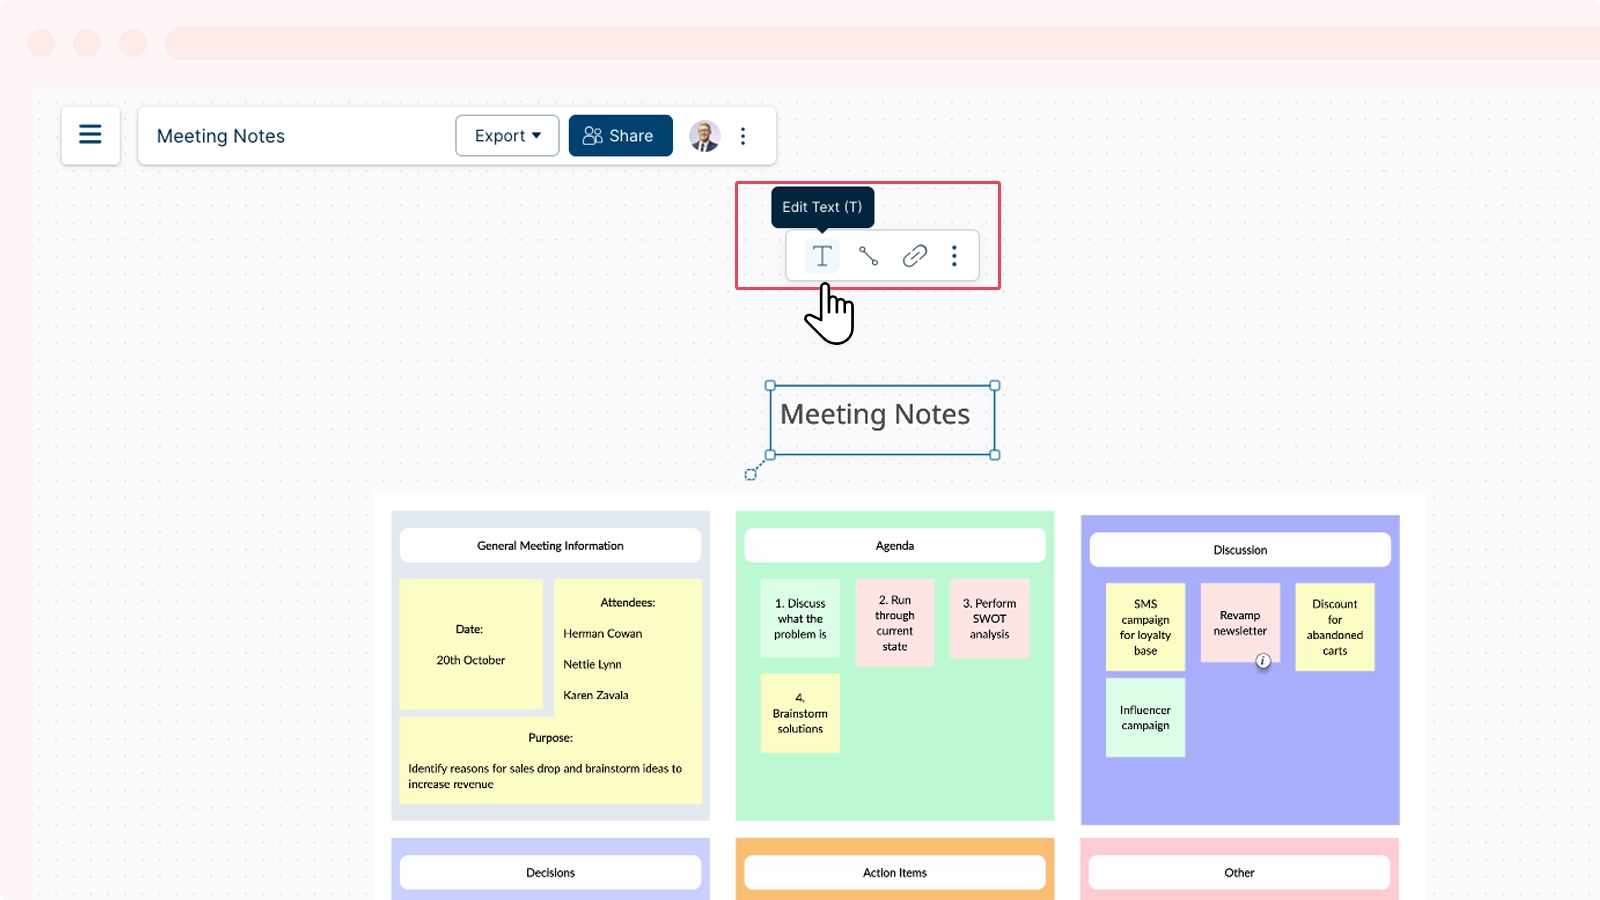
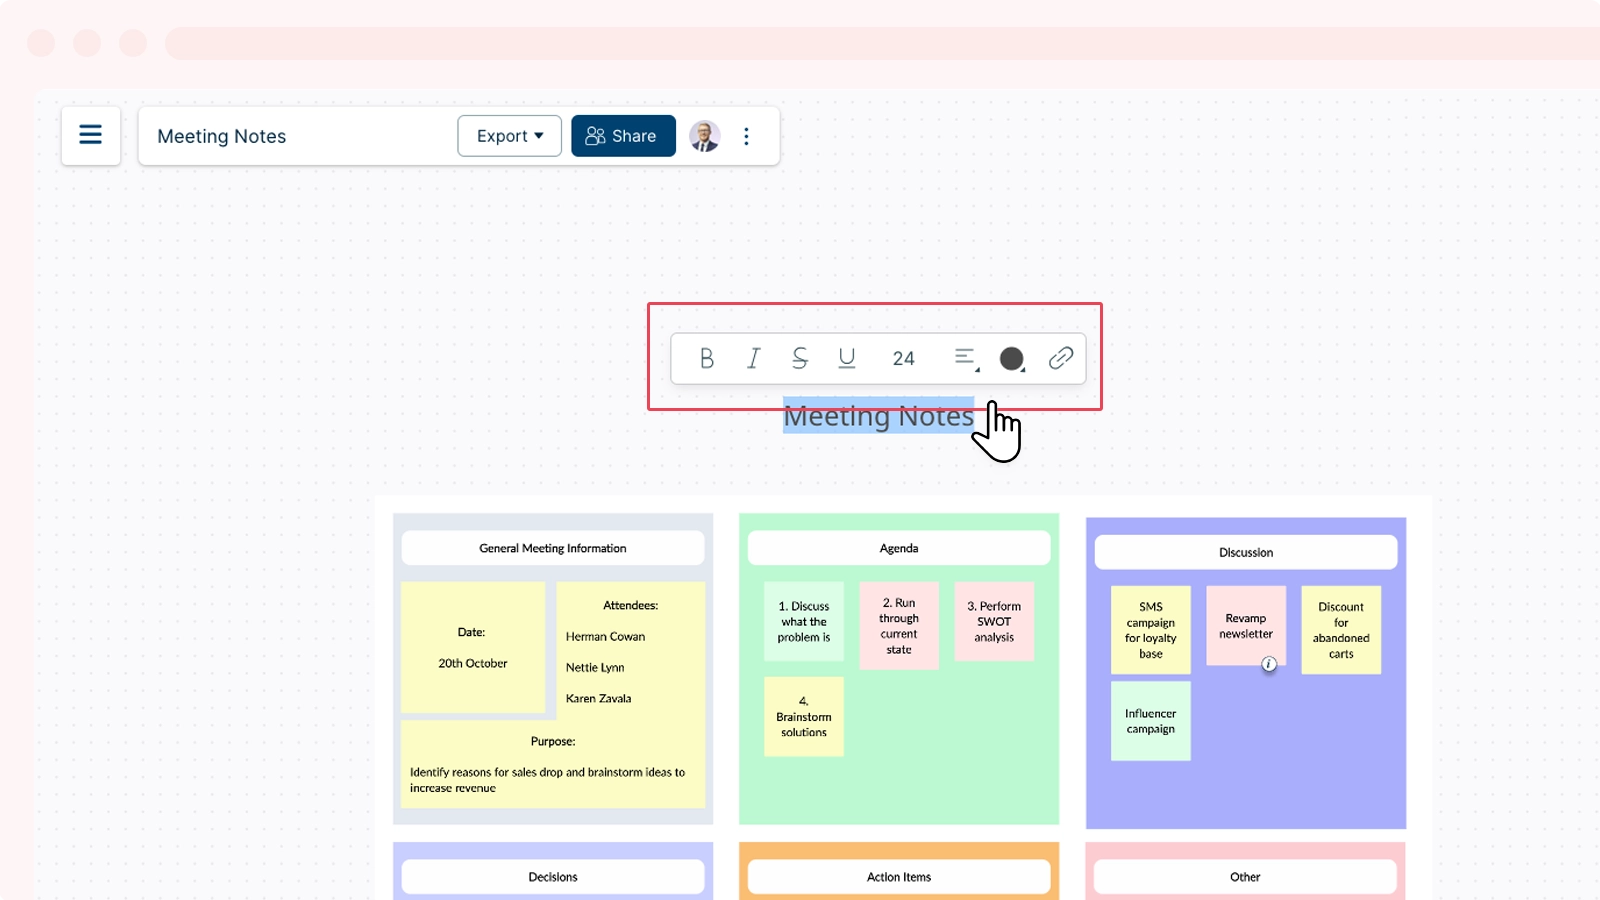
- Double-click on your text.
- Select Edit Text.
- Select the entire text or the portion you wish to edit as per your preference. The contextual toolbar will then appear after the selection as shown below:

Styling Options
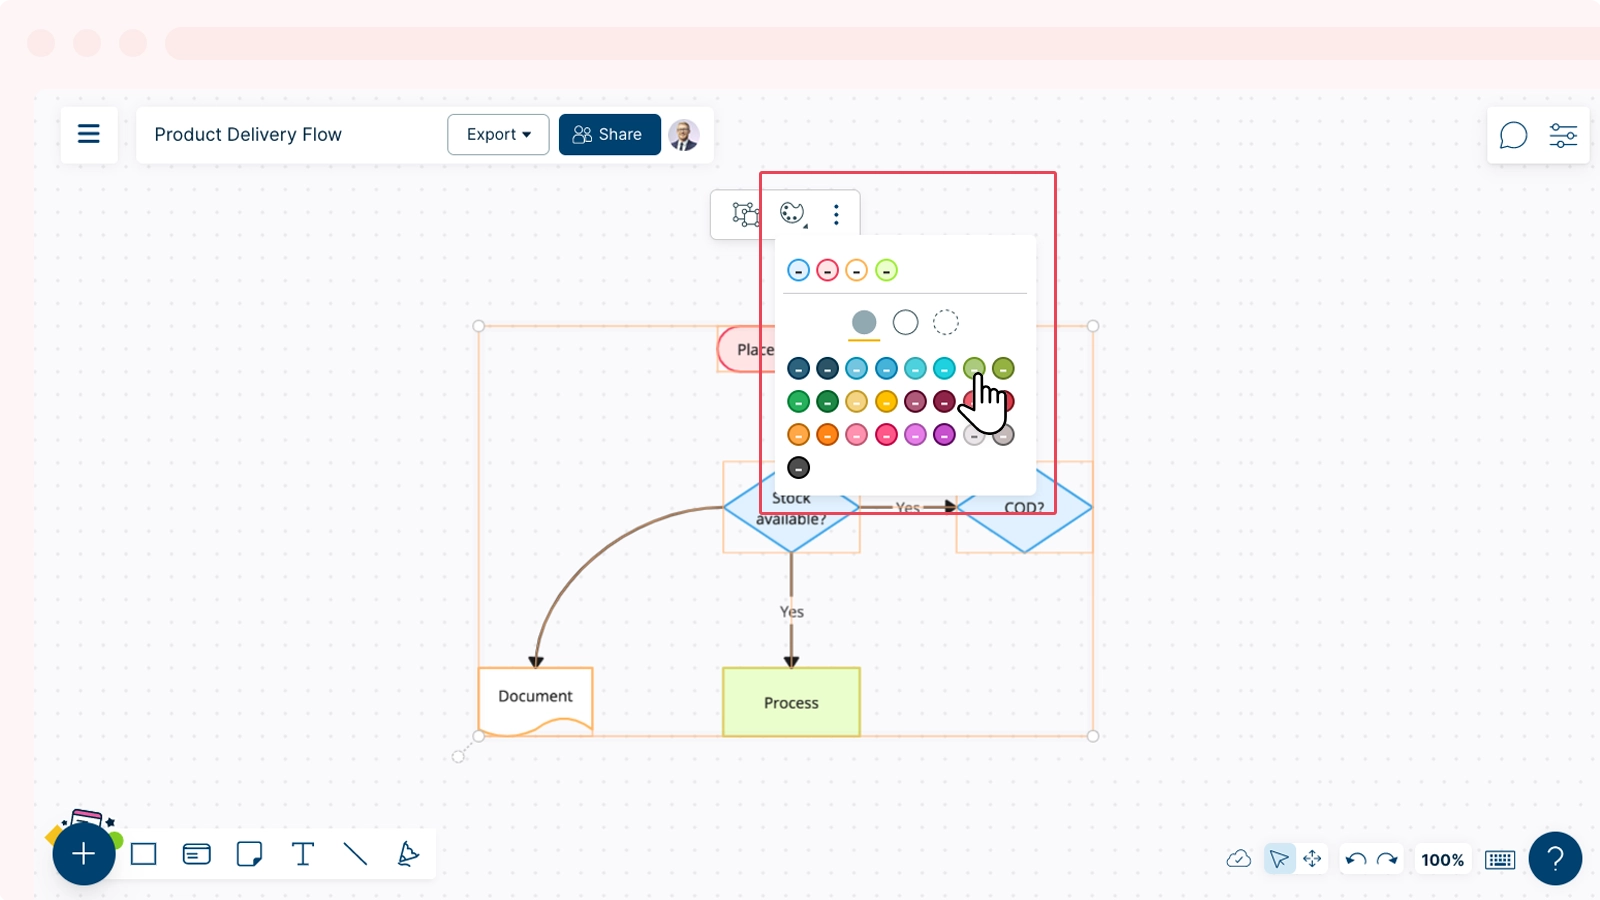
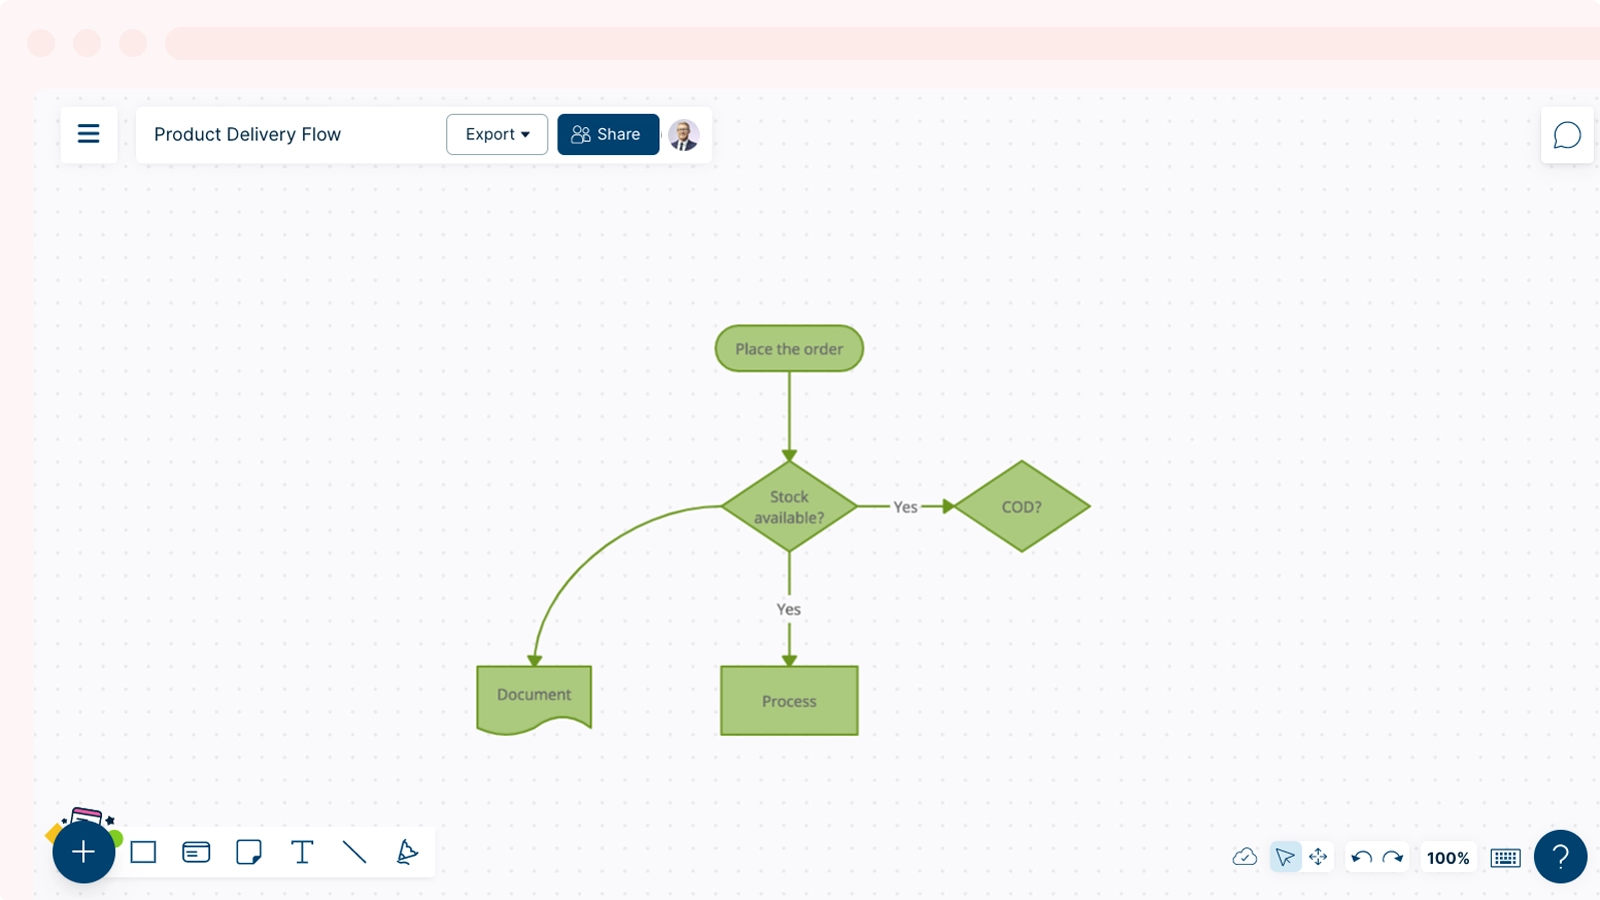
Adding Custom Colors
Easily customize your content by adding colours of your own choice to shapes and lines. Use the RGBA, HSLA and Hex standard colour codes to change the colour of any selected shape.
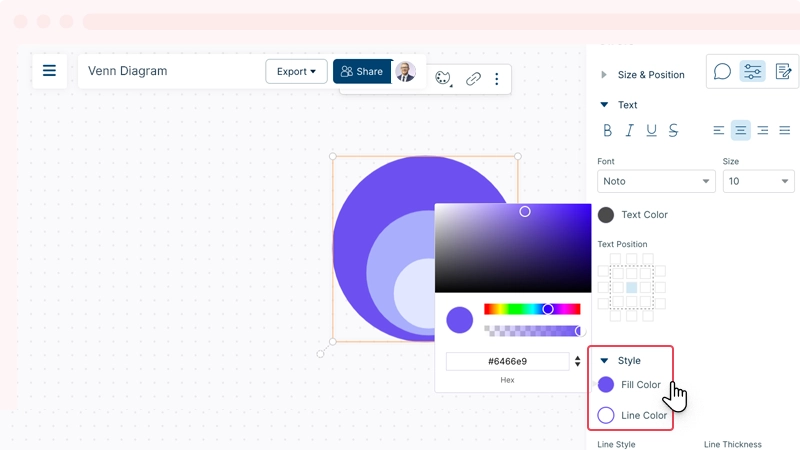
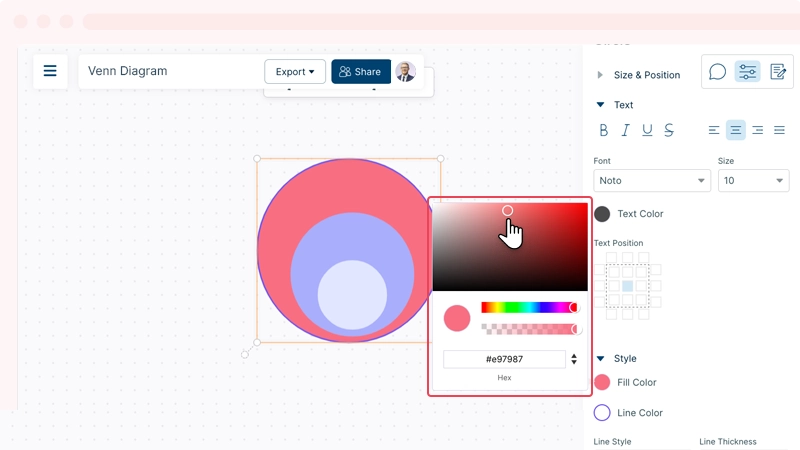
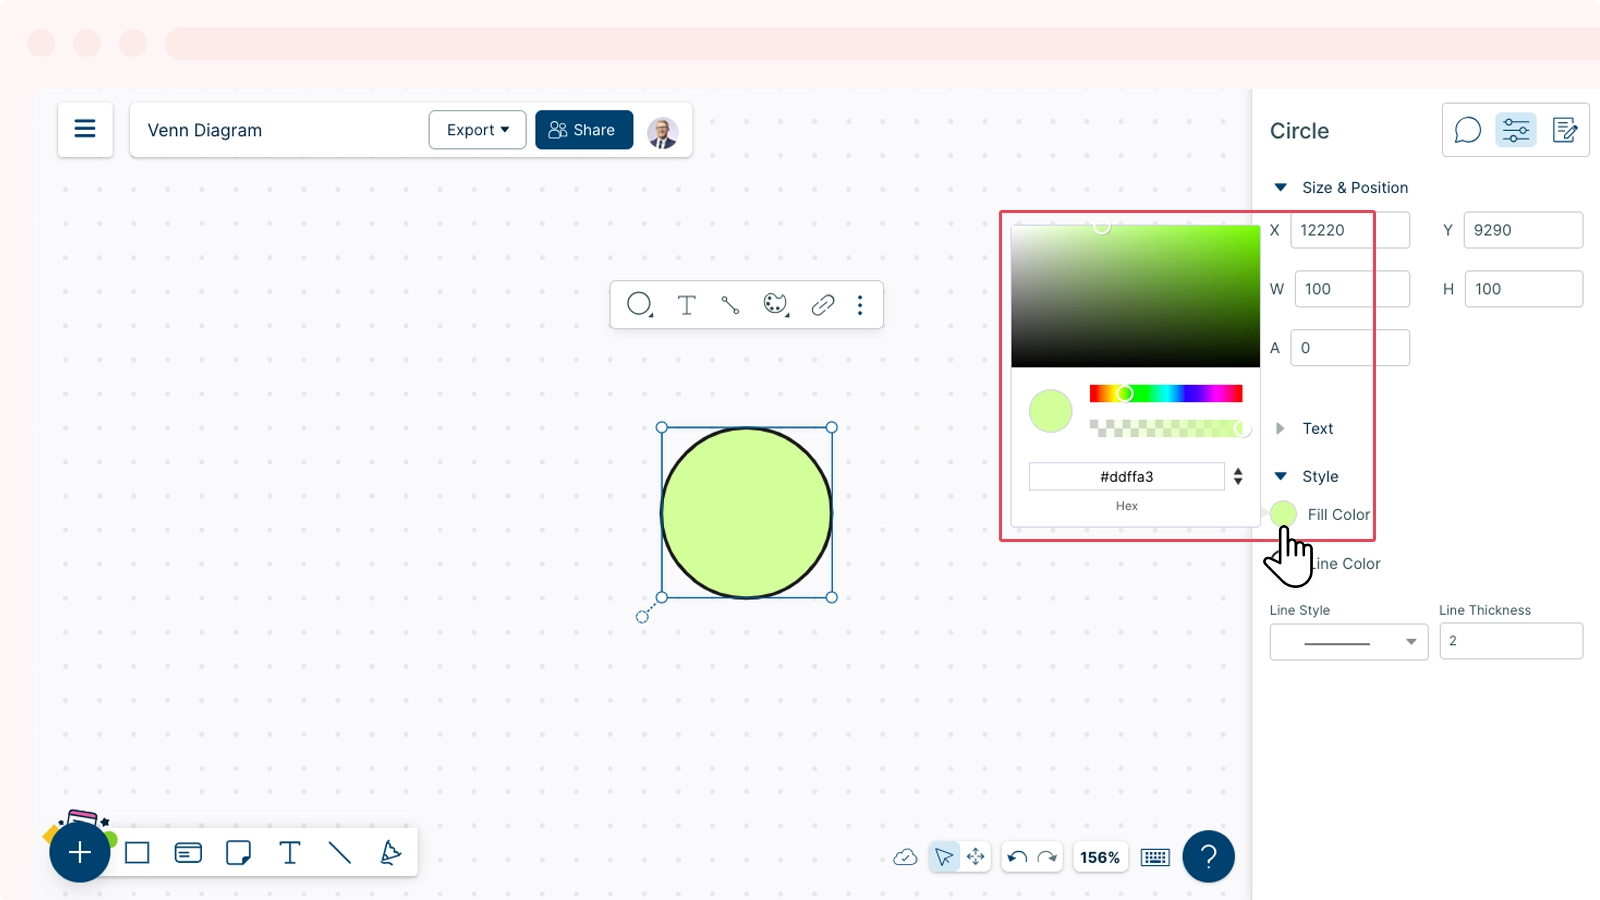
How to add a custom colour to a shape
- Select the Shape
- Open Shape Properties from the right-side panel
- Hover over Fill Color
- Select the relevant colour standard by clicking on the up and down arrow
- Type the respective colour code
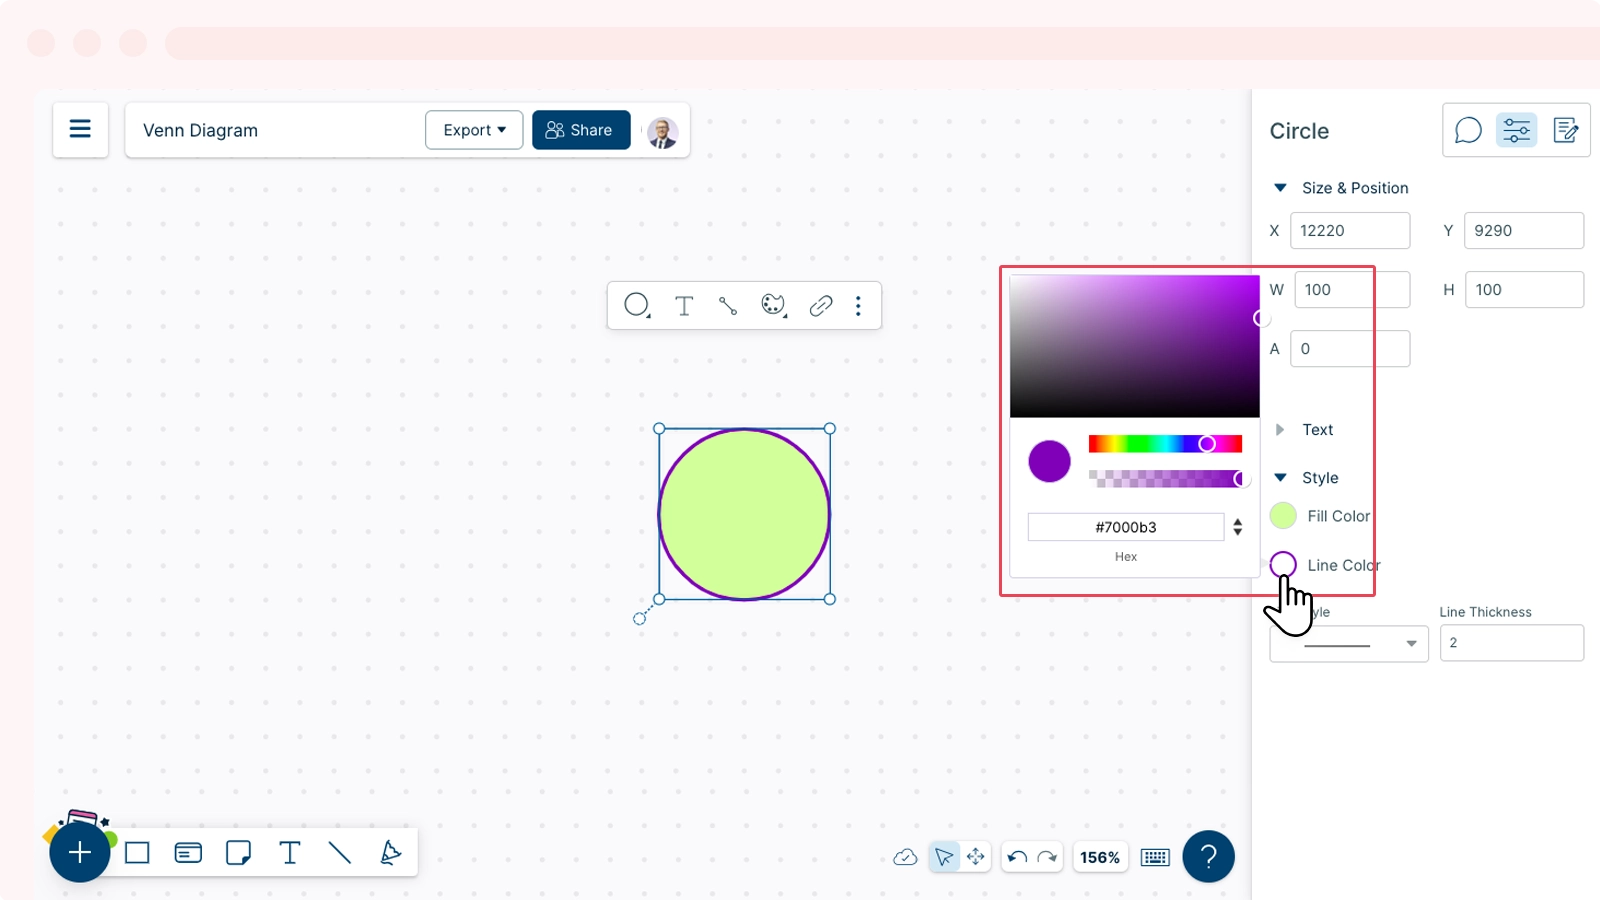
How to change the colour of a line of a shape
- Select the Shape
- Open Shape Properties from the right-side panel
- Hover over Line Color
- Select the relevant colour standard by clicking on the up and down arrow
- Type the respective colour code
How to change the colour of a text in a shape
- Select the shape
- Open Shape Properties from the right-side panel
- Select Text Color
- Select the relevant colour standard by clicking on the up and down arrow
- Type the respective colour code
You can also select colours from our preset colour palette
- Select the shape
- Go to Styles
- Select the colour of your choice
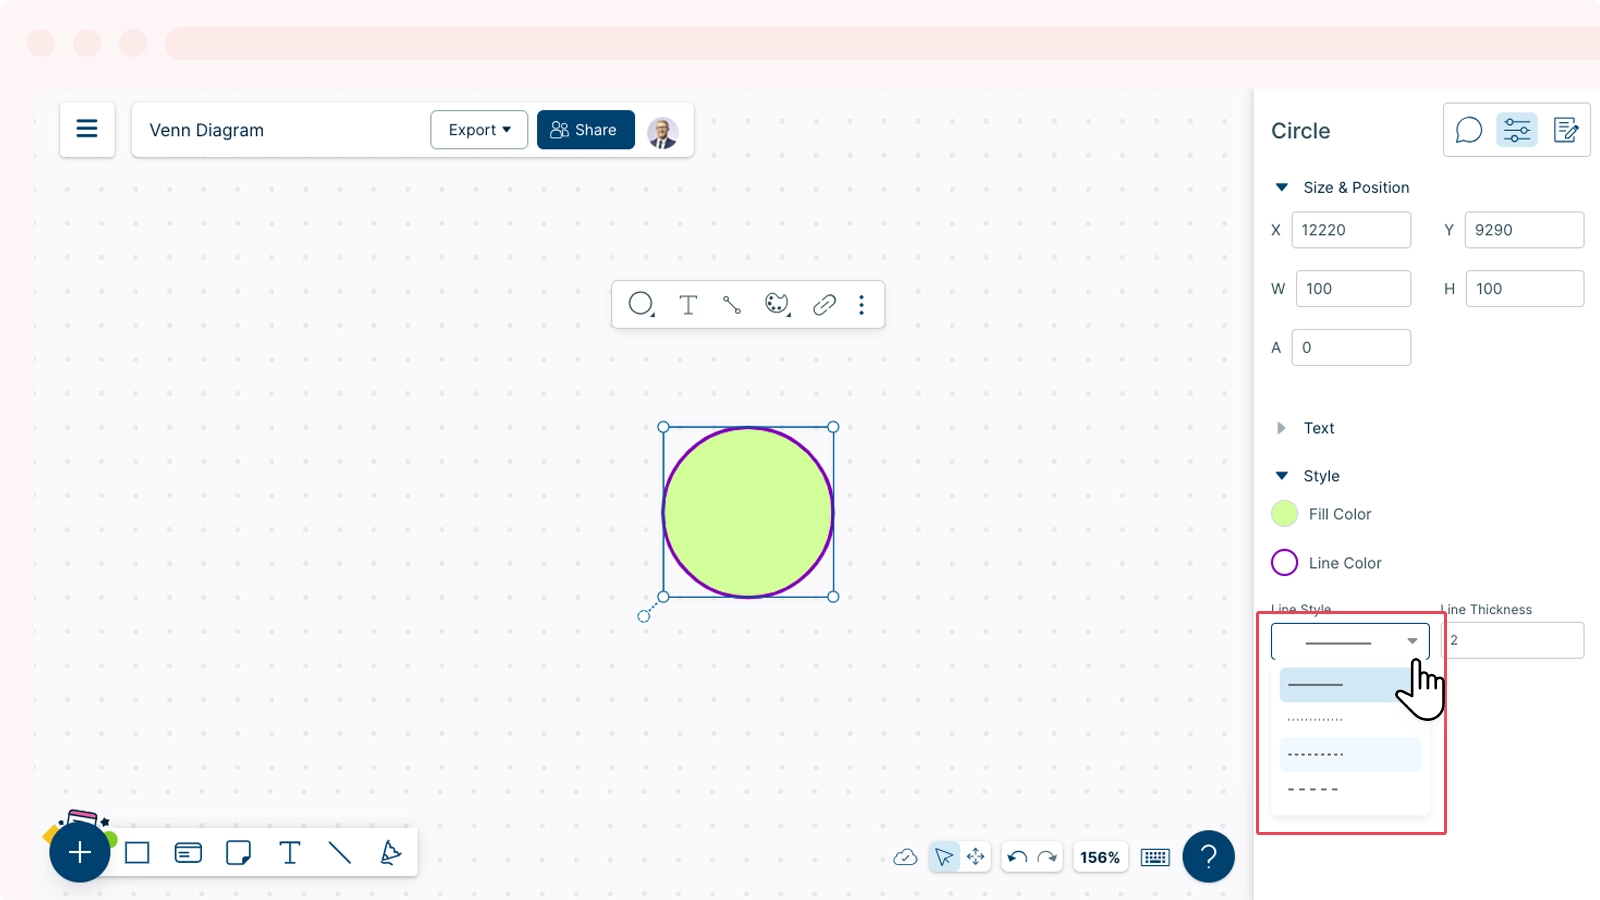
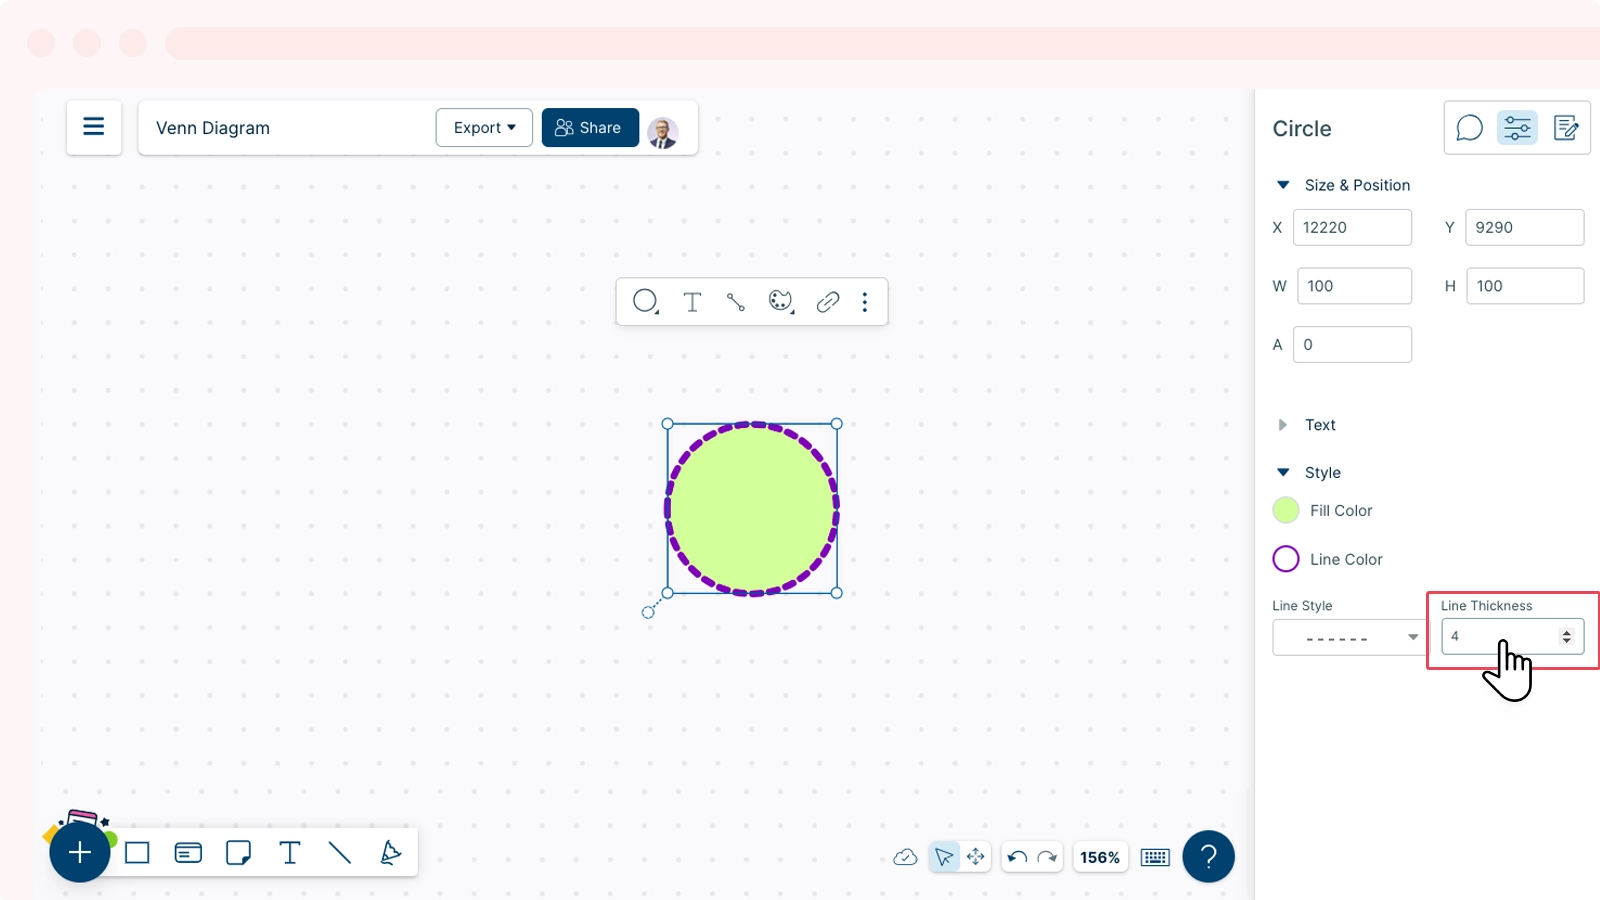
How to change the style and thickness of the shape
- Select the shape where you want to style its text.
- Go to Shape Properties on the top-right corner.
- Select a color, a style, and the thickness for the line as follows:
Working with Multiple Shapes
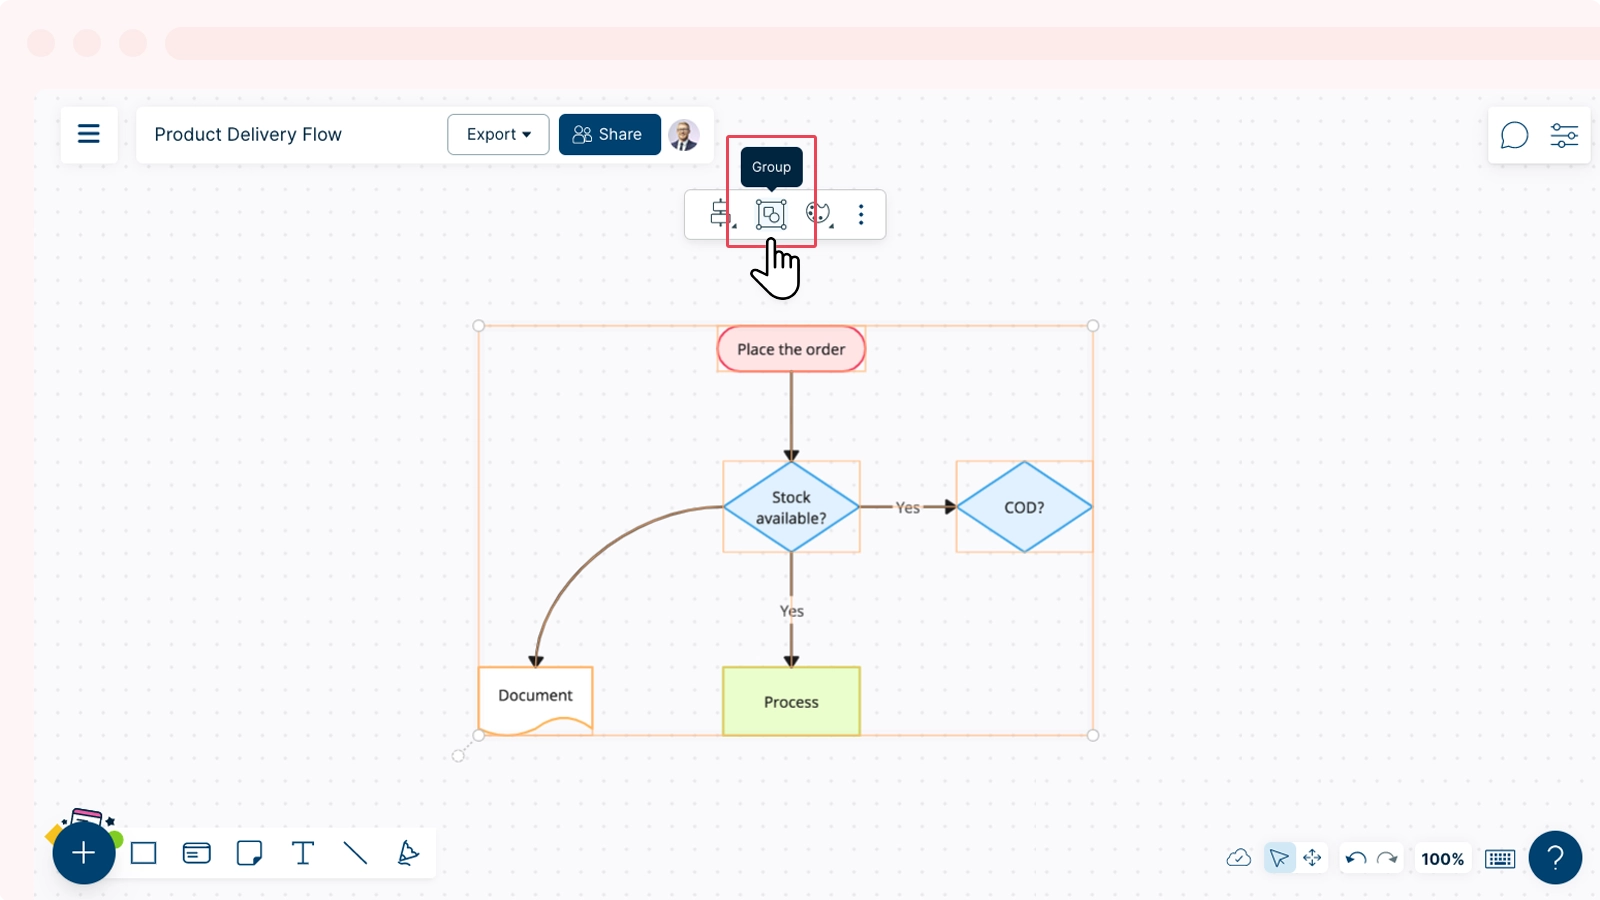
Grouping Shapes
Grouping shapes, text, and connectors let you move and format the grouped items as a single shape.
To group items on the workspace:
- Select all the items you want to group together (make sure every shape/text box/image is selected).
- Click on the
 Group icon from the contextual toolbar.
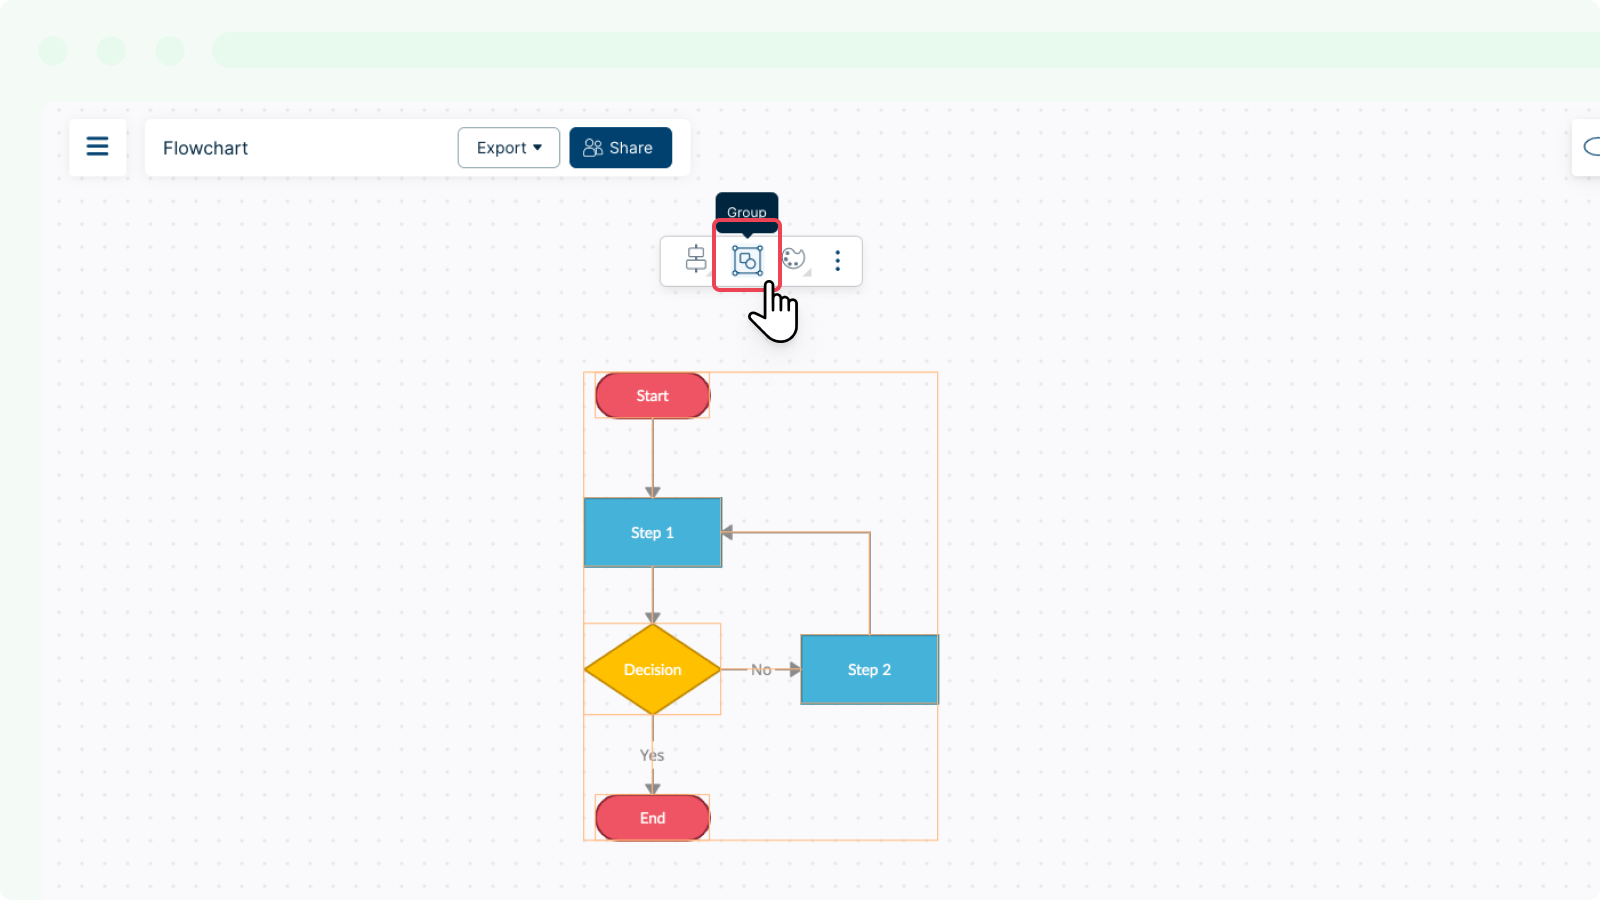
Once you have grouped your shapes, connectors and/or text, you could move them around or format them as a single shape.
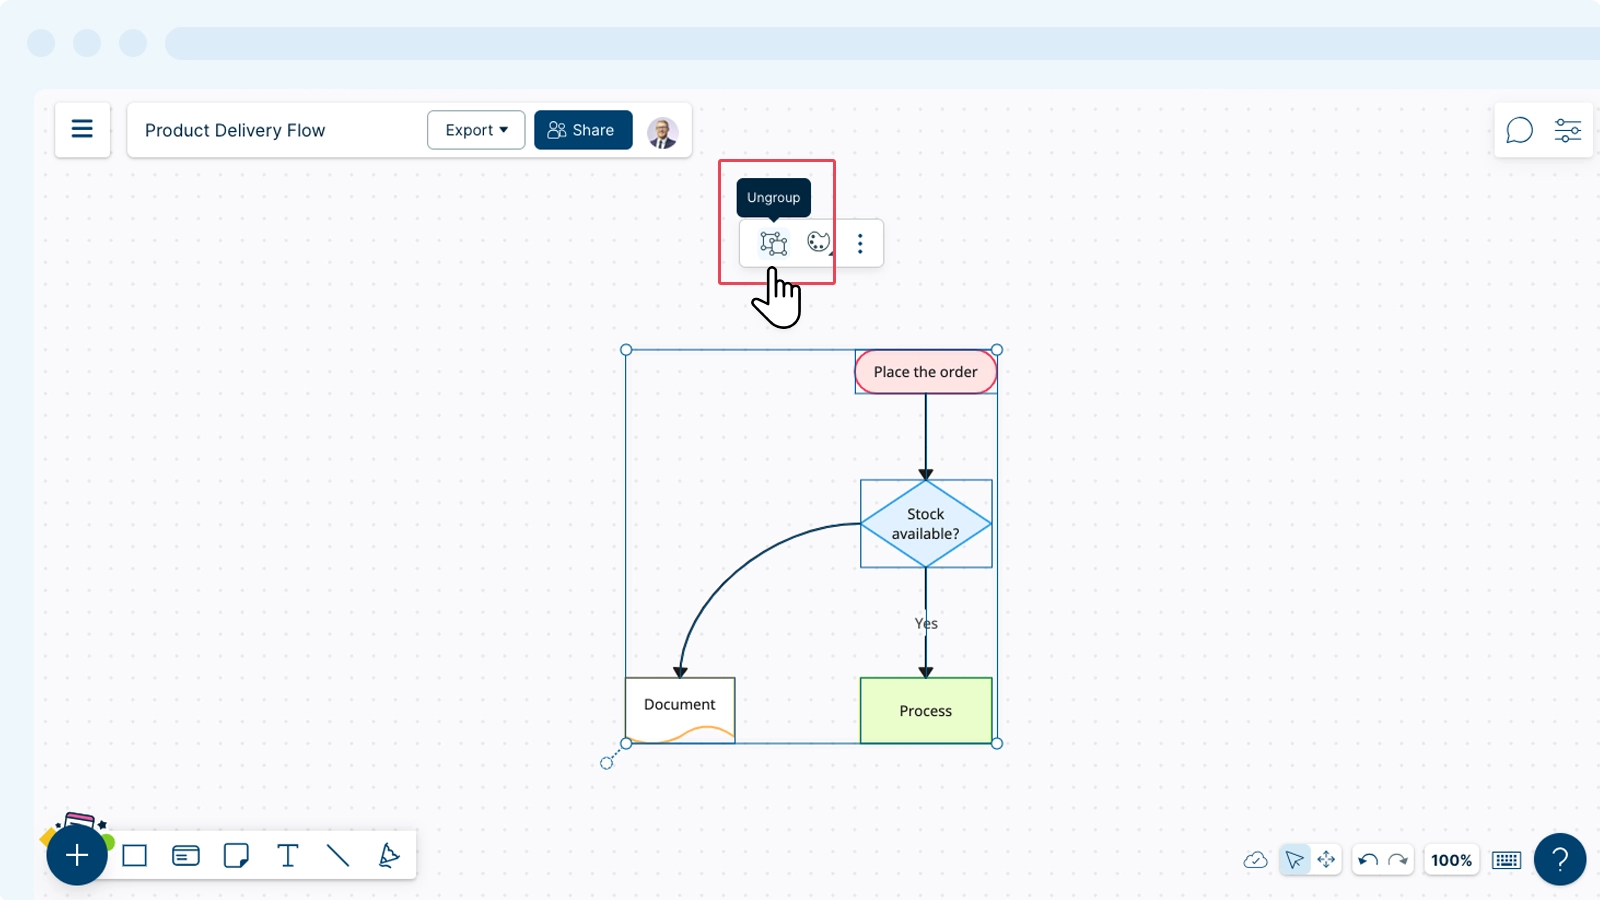
To edit shapes again individually, you can simply click on the grouped items and select ![]() Ungroup.
Ungroup.
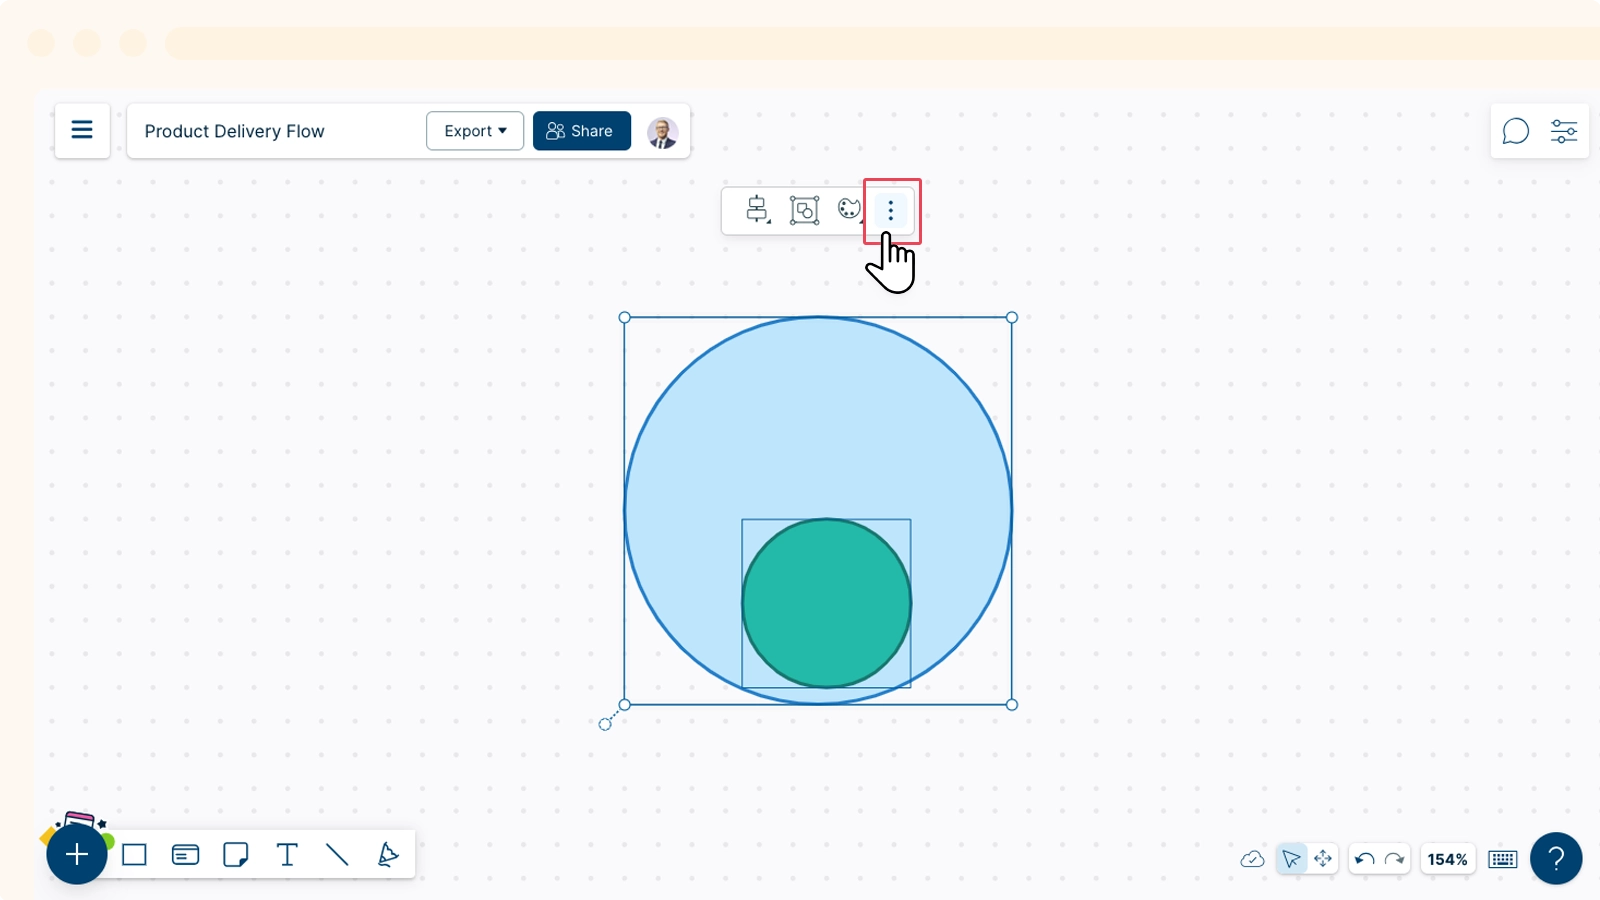
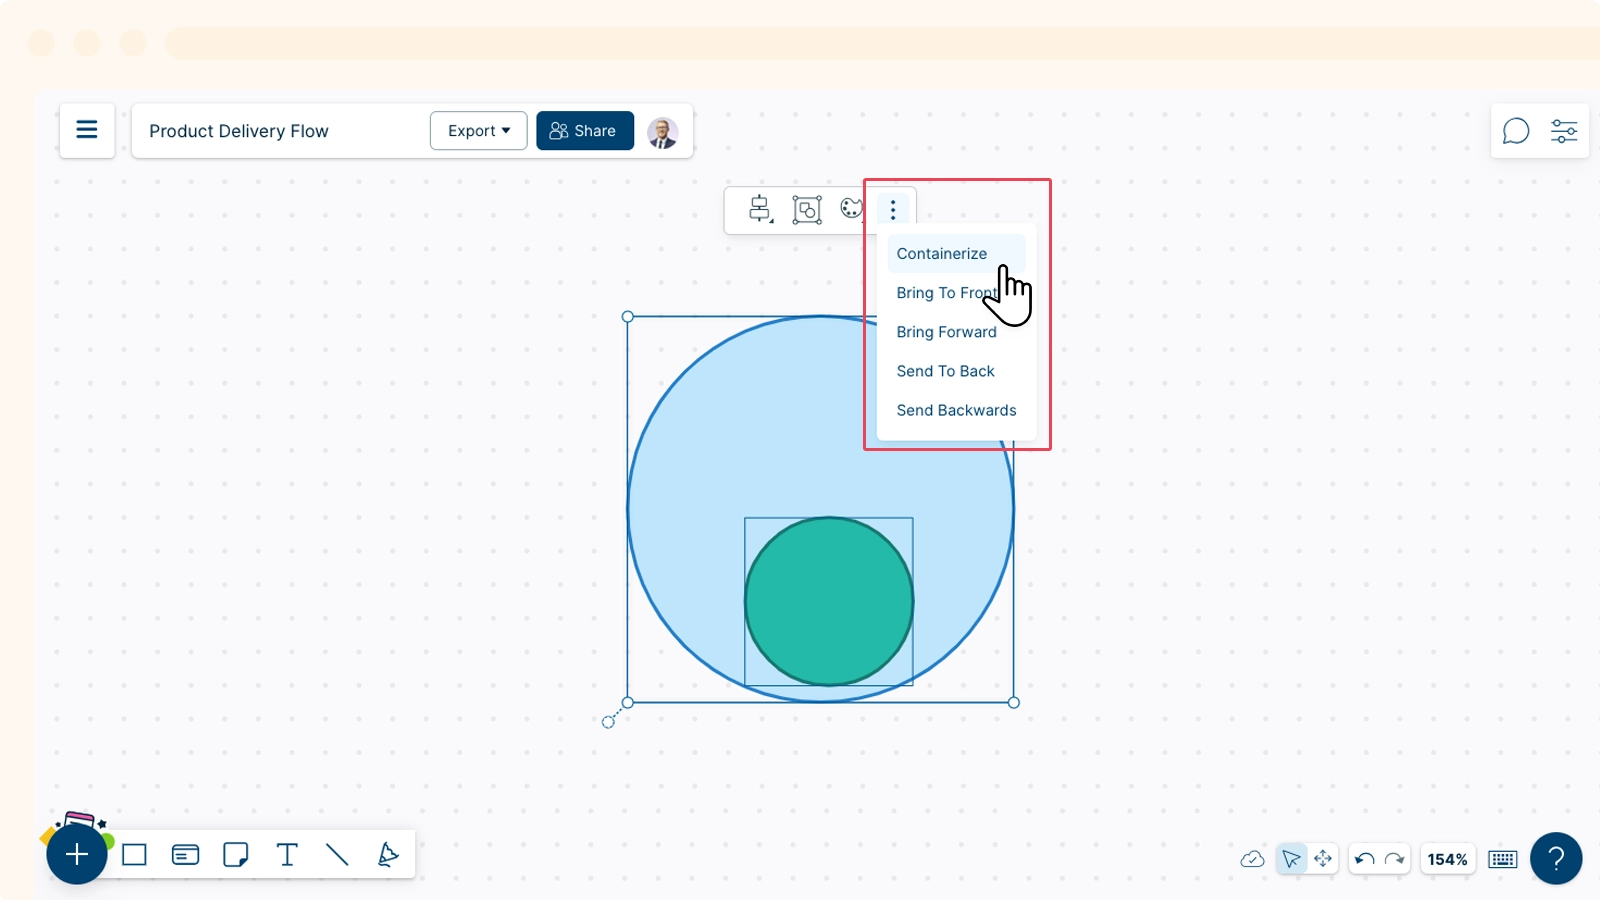
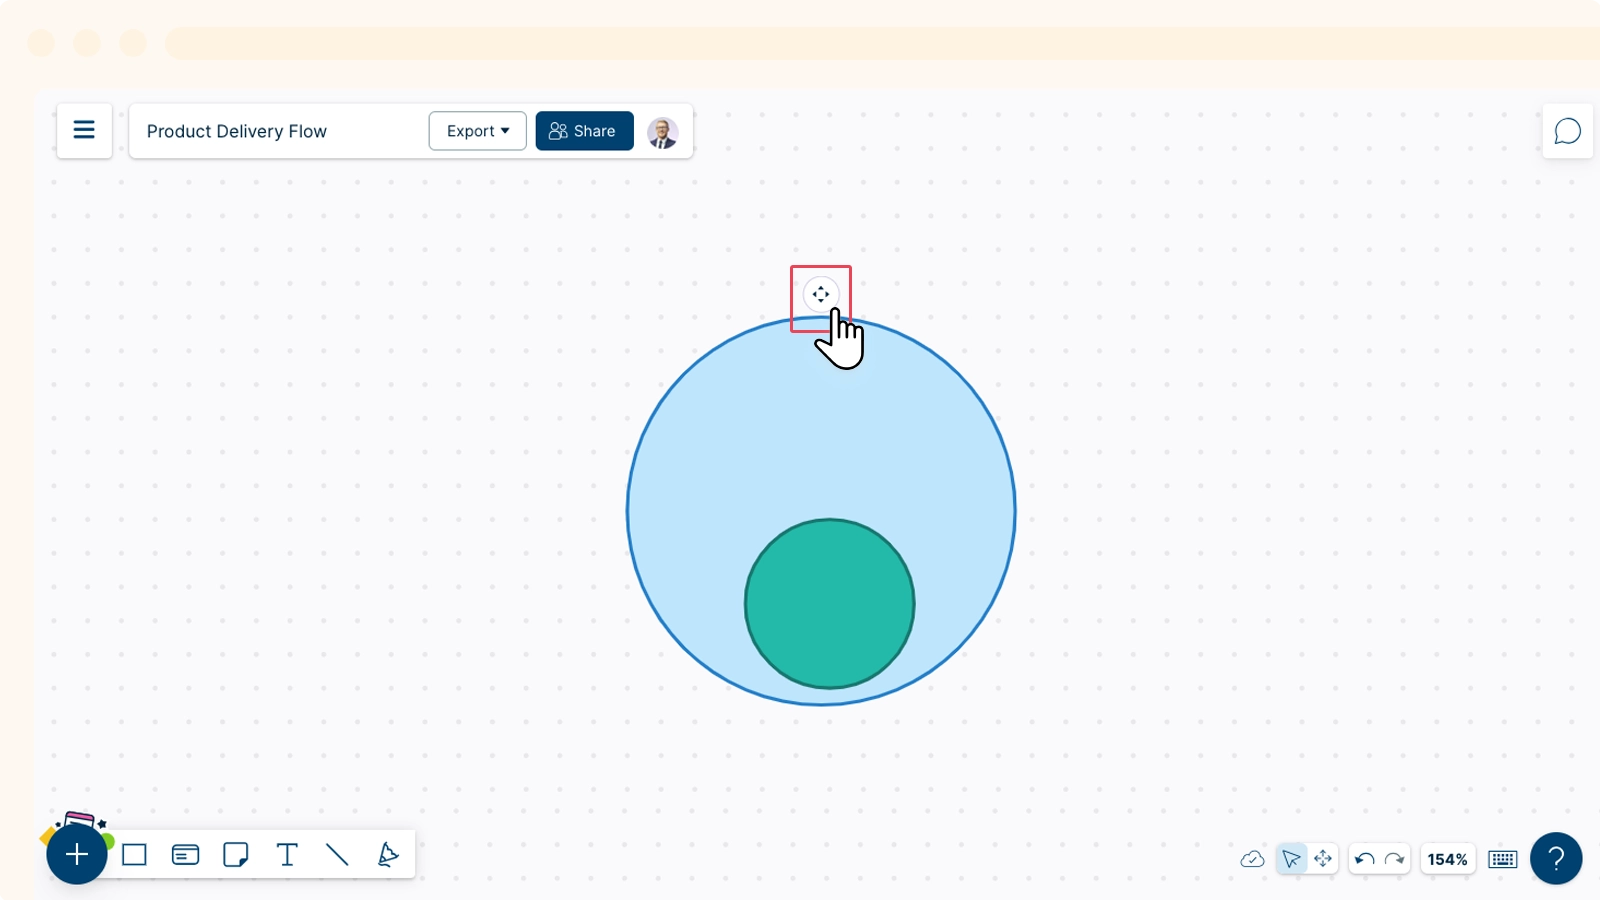
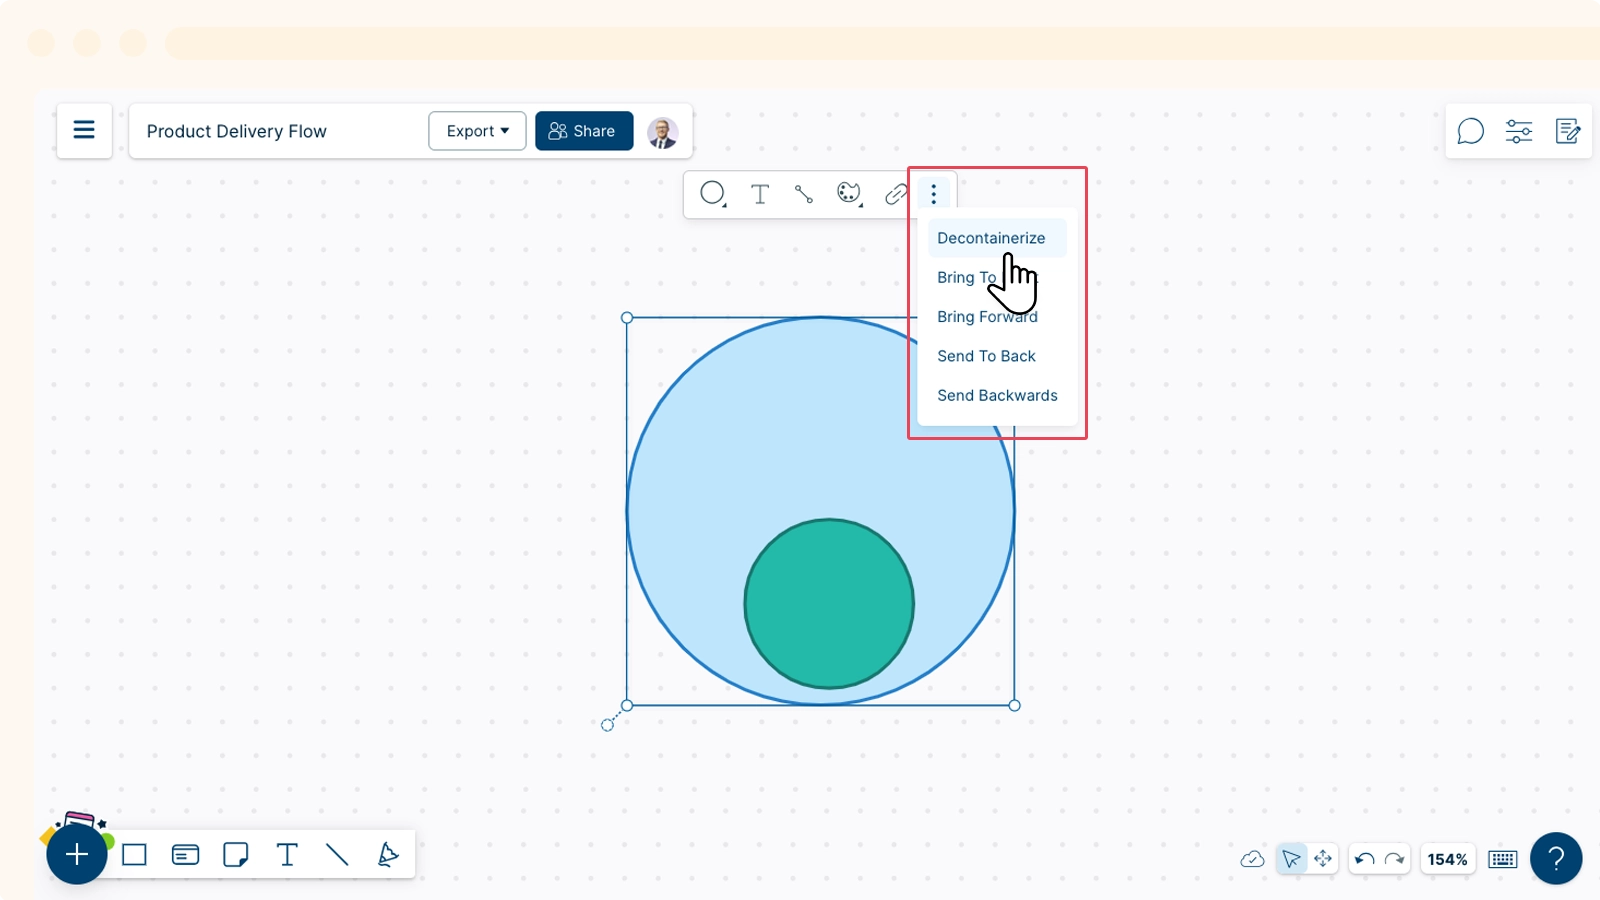
Containerizing Shapes
Containerize is a feature that allows you to easily align, move, and organize shapes on workspaces.
When you add shapes inside another shape and want to make sure nothing gets misaligned or goes out of place, you can containerize the shape carrying the content.
If you want to make the shapes independent and on their own, you can simply decontainerize the main shape.
- Select the shape you want to containerize.
- Click on the three dots in the contextual menu toolbar.
- Select containerize.
Similarly, you could decontainerize when you want to move the shapes independently.
Tip:
Grouping and Containerizing help you move and customize multiple shapes at once. Group to apply common customizations or move any number of individual shapes on the canvas at once. Containerize to connect shapes within a shape as a single shape, so you can apply common customizations or move them at once.
Locking Shapes
Locking a Shape makes collaboration much easier for teams with many members.
With ![]() Shape Lock, you can make sure your shapes and connectors are not being meddled with while other collaborators are on the canvas.
Shape Lock, you can make sure your shapes and connectors are not being meddled with while other collaborators are on the canvas.
To lock a shape:
- Right-click on the selected shape.
- Click on
 Lock Shape.
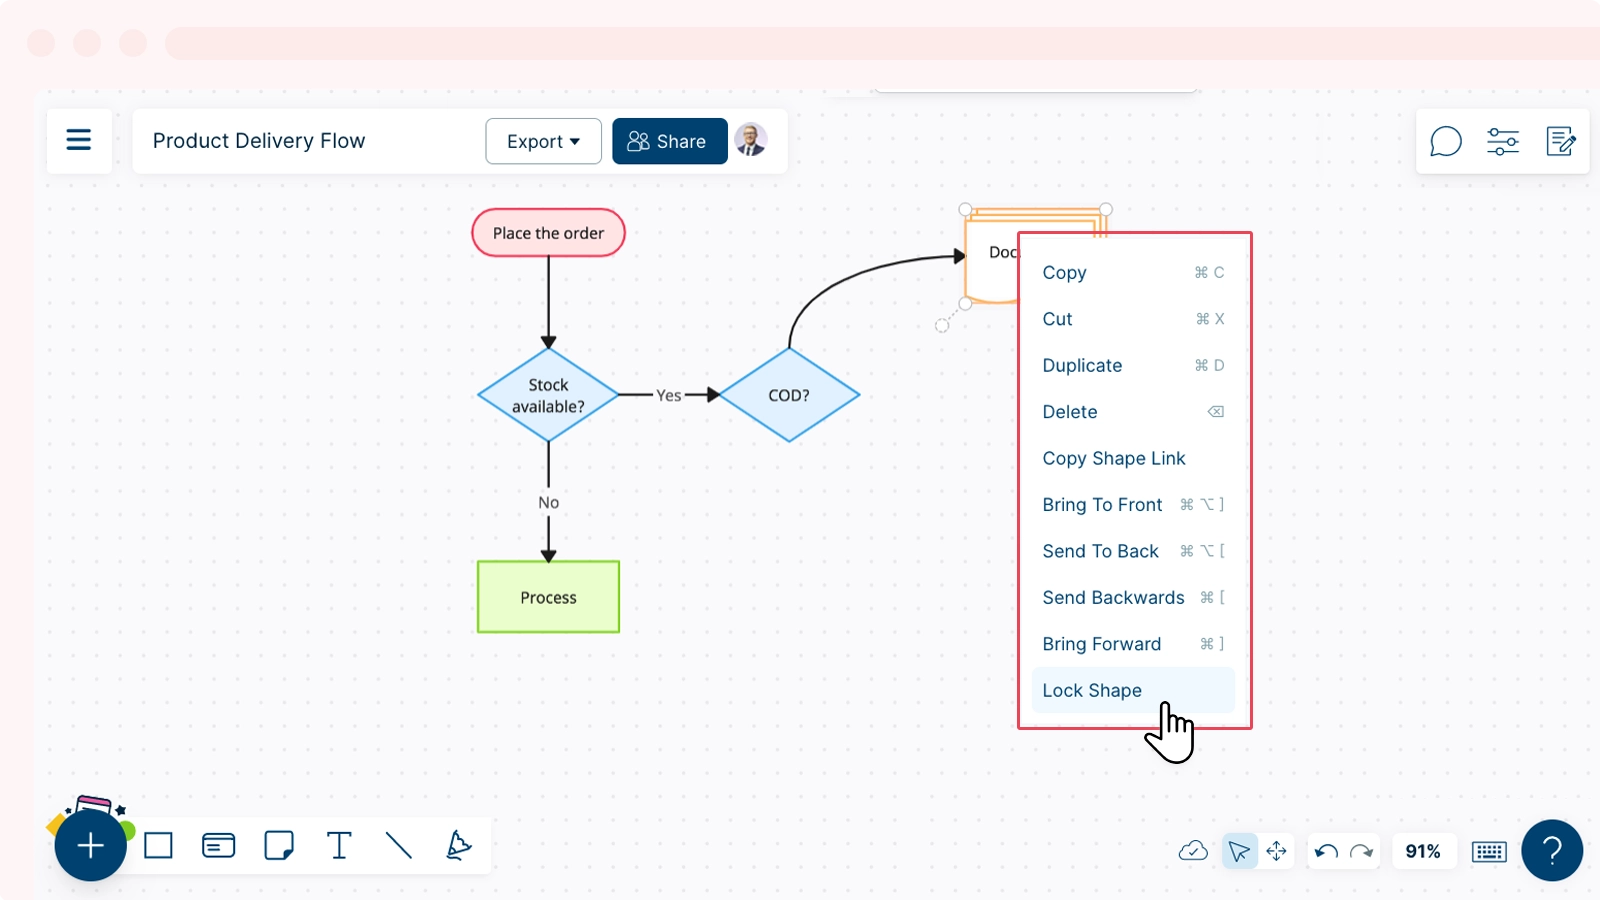
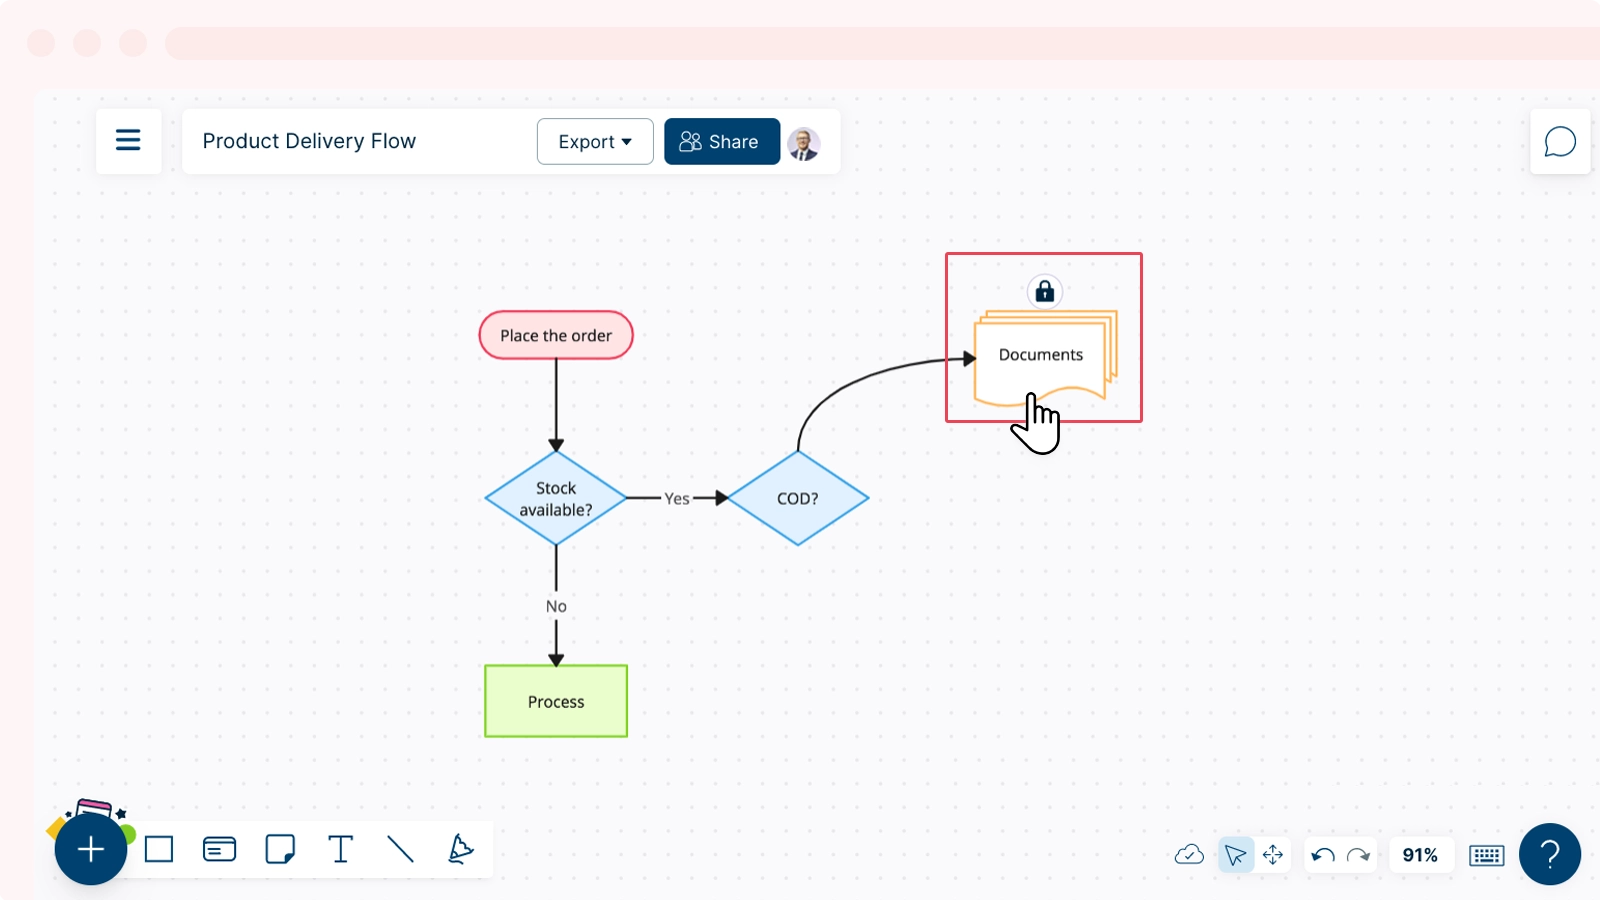
A locked shape will be inaccessible to other collaborators when making changes. It will not be subjected to grouping, containerizing, or any other formatting changes such as changes to color, font, or size. A locked shape cannot be moved around by you or any other collaborators in the workspace as well.
When you want to unlock the shape, you could do so by clicking on the lock icon that will appear on top of the shape.
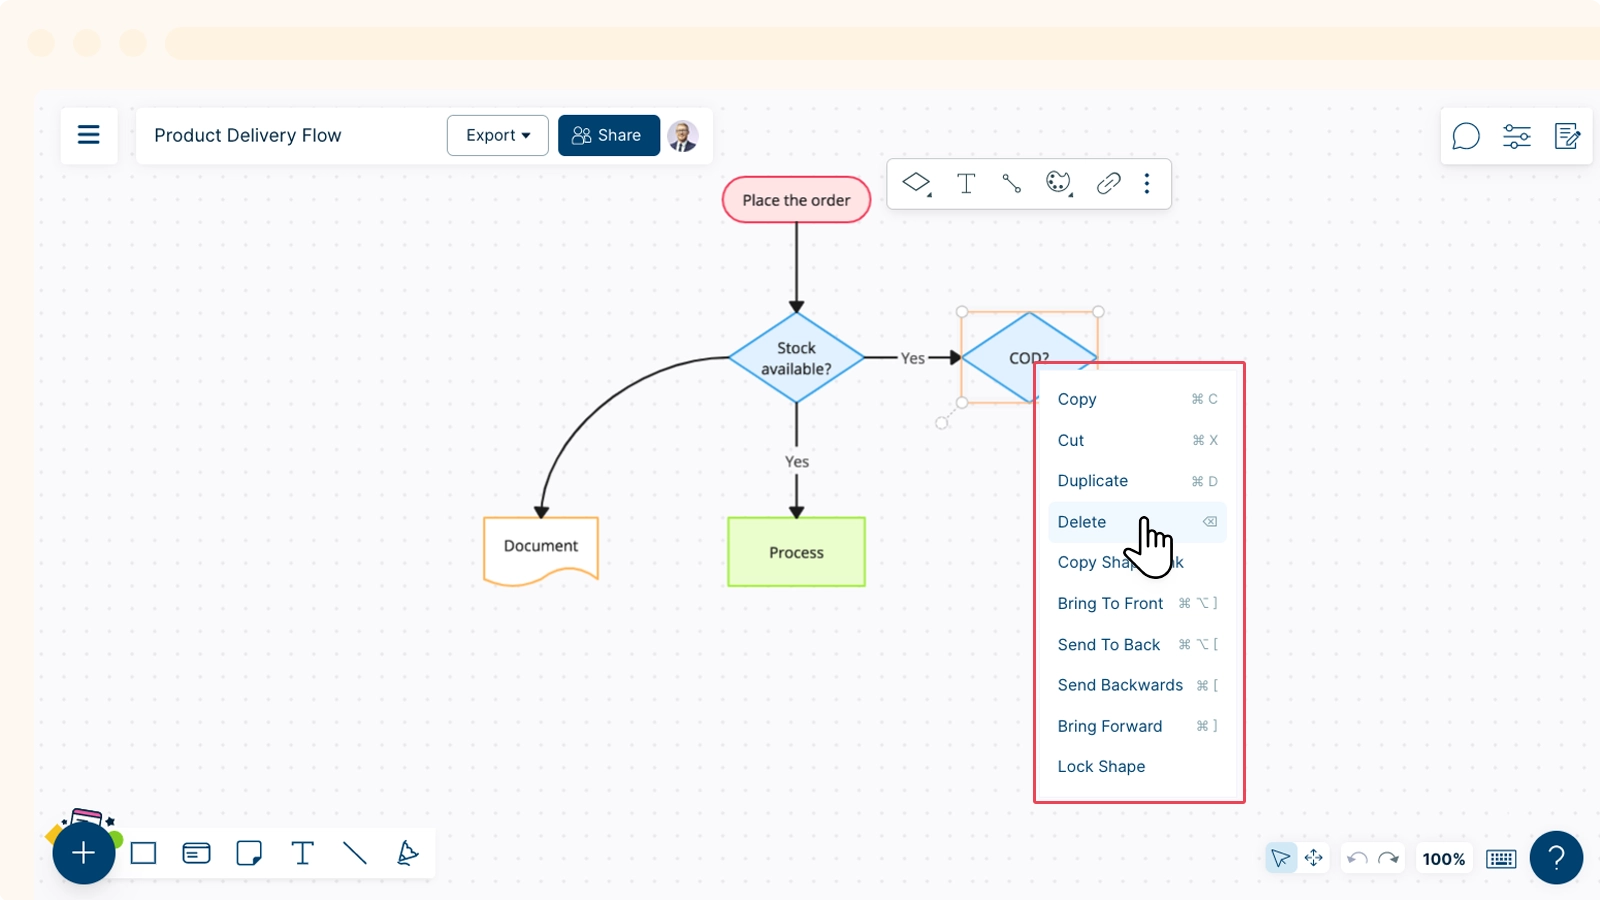
Deleting Shapes
You can easily delete shapes from the canvas with just a few clicks. To delete a shape:
- Click on the shape you would like to delete.
- Right-click on the shape.
- Select the delete option.
You can even select multiple shapes at once and delete them together. You could also use the delete or backspace button on your keyboard to delete shapes.