A Comprehensive Guide to ‘The Flipped Classroom’
Guide to The Flipped Classroom

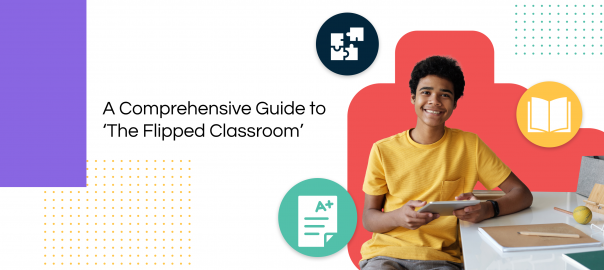
In the world of eLearning, the method of flipped classrooms is growing in popularity day by day. In fact, with schools being forced to shift their teaching online due to the COVID-19 pandemic, the flipped classroom has become one of the most effective techniques to help overcome the many challenges of remote teaching and learning. 

In this guide, we will guide you through the flipped classroom technique by explaining what it is and how to successfully implement it within the boundaries of your own online classroom, with some handy tools you can use to simplify the process.

What is a Flipped Classroom?

The flipped classroom sometimes referred to as the inverted classroom, is a modern instructional strategy that offers student-centered peer-assisted learning. 

Simply put, in a flipped classroom what is traditionally done in-class is done at home, while what is done as homework is now done in-class under the guidance of the teacher. 

As opposed to the traditional classroom, where the teacher takes the center imparting new information to students who passively absorb it, the flipped classroom technique focuses on providing students with learning material in the form of pre-recorded lectures, videos, presentations, tutorials, and other web-based material prior to the actual class. This method requires students to familiarize themselves with the new information and prepare for in-class activities with the teacher and peers, ahead of time. 

Class time, in the flipped classroom approach, is reserved for revisiting the topic while the teacher actively engages with the students through group discussions, collaborative coursework, and assessments. 

In a remote teaching and learning environment, this method has proven to be more effective especially when teaching theoretical parts of the curriculum.

Benefits of a flipped classroom include,

  • Creates an interactive learning environment where the educator or teacher can spend more time guiding students by answering their queries, helping them solve problems, and clear any confusion regarding the new topic 
  • Allows the students to take on a more active role in their learning rather than being passive listeners
  • Helps improve students’ engagement and communication between the teacher and students as well as their peers 
  • Provides the students with the opportunity to learn at their own pace; for an example, they can rewind, pause and fast-forward a video lecture as they want 
  • Helps retain the focus and attention of the students during the entire lecture 
  • Paves the way for deep learning when students processes and reflects on new information and concepts on their own 
  • Helps teachers get to know their students better, identify why they are struggling and where they are excelling 
  • The videos and other content created by the teacher can be reused for several years

The flipped classroom is made up of two major components; the pre-recorded video lectures along with other learning material that students go through outside of the classroom and the learning activities done during the actual classroom time. 

As students get to watch and listen to the teacher prior to the session, and do their homework in-class under the guidance and instruction of their teacher, the flipped classroom has proven to help students achieve better learning outcomes.  

The steps in flipping a classroom include, 

Step 1: Introducing the task 

The goal of the very first step is to increase student participation and prepare them for the activities they will be doing online and in-class during the flipped classroom session. 

This starts with setting clear expectations by clarifying what exactly you want your students to do and the amount of time they will need to spend in order to prepare for the upcoming in-class activities.    

Tip: Notify students in advance and set a date for your flipped classroom session. This will help both parties prepare well and contribute towards a productive outcome.

Step 2: Selecting learning material 

You can either create your own material for the flipped classroom or select from what’s currently available online. Often these include online resources such as 

  • Online videos: Videos vary from pre-recorded lectures to tutorials. It’s important to make sure that the videos that you create or select from an existing database such as YouTube, are concise (not exceeding more than 10-15 minutes). To engage students more effectively consider adding prompts or guiding questions which will help them quickly identify important areas they need to focus on. 
  • Online reading: Reading is another common flipped classroom activity. These can be a website, a blog post, reading notes, or a book. To get students’ attention to important areas you can add a diagram or a visual, highlight important areas, or include guiding/ reflective questions. 
  • Presentations: Presentations are another effective way to break down lessons and deliver them in an engaging way. Readily available tools for creating presentations include Google Slides, PowerPoint, and LinkedIn SlideShare.  
  • Podcasts and screencasts: A podcast is a digital audio file that students can download on their devices and listen to whenever they want. On the other hand, a screencast consists of both audio narration and computer screen images, which is more effective in terms of introducing new complex concepts and information. Like with videos, it’s important to keep the segments brief with guided or reflective questions in between to retain the focus of the students. 

Have a system in place for students to submit questions on concepts and areas they find difficult during the out-of-class activities, which you can then discuss and provide answers to during the in-class session.

This can be done through your institute’s LMS (Learning Management System), a communication platform such as Slack, MS Teams, or Google Meet, or even through social media channels such as Facebook (groups), or WhatsApp (groups).  

Tip: Encourage students to take down notes summarizing what they have learned while watching the tutorial videos or going through the learning material. During the in-class session with the teacher, students can proceed to discuss any misconceptions or confusion they have.

Step 3: Evaluating what students have learned

It helps both the student and the teacher to know how well the former has grasped the learning material prior to the actual in-class activities.

Thus you can alter the in-class activities as required to better engage the students. It also lets you ensure that students actually have completed the out-of-class activities assigned to them. 

You can easily test their knowledge after they have finished going through the learning material with simple techniques such as

  • Self-assessment quizzes (limit the number of questions included)
  • Multiple choice or short answer questions (this can also be done at the beginning of the in-class session) 
  • Online discussion forums where students can share comments or questions about the lesson which can be discussed prior to the class online or at the beginning of the class itself
  • Concept maps are a great way to test the student’s understanding of a concept. They visually represent the different elements in a concept and how they are connected to one another. You can ask the student to create one and share it with you prior to the class, which gives you time to review it and give feedback. 
Concept map example for the flipped classroom
Concept map example (Click on the template to edit it online)
  • Precis writing helps students aptly summarize what they’ve learned in one brief paragraph and it’s another great way to evaluate their understanding of the pre-class assessments.  

You can use an LMS where you can set it up so quizzes are automatically graded, or you can mark them individually and provide formative feedback. 

Tip: Take time to go through the assessments prior to class and identify similar themes (i.e. common areas of misunderstanding). You can then address them in-class and clarify things before starting the activities.

Step 4: Conducting in-class activities

By now students will have different understandings of the material they have reviewed and studied during the out-of-class activities.

After assessing and gauging their levels of comprehension, you can select individual or group-based activities to do in the classroom to further assist them with their learning process. 

In-class learning activities in the flipped classroom are focused on improving collaboration and interactions among the students, their peers, and the teacher. Here are a few techniques you can use to create an active learning experience in your (virtual) classroom. 

Individual activities

If you notice that students are struggling to fully comprehend the content they’ve reviewed during their out-of-class work, you can rely on individual-based in-class activities to allow them to reflect more on the topic before moving on to the group activities. 

  • Multiple choice questions and polls will help you take quick snapshot of how well the students are understanding the material 
  • Concept maps, mind maps and word maps are three effective visual tools to reinforce the student’s knowledge of a concept and identify connections and better understand them 
  • Individual problem-solving helps students with practically applying what they know to find a solution. Doing this under the guidance of the teacher helps the latter give feedback and correct misconceptions instantly.   
  • Speech presentations helps individual students further deepen their understanding of a topic

Group Activities 

Group activities are more common in the flipped classroom as they are more effective in helping students understand the material better and in discovering new knowledge.   

  • Discussions help actively engage the student in sharing knowledge while interacting with the teacher and their peers. 
  • Affinity grouping helps find common themes in the information. In groups, students can discuss and identify how and why different pieces of information belong under one category. This is usually conducted with the help of an affinity diagram 
Affinity Diagram Template for the Flipped Classroom
Affinity Diagram Template (Click on the template to edit it online)
  • Debates are a great way for students who are participating as well as who are watching to dive deep into a certain topic     

Find more activities you can use in the classroom here.

Tip: If you are conducting a virtual lesson, you need to consider an online collaboration platform like Creately which offers you an online whiteboard with infinite canvas space and access to different shape libraries needed to carry out activities such as concept mapping, brainstorming, mind mapping, affinity grouping, etc. 

What’s Your Experience with the Flipped Classroom?  

Pioneered by two high school teachers in Colorado named Jonathan Bergmann and Aaron Sams around 2007, the flipped classroom technique has come a long way in helping teachers and students enhance their experience around the classroom. 

With technology becoming an integral part of the everyday classroom, the conventional teacher-centered approach to teaching is slowly getting replaced with more student-centered, collaborative methods like the flipped classroom technique.

Flipping the classroom helps create a more engaging learning experience for the students while helping them memorize their lessons more deeply by applying what they learn to real problem-solving, in the class, with the guidance of their instructor. 

Got more tips to share on the flipped classroom technique? Let us know in the comments below.

The Easy Guide to Self-Learning for Remote Learning Students
Guide to self learning

One thing most successful people have in common is a desire to self-learn. It’s the modern way of learning, and it has proven to be more effective and convenient.  

Although self-learning hasn’t replaced the traditional ways of learning – yet, with the advancement of technology, it has become habitual to most individuals. Nowadays, you can learn how to do anything with a mere YouTube tutorial, or learn an entirely new language with a single app.  

With the world-wide school closures caused by the COVID-19 pandemic, self-learning has now become a practice all students should master. 

Here’s how to leverage self-learning effectively to grow your knowledge and improve your skills while learning remotely. 

What is Self- Learning

Self-learning is an approach to learning where the individual makes the effort to identify their own learning needs, set learning goals, find the necessary resources, and evaluate their own knowledge. 

As opposed to the traditional learning methods, the outcome of self-learning is not measured by any test results, rather it will contribute to improving your skills or knowledge in a particular area, and apply them practically to solve problems, perform tasks, etc.  

The Ideal Self-Learning Process

With all the resources available today, self-learning is no longer an impossible feat as it might have been a few decades ago. With the abundance of free resources online such as online courses, articles, essays, videos, books, and journals, all you need is a proper plan, time, and energy. 

 If you are exploring the world of self-learning like many other students and professionals confined to their homes due to the pandemic, here’s a good way to start: 

Set Learning Goals

A clear goal is essential to stay motivated and on track. You can create objectives supported by an action plan to guide you along.

Make sure that the goal you set is realistic, attainable, and measurable. For example, if you are learning a new language, your goal can focus on how you can apply what you have learned – perhaps by writing an essay. 

Choose Credible Learning Resources

Regardless of the subject you want to learn, you can find at least 100 resources with a single Google search. However, you should

  • Verify your learning resources for credibility. While the internet is flooded with resources, not all of them are accurate in knowledge and reliable. Therefore be skeptical, cross-check references, and make a habit of comparing the information you come across different resources.
  • Choose academic databases like Google Scholar or JSTOR for they offer reliable resources on varied subjects. 
  • Find relevant online courses with which you can further expand your knowledge on the subject and how to apply it in the practical world. Online learning platforms such as Udemy and Coursera have partnered up with leading educational institutions and academics to offer an abundance of courses that you can choose from. 
  • Look for discussion forums run by academics or experts in the field. Their opinions can help you further enrich your knowledge. 

Stick to a Schedule  

A schedule will help you overcome procrastination and keep track of your learning process. Your schedule can be as simple as a daily to-do list or a weekly or monthly action plan with estimates and deadlines. 

Weekly Planning Template for Self-Learning
Weekly Planning Template (Click on the template to edit it online)

Apply What You Have Learned

The best way to retain what you have learned and to test your knowledge is to actually apply it in the real world. 

If you are learning a new language, you can practice talking with someone else who is proficient in it or still learning it like you are. If you are learning graphic designing, you can apply what you have learned to create an infographic or a web page. 

You can also create a presentation, a video, a concept map or a mind map explaining the new concepts you’ve learned to further solidify your knowledge.    

Share Your Knowledge and Collaborate 

In order to share knowledge with another person, we have to make a conscious effort to comprehend the information better. This helps with better internalizing new concepts that you’ve learned.

You can connect with like-minded individuals and collaborate with them through online communities, social media platforms, discussion forums, etc. It’ll help you discover more resources, gain new insight into the subject of your interest, and find answers to things you are unsure about. 

Self-Learning Techniques 

Self-learning can sometimes be quite difficult and lonely. Here are some effective techniques to help you keep things engaging, easy, and productive. 

Reading

Anyone can read a book, but when it comes to self-learning, you take a step further and actually internalize what you read. You can take down notes and make connections as you read and learn. 

The internet is awash with blog articles and books that you can choose from based on your learning requirements. Or you can actually buy books or borrow them from the library, which you can also do online. 

While reading makes it an effective way to improve your comprehension of a concept, here are a few reliable sources where you can find reading material;

Visual Note-Taking 

Visual note-taking is a method that combines both text and visuals to record information that you come across while learning. The method enhances memory and comprehension by making use of images, illustrations, connectors, and structuring.  

While studying, listening to a podcast or watching an educational video, you can use this method to quickly take down important information in an effective way. An online visual workspace like Creately can help you easily do this online; you can also start with a premade template to get a headstart.   

Here are some popular methods of visual note-taking that you can incorporate into your self-learning process. 

To learn about this method and the tools above in more detail, refer to our extensive guide on visual note-taking

Educational Videos 

Videos provide an easy and engaging way to learn. They are currently used across schools and universities as an educational tool for enhancing the learning experience of students – now more than ever as most students are learning remotely. 

There are different video types that you can use to educate yourself, ranging from films to 50-60 second video clips. Find them on, 

Join relevant groups or follow pages on social media channels to find more videos. 

Online Courses

There is a range of online platforms where you can find thousands of free and paid courses that you can follow to further improve your skills and expand your knowledge.

Here are some of the most popular platforms to get you started, 

Learning Apps and Software 

Software and apps provide an entertaining as well as an effective way to grow your knowledge. The best thing about using an app is that you can use them on your mobile devices and continue your learning process wherever you are. 

Here are a few web learning and mobile apps to get you started. 

Got More Tips on Self-Learning? 

Self- learning has quickly grown in popularity after COVID-19. Thanks to advancements in technology, there are many options available for students who are learning remotely to make good use of their free time and develop their knowledge even without the presence or guidance of their teachers. 

How have you incorporated self-learning into your life? Let us know your tips in the comments section below. 

The Ultimate List of Effective Online Teaching Methods
Online Teaching Methods

Traditional forms of teaching around the world are changing rapidly with the advancement of technology. Even in physical classrooms, technology has taken on a bigger role, changing how lessons are delivered and received.  

While there are numerous teaching methods, most of the traditional methods used in class can be applied equally efficiently online. However the teaching method you select will change based on your teaching philosophy, objectives, subject area, and classroom demographics. 

In this post, we’ll list down x effective online teaching methods that’ll help simplify the delivery of your virtual lessons.  

Online Teaching Methods 

Listed below are some of the most effective methods of online teaching.

Presentations

Presentations, like in the physical classroom, are one of the most common methods of online teaching. This technique helps make a more significant impact on students – most of whom are visual learners – than a teacher simply relaying information out of a textbook. 

Most importantly, presentations allow you to incorporate visuals (images, GIFs, videos, etc.) which makes it easier to deliver and comprehend complex information and data while making the lesson more engaging. Plus you can also share your presentation with the students after the lesson for revision and studying. 

Presentation Template
Presentation Template (Click on the template to edit it online)

Here are a few presentation tools to get started with 

Online, presentations are more effective when delivered over video conferencing with a tool like Zoom or Google Meet

Resources 

Jazz Up Your Presentation: 6 Ways to Put an End to Ugly Charts and Graphs

Online Whiteboard

Online whiteboards have risen as a popular choice to virtually emulate the in-person classroom experience shared between teachers and students. They offer an infinite canvas, shape libraries to create different diagrams and charts, pre-made templates, sketching, typing, image import options, etc. 

Unlike the traditional whiteboards, they also let you digitize the content created, hence allowing you to re-share them and refer to them at a later time. You can also collaborate with students on the same canvas in real-time which paves the way to 

  • Carry out assignments 
  • Brainstorm around lessons
  • Mind mapping
  • Do interactive exercises such as quizzes 
  • Review homework and leave feedback 

Find out more about how to successfully use an online whiteboard for teaching

Live Online Classes

Technology has made it straightforward to deliver lectures online even if you are not in the same room as the students, replicating many of the elements of face-to-face interaction. 

Using video conferencing tools you can connect and communicate with students across the globe to deliver lessons. Incorporating an online whiteboard, you can make the classes even more engaging.

Lectures tend to put students in a passive role. Therefore to keep students engaged throughout the class online; 

  • Be prepared by outlining the content of the lesson 
  • Ask questions during and after the lesson and leave time for students to answer
  • Carry out discussions around the topic and encourage students to participate actively
  • Make use of graphic organizers, images, posters, videos, visuals, etc. 
  • Break down the main topic into sub-parts which will allow you to deliver the lecture in smaller chunks making it more effective in terms of keeping the students focused and engaged 
  • Set clear guidelines for online class etiquette for students to maintain 

Pre-Recorded Video Lectures   

The benefit of pre-recorded lectures, as opposed to the live ones, is that the former allows the students to learn at their own pace at any time without the presence of the teacher. It also gives them material to go over during revision.

The teacher or instructor, on the other hand, can use the videos to avoid repetitive teaching between different classes. 

To create effective pre-recorded lectures; 

  • Start with a script. Outline the talking points and what should go on each slide.
  • Practice as necessary. Unless you are confident enough to do it in one go, rehearse what you will be saying prior to recording.
  • Keep it short. If the video is longer than 20 minutes, consider breaking it up into smaller videos. This will not only come in handy when uploading them online but in case you need to replace the content with new information, it’ll be easier to re-do a few minutes video than an hour-long one.  
  • Have everything ready before recording. Make sure that you are in a place devoid of distracting noises and backgrounds, and that your script and props are in place.
  • If you are recording your screen, make sure to have closed unnecessary tabs and apps that may send you notifications.
  • Maintain good eye contact with the camera and a tone you would use in a normal one-on-one conversation 

Flipped Classroom 

The flipped classroom has become one of the most popular teaching methods in education during the past few years.

It entails a strategy opposite to the traditional class format; here the students are required to review class material prior to the actual lesson, hence reserving actual in-class time to put what they have learned into test with teacher-guided activities such as debates, problem-solving, in-depth discussions, quizzes, etc. 

Videos have become a core element in the flipped classroom model.  While many teachers create videos of their own, some also use videos created by other teachers. Video-sharing platforms such as YouTube can be utilized to share these among students.

Some of the other effective techniques for the flipped classroom include,

  • Online quizzes – help students self-regulate what they have learnt and further improve their comprehension of the subject 
  • Polls – help students reflect and analyze what they have learned by polling their own choices 
  • Infographics – increase student engagement and enhances memory 
  • Mind maps or word clouds – allow students to brainstorm around topic areas and develop their thinking skills 

Game-Based Teaching 

Game-based learning is a popular technique used to improve student engagement and retain attention. This approach helps reduce student anxiety and increase their involvement, especially when teaching complex concepts. It also paves the way for weaker students to develop their competences by interacting actively with their classmates. 

And in online teaching, games help close the gaps in the interaction between face-to-face learning and online learning. Depending on the game you select, here are a few tips to keep in mind when carrying it out online, 

  • Ensure that all students in the virtual classroom have access to the same set of data. You can share your screen or communicate them to your audience using a video conferencing tool 
  • Use the chat option to take down concerns and questions of students and clarify and you can answer them live  
  • Allow students time to reflect their answers and discuss them with other group members by breaking down the game into subsequent periods 
  • Allow students to carry out discussions using chat platforms such as WhatsApp, Skype, Slack, Facebook, Zoom breakout rooms, etc. 

Class Blog 

A blog can be a great place for students to share what they have learned in the form of in-depth articles. Students can work on blog posts individually or in groups. It’s a great strategy to improve students’ research skills and encourage them to explore self-learning. 

The teacher can also use the blog as a platform to share learning material for the lessons.  

Live Chatting 

Live chatting is another great way to replicate the real-time discussions that take place in the classroom. Platforms such as Slack, WhatsApp, Facebook Messenger, Skype, etc. allow students and teachers to communicate and brainstorm around lessons. The chat itself will provide the students with information for revising before exams or assignments. 

Make sure to set clear guidelines to ensure that all students get an equal chance to communicate their ideas and pose their questions.  

Discussion Boards and Forums

These tools provide students the space to share what they have learned or what they want to know more about with others in the classroom including the teacher. 

You can maintain different discussion boards for individual lesson topics, so it’ll be more organized. You can create one easily with an online visual workspace like Creately and share it with all students with one public edit link giving everyone quick access. 

You can also create separate Slack channels, Facebook groups, or Whatsapp groups for forum discussions.    

Any Other Online Teaching Method? 

Online teaching has paved the way for new models of teaching and learning. With the world-wide school closure caused by COVID-19, the process only has accelerated. As students and teachers explore new ways to deliver and receive lessons virtually, we hope these techniques will help you explore something new and do it more effectively. 

What other online teaching methods have you incorporated into your virtual classroom? Let us know in the comments section below. 

This post is a part of Creately’s series on remote teaching. More resources you would find useful include,

7 Effective Remote Teaching Best Practices

Essential Remote Teaching Tools for Conducting Effective Online Lessons

The Ultimate List of Visual Teaching Strategies

The Ultimate List of Graphic Organizers for Teachers and Students

The Ultimate List of Visual Creative Thinking Techniques

The Ultimate Guide to Visual Note-Taking for Students and Teachers

The Ultimate Guide to Visual Note-Taking for Students and Teachers
The Ultimate Guide to Visual Note-Taking

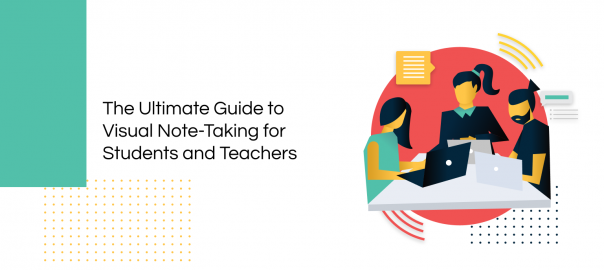
In the age of digital education, note-taking has taken on a new role. Where classes are held online over Zoom calls and lessons are explained with the help of an online whiteboard, note-taking is also increasingly becoming more digital in form. 

Students and teachers are using online document editing apps and visual collaboration tools to record and share information instead of writing everything down in a book. 

The use of visuals to map out ideas and to showcase interrelationships between them has become extremely popular over the last few decades, especially because visuals help the brain process information much faster and enhance memory and understanding better. 

In this post, we’ll dive into simple yet powerful visual note taking techniques students and educators can use along with tips on how to use them effectively. Whether you choose to do it by hand or use a digital tool like Creately, these methods can help you record information much faster in a structural manner.  

Templates provided are free and can be edited online; you can export them and take printouts or you can use them right away on Creately during your classes.

What is Visual Note-Taking?

Visual note-taking, also known as graphic visualization, visible thinking, and sketchnoting, combines both text and visuals to record information that is shared or experienced. 

As opposed to the traditional text-heavy form, visual note-taking makes use of images, structuring, connectors, and text to record information in a way that makes sense to the note-taker and helps them understand and comprehend the information quickly and easily.

Visual Note-Taking Techniques 

Visual note-taking represents information non-linguistically, which entails using pictures or drawings. While you can use sketches or doodles, you can also use more structural methods such as the ones listed below. You can also combine both sketching and the following diagram types for visual note-taking in a way that best suits you.

Mind Maps

Mind maps are an easy yet powerful way to capture thoughts and visualize them in a logical manner. The tool focuses on relationships and hierarchy, hence it’s ideal for simplifying complex ideas. 

A mind map connects information around a central idea or topic. It has subtopics branching out of the central idea, revealing greater details about the subject and how they are interrelated. 

During note-taking, you can use mind mapping to record ideas without losing what’s about to come next. Plus it provides a good structure to your notes and helps them from getting messier or too crowded. Even if you are not adding any drawings, you can incorporate the elements of color and connectors into your mind mapping activity to make it more effective in terms of visual note-taking.

Mind Map Template Visual Note Taking Template
Mind Map Template (Click on the template to edit it online)

How To Do a Case Study Analysis Using Mind Maps

Concept Maps 

Concept maps are another great way to record knowledge. It also incorporates keywords, shapes, and connectors to visualize concepts. The central topic goes at the center and related ideas are placed surrounding it. They are then connected by arrows that have a brief explanation (1-2 words) on them to explain the type of relationship between the two ideas.

By using a concept map for note-taking you can easily organize your ideas, dig deeper into concepts, and find relationships that you would have missed when you heard about it first.

Concept Map Template
Concept Map Template (Click on the template to edit it online)

The Ultimate Guide to Concept Maps

How to Use Concept Maps for Studying and Organizing Information

Flowcharts 

Flowcharts visualize the flow of a process or event step by step leading to its outcome. It’s a great tool to graphically capture the thinking process in a logical and organized manner during note-taking.  

In business use, drawing a flowchart involves the use of many symbols, however, for education purposes, the basic shapes of Start and End (oval), Process (rectangle), and Decision (diamond) will suffice. Arrows are used to connect the steps and indicate the flow of action.

Flowchart Template Visual Note Taking Technique
Flowchart Template (Click on the template to edit it online)

Ultimate Flowchart Tutorial

Flowcharting Basics: How to Create a Simple Flowchart

Thinking Maps 

Thinking maps include 8 visual-verbal learning tools that help visualize our thinking and thus give concrete images to abstract thoughts. Thinking maps enable meaningful learning as they help organize ideas and information in a way that is easy to understand. 

They also help break down complex information into easily comprehensible sections and discover connections in between. And they can be very useful during critical and creative thinking exercises. 

They include,

  • Circle Map – Defining in context and brainstorming 
  • Bubble Map – Describing using adjectives 
  • Flow Map – Ordering and sequencing 
  • Brace Map – Depicting the whole of something and its parts 
  • Tree Map – Classifying and grouping 
  • Double Bubble Map – Comparing and contrasting 
  • Multi-flow map – analyzing causes and effects 
  • Bridge map – Seeing analogies
8 Thinking Maps
8 Thinking Maps

Refer to our guide to effectively using thinking maps to learn how to effectively use them in the classroom for note-taking.

Graphic Organizers 

A graphic organizer is a tool that is used to organize information and ideas in a way that is easy to comprehend and internalize. It combines text, shapes, and connectors to simplify concepts and show connections between their elements.

Persuasion maps, sequence charts, story maps, learning maps are some of the popular types of graphic organizers out there. 
Here are 19 types of graphic organizers with templates that you can easily utilize for visual note-taking during lessons.

Persuasion Map Graphic Organizer
Persuasion Map Graphic Organiser (Click on the template to edit it online)

Venn Diagrams 

Venn diagrams are used to compare ideas, concepts, or items. At a glance, they reveal the differences and similarities between or characteristics of two or more things. During a lesson where the teacher is comparing two concepts, students can use Venn diagrams to note down connections and disparities between them.

Venn Diagram Template Visual Note Taking
Venn Diagram Template (Click on the template to edit it online)

Visual Note Taking Tips 

Like any other note-taking method, visual note-taking also may vary based on the user. Whether you would like to rely on sketching or a well-structured method like mind mapping, here are a few tips on making your visual-notes more effective. 

Adding Images

The purpose of adding images to your visual notes is to make them more memorable and comprehensible. Therefore, any illustration you add should always be directly related to the information in order to avoid confusion. 

Always write down information before adding illustration, and always accompany an image with text in your notes to provide more clarity. 

Adding Text 

Equally important as visuals in visual note taking is text.  The good thing is that you don’t have to write down everything your teachers say – only capture the key points and meaningful quotes without trying to summarize everything. 

When adding text, use them in a visually appealing way. 

  • Include different fonts and font sizes, so that you can emphasize the important words or sentences on your notes
  • Avoid long sentences by adding symbols, abbreviations, and images 
  • Avoid making lists or creating outlines and rely on chunking information to leave as much white space for clarity as possible
  • Add containers (boxes, circles, thought clouds, etc.) around the text to provide more structure and for emphasis  

Using Connectors 

Use arrows and lines to connect ideas and highlight relationships or the flow between them. They help easily distinguish between the key concept and supporting ideas. 

Structuring

Follow a proper structure to maintain a sensible flow of information. Place the key topic or central theme in the middle of the canvas. Related pieces of information are to be added surrounding the topic at the center. 

Or you can organize it from top to bottom, with the key subject at the top and the other pieces of information cascading down, creating levels of hierarchy.

Place the unfamiliar concepts or words on one side of the canvas under a further research section, to easily spot them and as a reminder.  

  • Use a framework for your visual notes; the techniques discussed above can be used here
  • Use white space as much as possible to separate major ideas 
  • Limit your notes to one idea or concept per page 

Using Colors 

Colors, like different font types and sizes, are another great way to highlight key areas on your notes and differentiate between information. Use between 2-3 colors to keep things clear.  

What’s Your Take on Visual Note-Taking? 

Human beings are highly visual – from cave paintings in the stone age to modern-day emojis, communicating visually is something that we’ve always loved and visuals accompanied by text have always been a powerful way to capture and share ideas.

Where 65% of the population identifies themselves as visual learners, visual note taking is a no-brainer. And learning the visual note taking techniques above can help you one way or the other. 

Let us know any other visual note taking technique that you love to use in the comments section below.

How to Effectively Use an Online Whiteboard to Enhance Online Teaching
How to Use an Online Whiteboard for Teaching

The COVID-19 pandemic has changed the physical ways and methods of teaching and learning, accelerating the digitization of them. Video conferencing has replaced the face-to-face engagement in a physical classroom; screen sharing and presentation slides have become the new whiteboard. 

As teachers and students around the world are now slowly embracing the patterns of online teaching and learning, video conferencing tools like Creately’s whiteboard software, Zoom and Microsoft Teams alone have become insufficient to accommodate online teaching requirements, especially in terms of maintaining the active involvement of students and collaboration between them and their teachers. 

As education is rapidly turning digital, the need for and the availability of tools to facilitate online learning and teaching has surged over the last few years; and online whiteboards are gaining popularity by the day. 

In this post, we will talk about online whiteboards and their use in enhancing online teaching and learning experience. The online whiteboard tool we’ll be referring to is Creately – a visual collaboration tool used by educators to create learning material and collaborate with students online.

What is an Online Whiteboard

Digital whiteboards allow teachers and students to replicate the experience of a physical whiteboard online, with an infinite canvas. They offer shape libraries and premade templates that can be used to create content (i.e. charts, diagrams, posters, visuals, etc.). They also digitize the content created, which makes it easier for anyone to access it online from their own personal device.

Advanced online whiteboard tools like Creately also offer in-app video conferencing and real-time collaboration features where teachers and students can work on the same canvas and track each other’s changes with real-time change previews and mouse tracking.

Ceately-Online-whiteboard-for-teaching

Why use an online whiteboard

Just like in a physical classroom where everyone interacts around a whiteboard (or a blackboard), an online whiteboard makes it possible to 

  • Make your online lessons more interactive 
  • Write, draw and visualize concepts online on a canvas as you teach 
  • Allow your students to actively participate and collaborate 
  • Create presentations, posters and other learning material for the online lessons

How to Use an Online Whiteboard to Enhance Teaching

Whether you are currently using an online whiteboard or looking to try one, here are some great ways to utilize them better in your online lessons. 

Collaborate with Students

An online whiteboard is primarily a collaboration tool. While you can use it during lessons/ lectures to visualize and simplify concepts and ideas for the students, you can also get the students to contribute. 

For example, on Creately, once you create a new document, you can add students to it as collaborators. You can also share an Edit enabled link with the students via email or a chat platform you use, to communicate with each other online. 

Here are a few ways you can use Creately to collaborate with your students. 

Brainstorming: 

Create a document or choose a Creately brainstorming template to start with.

Brainstorming Template
Brainstorming Template (Click on the template to edit it online)

Add all students to the document. Use Creately’s built-in video conferencing feature to communicate with each other as they edit the document. If you are using a third-party app to communicate, share your screen, and track students’ movements across the canvas with real-time mouse tracking.

A variety of visual brainstorming techniques can be used here; some of them include, mind map online, idea board online, concept maps, affinity diagram tool, lotus diagrams, and starbursting.

Homework:

Create separate documents containing the same content (i.e. assignment), by simply duplicating the original. Create separate folders inside Creately where you can organize and track them, for each activity or class you teach. You can also use the Google Drive integration to create, organize, and manage permission to your Creately documents from there.

When naming the duplicated document, include the student’s name in it to easily track which document belongs to whom. Once the student has completed the assignment, you can review and leave your feedback with in-line comments. You can also hop on a quick video call and walk each individual through the recommended changes.

Interactive Exercises 

A recurring challenge in online teaching is creating an environment where the teacher and students can actively interact with each other during the lesson. Online whiteboards bridge this gap by providing a shared space where both parties can work together. 

You can use Creately to easily create quizzes, and other fun games such as crossword puzzles, hangman and get the students involved in playing in real-time.

Create and Share Material Needed for the Lesson

When teaching online, keeping things brief and visual is essential. It’s said that visuals are processed 60,000 times faster than text and that visuals improve learning by up to 400%.  

Using charts, diagrams, posters, graphic organizers, storyboards, infographics, etc. you can easily summarize a one-hour lecture and explain complex concepts better. An online whiteboard makes it easier to create and share these visuals quickly with an entire class.  

Creately offers extensive shape libraries and pre-made templates for over 50 types of charts and diagrams including flowcharts, thinking maps, mind maps, infographics, storyboards, etc.   

You can also add more shapes and images with built-in Google image search or by importing them from your own device. 

You can export these visuals as PNGs, SVGs, JPEGs or PDFs, for embedding in presentations, websites, reports, etc. You can also simply share a View-only link with the students if you don’t want to add them as collaborators.

Do Presentations

An online whiteboard is one big canvas that allows you to create visually stunning and engaging presentations as a whole or on one single space. 

To make it easier on Creately, create the structure of your presentation first and number or title each slide. Later this will make it easier to navigate from one slide to the other. 

You can Google or import images in different formats (JPEG, PNG, SVG, GIF, etc.) and add them to make your presentation slides more expressive. 

During the presentation zoom in on each slide and explain the content to students with screen share or Creately video conferencing.

Presentation Template
Presentation Template (Click on the template to edit it online)

Visual Note-Taking

Visuals make a great way to synthesize content. While you can present important concepts in the form of a chart, graph, or diagram on an online whiteboard during the lesson, you can encourage students to use the same tools to take down their notes.

Research shows that 90% of information transmitted to the brain is visual and that people tend to recall data better when visuals are involved. By encouraging students to use a mind map, concept map, flowchart, or graphic organizer to take down their notes, you can help improve their ability to retain information. 

Creately offers an array of premade templates that students can quickly put to use during note-taking. You can also create a template prior to the lesson and share it with the students for note-taking.

Have You Tried an Online Whiteboard for Teaching Yet? 

Between hours of Zoom calls with students and staring at a screen, the engagement and the receptivity of students have greatly decreased. An online whiteboard for teaching can restore the energy that exists between the teacher and students in a physical classroom by emulating the collaborative experience online. 

Let us know your online teaching and learning hacks in the comments section below. 

This post is a part of Creately’s series on remote teaching. More resources you would find useful include,

7 Effective Remote Teaching Best Practices

Essential Remote Teaching Tools for Conducting Effective Online Lessons

The Ultimate List of Visual Teaching Strategies

The Ultimate List of Graphic Organizers for Teachers and Students

The Ultimate List of Visual Creative Thinking Techniques

Essential Remote Teaching Tools for Conducting Effective Online Lessons

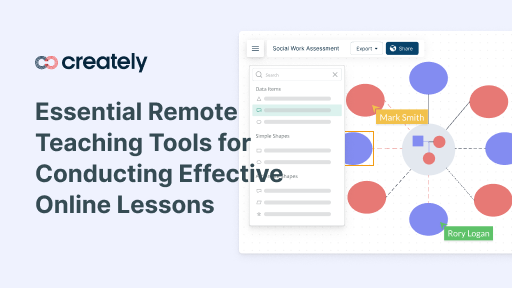
The sudden transition to remote teaching has left many teachers, as well as students, faced with various challenges, from not having access to the internet to finding the proper tools to overcome the boundaries of online teaching. 

We have compiled a list of tools that you can use to enhance your experience with teaching online, or remote teaching as popularly referred to these days. You can go through the list and select the ideal online teaching tools for your remote teaching goals.

Remote Teaching Tools 

Familiarizing yourself with how the tool or platform that you use works, is as important as selecting the correct tool. 

Explore each tool and learn ways to maximize its utility to create a better teaching experience.  Your students will depend on you to instruct them on how to use the platform themselves.  

There’s a range of remote teaching software available out there, and from them, we have chosen the best ones and categorized them based on their primary purpose.

Online Communication Tools

Effective communication is the key to successful teaching and learning, whether in a physical classroom or a virtual classroom. However, maintaining online communication with not one, but over twenty students is undoubtedly challenging.

Communication platforms help overcome it; they enable communication with larger groups, with video conferencing, instant messaging, audio calls, virtual rooms, and more, with any device and from anywhere. 

Some of the tools in demand are,

For a better teaching experience with these tools,  

  • Create an agenda or a plan for each online class and share it prior to the lesson  
  • Clearly explain the online etiquette students should follow during the class and what is expected of them prior to or at the beginning of the lesson 
  • Have all microphones, except for the person who is speaking, muted. This helps cancel out the distracting noises and retain the focus of the students. Anyone who needs to speak can make a gesture to catch the attention of the speaker without interrupting them.
  • When delivering a presentation or sharing an image, document or file, give some time for students to take down notes, to view or go through them.

Online Whiteboards 

Online whiteboards or digital whiteboards help emulate the classroom whiteboard/ blackboard experience with the students. Most of these tools offer an infinite canvas with shape libraries for creating different types of diagrams, charts, graphs, and other visualization purposes (i.e. creating posters, graphic organizers, etc.).  

Creately is widely used by educators for a variety of purposes: 

Creately Editor - Creately for Online Teaching Tools
  • As an online whiteboard where teachers and students can collaborate on the same canvas as they visualize ideas, concepts, etc. Moreover, students and teachers can connect via in-app video conferencing and track changes each other makes with real-time mouse tracking and change previews. 
  • Create a variety of diagrams and visuals (i.e. dichotomous key maker, graphic organizer generator, visual lesson plan templates, etc.) needed for presentations, lessons, assignments, etc.  
  • To share documents with students and colleagues for their output and feedback (with in-line comments) 

Work Planning Tools

Maintaining a work schedule is even more important when you are working from home; especially during stressful times, a solid routine can help maximize the use of your time. You can use time management and scheduling apps like Google Calendar and Calendly to streamline: 

  • Creating schedules to use in  your online classes or for personal use  
  • Creating schedules of online classes and keep everyone notified of dates and times.  
  • Scheduling appointments with parents and students; avoid double-booking a slot 
  • Inviting parents, students or colleagues for online events (i.e. webinars) 
  • Creating lesson plans and sharing them with students, administrators, and colleagues. 

Learn how to create a lesson plan using Google Calendar here.

Social Media Channels

Social media channels provide a great platform for teachers, students and parents to stay connected. 

Channels like Facebook, LinkedIn, WhatsApp, etc. allow the creation of exclusive communities or groups teachers can leverage on to  

  • Communicate and maintain presence after online class hours  
  • Share and store important information, presentations, and resources related to lessons 
  • Conduct Q&A sessions 
  • Encourage students to maintain communication among themselves and engage with each other while studying or doing homework  
  • Conduct live events such as webinars (with Facebook or Instagram Live)

Document Management Tools 

From test papers to lesson plans, there’s an array of documents teachers have to maintain regularly. A central location to store, organize, and manage all these documents is essential to properly keep track of them, especially when you are teaching remotely.  

Tools such as GSuite, MS office, OneDrive, Dropbox, and Evernote simplify the process of maintaining the documents you own. 

  • Store all documents, files, etc. in the cloud which allows you and your students to access them with any device from anywhere 
  • Neatly organize documents in relevant folders and subfolders making it easy to retrieve them 
  • Quickly share files and documents with anyone with a single link or as a file. You can also adjust permission settings, changing them to Edit, View, and Suggesting mode on GSuite apps.
  • Collaborate with students on editing and reviewing documents, add comments and suggestions and track changes with version history

Online Video Tools

YouTube and Loom are great online video tools for creating and sharing videos with your students. You can use these tools in a number of ways; 

  • Record your online classes or lectures and share them with students 
  • Students can re-watch the videos if they were absent or during exam revisions. You can also have the video recorded prior to the lesson and have it shared with the students when you are on leave  
  • If you are teaching the same lesson to different classes, you can make use of a pre-recorded lesson to avoid repetitive teaching 
  • Encourage students to learn independently with pre-recorded video lessons. The chance of students learning a concept better is higher when they understand it on their own 
  • Share links to existing video resources online

Online Quiz Makers

Whether you are teaching online or in a physical classroom, quizzes are a great way to check a student’s performance.  Online quiz makers make it easy to, 

  •  Create, format, and share assessments online
  •  Create answer sheets which allows you to easily track and score answers of each student 

There is a plethora of online quiz makers that are both free and paid, starting from Google Forms.

Find more useful online quiz makers here.

Online Homework Platforms 

One thing that is most challenging when teaching from home is keeping track of students’ homework. 

Homework can come in different forms; essays, speeches, tests, etc.  You can use a combination of the platforms above to get students to submit their homework. 

  • Google Docs – for essays and other written assignments 
  • Zoom, Skype, and other video conferencing apps – for verbal assignments 
  • Loom, YouTube, Prezi, Google Slides – for videos and presentations 
  • Google Classroom – Distribute assignments, grade and send feedback

Did We Miss Any of Your Favorite Online Teaching Tools? 

Most of the online teaching tools listed above are free or you can try for free and see how it works for you. Invite a colleague to explore the tools and select the ones that best suit your teaching objectives. 

What other remote teaching tools do you recommend? Let us know in the comments below. 

This post is the second in our article series on remote teaching. More resources you would find useful include,

7 Effective Remote Teaching Best Practices

The Ultimate List of Visual Teaching Strategies

The Ultimate List of Graphic Organizers for Teachers and Students

The Ultimate List of Visual Creative Thinking Techniques