Writing can be intimidating, even if you are an experienced writer. But a process – by breaking it down to simpler steps – can help you write faster and better. After all the way you write affects how well you write.
And a proper writing process can make all the difference.
The goal of this guide is to help you learn how to properly write, whether you are writing a research paper or a blog post for your website.
Read on to
- learn what the writing process is
- see the different writing processes (3-step, 4-step, 5-step, 6-step, and 7-step) that you might have come across before you landed on this page compared next to each other
- understand the proper writing process with each step explained in detail
- find useful templates that you can use throughout to simplify the writing process
Let’s dive right in.
What is the Writing Process?
Let’s start from the very beginning – by clarifying what it is first.
The writing process refers to the steps someone takes to compose text. That said, every individual writer follows his or her own writing process and it usually comes naturally to them.
But there are basic writing process steps that are universally referred to and followed. Understanding them will help you develop your very own writing process more easily.
Still not convinced why you need to follow a process? Following a proper writing process is actually important for a few good reasons
- It will help you write better and faster. By breaking down the task into manageable steps, you can do away with the struggling and procrastinating.
- Since you will be following individual steps, you can focus on each better, which in turn will be reflected in the quality of the final copy.
- Practice makes perfect. The more you follow the process, the more it will improve your writing skills.
- At the end of it, you’ll have something that is well-written, free of grammar or spelling errors, properly formatted and of greater quality.
Many different processes for writing
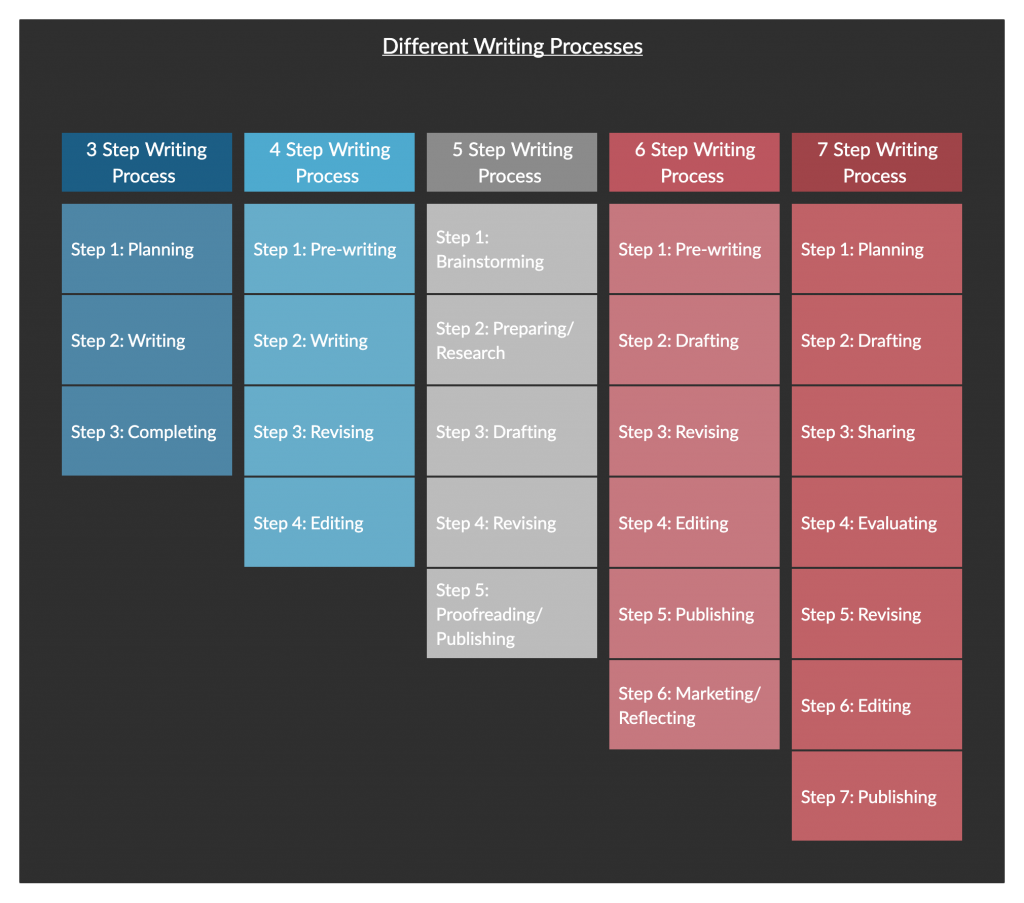
If you have already searched the term writing process on the web, you may have come across several different types of it. Some claiming to have 3 steps, 4 steps or even 7 steps. Here’s what we found;

If you look closely, you’ll see that they refer to more or less the same steps. The 3-step process is a generalization of the other process types, while the 7-step process breaks down the sub-steps in the others.
In the 6-step process, marketing and reflecting refer to bringing what you’ve written in front of your audience and assessing the feedback to understand what you could have done better.
The 7-step writing process here is used mostly in schools where teachers guide the children by showing them how to write by planning and drafting a model piece in front of the class. Then they can incorporate the input of the children with a shared piece, which can then be evaluated, revised and edited (with the help of the teacher) before publishing.
The 5 Step Writing Process
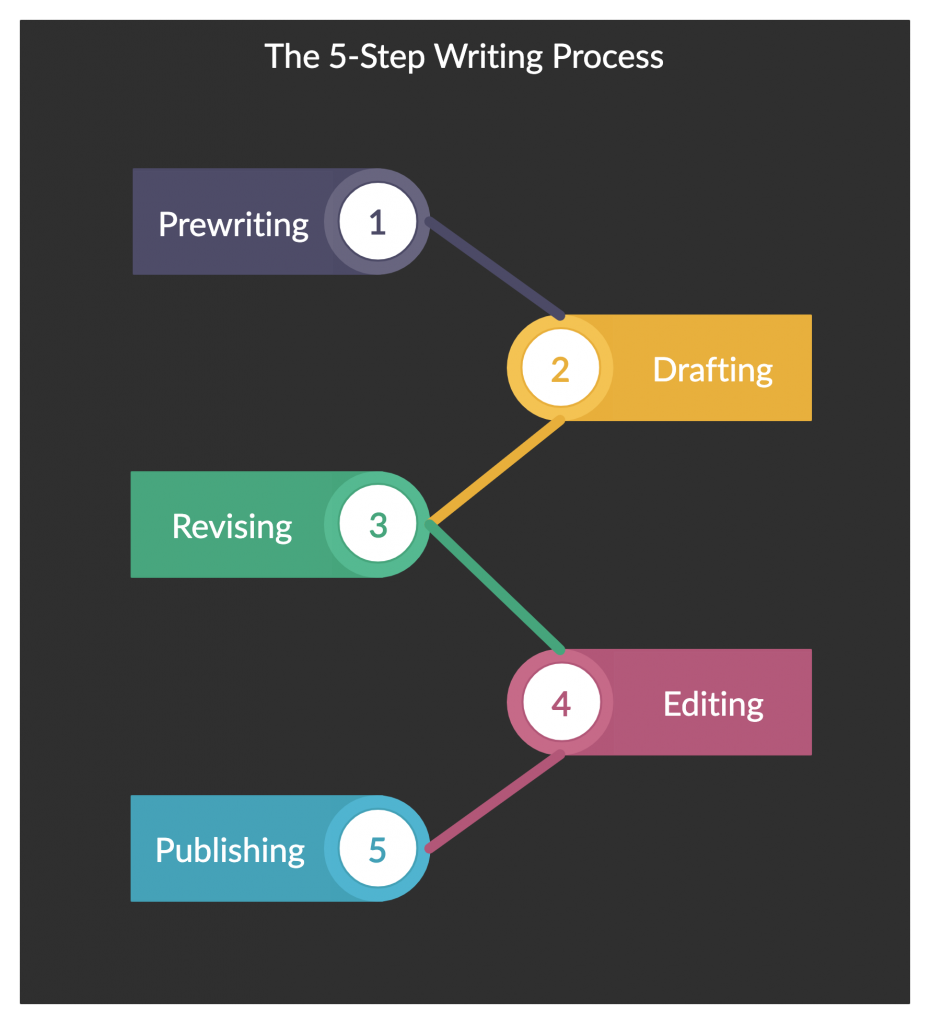
For the sake of keeping it simple and effective, we’ll stick to a 5-step writing process that anyone can refer to and use for better results.

Step 1: Prewriting
Many tend to overlook this step completely.
They jump right into writing without taking the time to plan and organize their thoughts. And they end up with a low-quality piece that took a lot more time than they hoped.
Taking time to complete this step is important because it helps with gathering and preparing everything you need for the subsequent writing steps.
In this stage, spend time brainstorming and conducting research to understand your topic better and gather relevant information.
Rely on authoritative sources from experts in the subject area and list them down so you can refer to them when writing your piece later to increase its credibility.
It’s also a best practice to identify your target audience. Understanding your target reader and what they want well will help you narrow down your focus.
Some prewriting strategies you can use here are,
- Freewriting is writing freely without regarding quality or correctness (grammar, spellings, punctuation). The purpose is to get what’s in your head on to paper or screen without stopping. You can consider this as a warmup exercise.
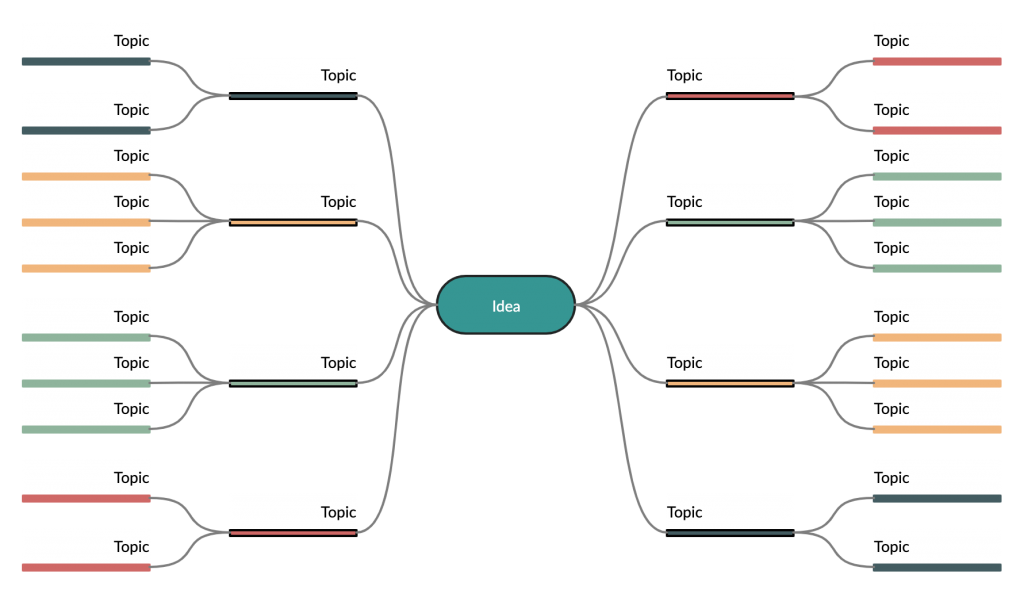
- Clustering is also known as mind mapping, diagramming, bubbling, etc. and is a brainstorming method. This method uses visualization to capture your thoughts. Place your topic in the center and write down related ideas, terms or words that come into your mind around it connected by lines. You can delve further into these subtopics by breaking them down as well.

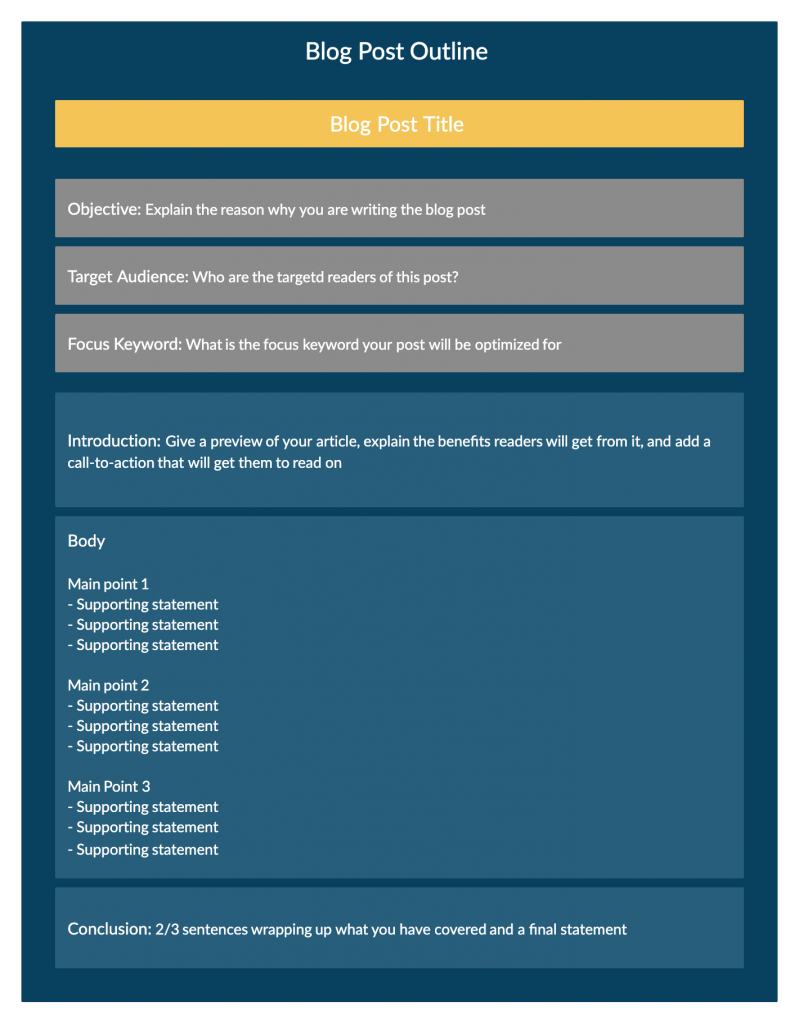
- Outlining helps with neatly organizing what you have already found out through research and brainstorming. It’ll help fish out the important points that will help you tell your story, from the jumble of ideas you have gathered. And it actually makes drafting a much easier task.

Step 2: Drafting
Now that you have researched the topic and have an outline ready, apply them to create a rough draft. Remember that this is only the first draft, meaning it will be revised and edited in the later steps.
It’s important that you only focus on getting the ideas roughly into sentences without worrying too much about spelling, grammar or vocabulary here.
If you spend time perfecting every sentence and paragraph that you write in the drafting stage, you’ll be more stressed and the quality of the final outcome will be lower.
Instead, work through the outline you’ve prepared earlier as you write. Write complete sentences and paragraphs, and almost as in freewriting don’t stop yourself to look back and edit.
However, try moderately to use proper grammar and put together words in a way that makes sense when you revise.
By the end of this step, you should have written everything you needed to say about the topic.
Step 3: Revising
This is a critical part of the writing process. It’s during this phase that you will revisit the draft and improve it by modifying and rearranging the content. To make it more appealing to the target audience you can add, rewrite or delete sentences or paragraphs.
And as you reread your draft, you will detect areas that need to be improved to reinforce your argument better. It may require you to do a little more thinking, and even in some cases more research, to find the information you need to logically prove your point.
You don’t have to do this step alone. Sometimes a fresh pair of eyes can help provide new insight that you might have missed; you can ask for help from your colleagues or peers during this stage.
You can revise your draft as many times as you want. However, it’s better to wait at least a few hours if not a day to revise you draft again after the first attempt.
Step 4: Editing
Editing requires you to fix grammar mistakes, spelling or punctuation errors, repetition, and style. This is why you should wait to edit until you are done with revising your piece; for there’s no point in editing something you will later delete or rewrite.
You can make this another chance to ensure that your article delivers what your title promises. It’s better to get someone else to read your piece in this step as well, for they may find errors that you might have gotten too tired to notice after sifting through it for dozens of times.
Step 5: Publishing
Then comes sharing your piece with your audience.
If you are adding it to a website or blog you may have to optimize it for SEO purposes and add visuals. In which case you may also have to consider marketing your piece, which you can do through social media, email newsletters, etc.
Any Tips or Advice?
You may have already developed your own signature writing process, maybe with a few additional steps to what we have covered here. We’d love to hear how you go about it, or any other tips that our readers may find useful.
Let us know your thoughts in the comments section below.


Very informative indeed
This is awesome, a summarized guide to aspiring writers
Very wonderful information. Thank you
This information is so useful thanks.
I read through it all.