Today is a big day, we are launching a new app interface, new feature sets, a new logo, and in essence a whole new Creately.
Our new identity signifies so much more than just a brand revamp, it’s a transformation aimed to usher in a new era of work.
For years Creately’s success was built on its ability to simplify work by providing a platform to think visually. We have taken these same core principles and built a tool that connects all aspects of work through data, integrations and visual tools, providing a central place where teams and organizations can get together and get things done.
Work today is done on docs, spreadsheets, and dreaded productivity apps. Too much time is spent pinging-ponging between different tools, finding information and coordinating efforts. This is time that could be spent thinking creatively about solutions, better understanding problems, and making decisions that have large positive impacts. So, how do we build a space where we can be productive and not just busy, where data and decisions go hand-in-hand and where the true spirit of human creativity can be unlocked? We do it by changing the rules, we do it by taking the playfulness of a canvas and adding the power of a database. We do it by breaking down the restrictive structures that force us to work in silos and give teams a space to be open, free, and collaborative. We do it by taking away the friction and frustration of modern work. We do it by being …
The New Interface for Work
Why The Change?
Creately was built on its visualization capabilities; millions of users have used it to brainstorm ideas, represent models, create flowcharts, and plan processes. But at its core, it was a diagramming and visualization tool and our previous logo embodied that. As our core purpose evolved, we needed a logo to represent this sea change in how we are approaching the modern work environment. Creately is now the world’s first work management platform that runs on a smart visual canvas.
The Core Principles
To create a new brand language we established some core values to govern every facet of Creately.
Connected– To people, data, and apps. Creately brings it all together and provides a central platform for all your work.
Insight- Multiple ways to look at the same information. See things differently, gain big picture understanding and uncover your ‘A-ha!” moments
Simplicity– Represent complex problems in easy ways. Creately’s platform is powerful and robust and super simple to use.
Flexibility- Free-form and completely customizable.
We began exploring ways to visually express Creately’s highest order benefit which is to connect the Dots Across Your Company.
Explorations:
It took months of work and 100s of iterations to find the best representation of our core values. And while we had many great options to choose from we selected what we felt was the most iconic representation of our brand story.
The new Creately logo has a simple form factor but is memorable and distinct. It uses the negative space to showcase the literal connection of data points, it invokes the feeling of collaboration and vision while retaining our brand name at its core.
This visual evolution encapsulates the next phase of Creately. Our new capabilities are unlike anything available now and is a completely new way to think about how to organize and manage your work.
We see it as an evolution of how people work with apps and systems. It’s flexible, visual, easy to change and cuts down grunt work between systems. A single portal for the details and the big picture that’s always in sync.
We cannot wait to see what you’ll build with Creately.
Product management has many moving parts, but any product manager will tell you that the hardest part of the job is deciding what to build when. A list of good feature ideas may be endless but time, resources, money, and energy are not. Prioritizing potential features from a long list means deciding on what’s important, realistic, and urgent. In this article, we will look at some of the best ways to prioritize features and the visual tools you can use to align teams and make collective decisions on how to manage your product backlog.
Why Feature Prioritization Is so Hard:
In a study conducted by Mind the Product Survey, 49% of product managers said that their biggest challenge was not being able to conduct proper market research to validate whether the market truly needs what they are building. This is largely due to the haphazard nature in which feature requests come in and not having standardized ways to measure the impact of working on a particular feature.
Personal Biases: The decision to build a particular feature is oftentimes not just a product decision, but a personal one. Every single feature idea represents someone’s hard work and opinion. In large organizations, with multiple stakeholders with different levels of investment and control, people in higher positions can insert their choices or opinions without the necessary data or understanding and consequences. All too often product managers fall prey to HiPPO ( Highest Paid Person’s Opinion) and prioritize features that have no lasting value in the development of products.
Sales and Support Requests: They are often the loudest people at the table and can be difficult to ignore. While it is important to listen to the sales team as they are closest to interacting with customers, features shouldn’t be prioritized in a very reactionary manner without considering the long-term value it will add to the customer.
Isolated ROI: Often the product vision is set aside to build features that will achieve short-term revenue. But more income doesn’t necessarily equate to a better user experience. Not being tempted by short-term monetary gains is important because in the long run, happier customers are what will bring you the most success.
How Constraints Help in Prioritization:
Constraints can be a good thing. Working with limited time, people, and money can serve as prioritization filters that force you to make tough but important decisions. Making choices based on constraint-specific questions like whether you have the time to build this or the right skill set allows you to focus your energy in more efficient avenues. Generally speaking, constraints could be people, time, or dependency-based and create a framework around which the most optimal decisions have to be made. Therefore, it is critical to fully understand your constraints before making feature decisions.
How to Prioritize Work:
To take personal biases and reactionary based decisions out of the equation, it is useful to look at feature prioritization through the following lenses:
Feasibility: These are the technical implications that need the inputs of back-end engineers, UI designers, and front-end developers. It involves figuring out how technically possible a feature is given the current resources and tools you have. This allows you to frame the question differently and allows you to go from asking “Should we build this?” to “Can we build this in the first place.”
Desirability: This involves the analysis of focusing on the customer experience. The most basic question to answer here is “Do customers actually want it?” It is important to evaluate every feature request against what value it will provide to the end-user. Tools like the house of quality template can help in this evaluation, as they allow teams to map customer needs against design features. This involves talking to researchers, UX designers, marketers, and support, as well as going through any user tests and validation you may have already completed.
Viability: This involves putting feature requests in context with the overall business goals. It entails deciding whether a particular request fits the overall strategy and requirements of the market. By talking to executives and other product managers, you need to understand how a particular feature fits into the overall ecosystem.
Visual Tools to Guide Feature Prioritization:
Effort/ Impact Scale
After evaluating which features are worth pursuing, you still have to decide which features you will work on first. A great way to visualize your options and come to a collective decision with your team is to plot an Effort/ Impact Matrix. This simple 2X2 grid represents the different levels of effort required to build a feature and visualizes the impact that feature will have.
Effort-Impact Matrix (Click on template to edit online)
The goal here is to find the feature that has the lowest effort but will yield the highest impact. This activity is best done by gathering a group of diverse teammates and getting them to list down a feature, explain it, and place it on an online collaborative whiteboard like Creately. The group then collectively votes on where it should be placed on the grid.
RICE Framework
Sometimes feature prioritization in more detail. The RICE framework is a method to standardise your evaluation criteria and make informed decisions based on the information available. Each feature idea is evaluated on the basis of metrics and given a score accordingly
RICE Framework (Click on template to edit online)
Reach: Determine how many people your project will affect. Reach is usually measured by the number of people impacted within a given period of time. Assigning tangible data will help you come up with a more meaningful RICE score.
Impact: Impact measures the consequence of your reach and the effect it will have. Impact can be hard to quantify so teams usually use a scale of 1 to 3 to estimate low, medium, and high impact tasks.
Confidence: Confidence is evaluated by how certain you are that an action you take will have the desired result. Confidence is usually measured as a percentage.
Effort: With time and resources limited, you need to determine if a task is worth it and consider the amount of time it will take to execute a project. Effort is measured in person-months, which is the amount of work that one team member can complete in one month.
After you have a number assigned for each category, you can calculate your RICE score. Do this by multiplying reach, impact, and confidence and dividing the total by effort. The resulting score gives you “total impact per time worked”—a powerful number for prioritizing features accurately.
Kano Model
The Kano Model is a feature prioritization technique that identifies features in a product roadmap based on the likelihood of them satisfying customers. It helps come up with strategically sound decisions by weighing a high-satisfaction feature against its cost to implement. Product managers can use this model when prioritizing new features by grouping them into categories that range from those that could disappoint customers to those that are likely to satisfy or even delight customers.
With the Kano Model, each potential feature is broken down into different categories based on the emotional response expected from users.
Kano Model Template (Click on the template to edit online)
Attractive Needs: These are features that aren’t strictly necessary, but will greatly increase the levels of satisfaction of customers if implemented.
Performance Needs: These features are the ones that have a proportional relationship between functionality and satisfaction; the more we provide, the more satisfied our customers become.
Basic Needs: These are the features that customers expect your product to have. If your product doesn’t have them, customers will consider your product incomplete.
Story Mapping:
This is a great way to identify the Minimum Viable Product by organizing and prioritizing user stories and the development releases. The idea is based on the concept of mapping out the workflow of your product from beginning to end.
It is done in 3 steps;
Create the workflow using cards or a Kanban board, arranging the cards from the start of the customer experience to the end.
From top to bottom, order the most important things to develop.
Finally, you create slices of releases based on the prioritization.
Story Mapping Template (Click on the template to edit online )
Final Thoughts:
Feature prioritization is part of a broader strategic planning process and needs to always be put into context. The prospect of building new features and experimenting with new functionality can be extremely exciting. But one of the most important roles of a product manager is to be the voice of reason. This means constantly mapping release schedules and roadmaps back to the value of the product. It is important to not let short-term results outweigh your long-term strategy.
The act of prioritization is never over and you must constantly reprioritize based on business needs and market changes. Although you worked hard to prioritize features, they may change in the future. Make sure your list continues to align with your big picture by taking the time to go through it.
What are some of the best techniques you have come across for product prioritization? Let us know in the comments.
Developing a comprehensive understanding of business systems is hard work. It usually involves high-level modeling or complex process mapping. This can be a highly technical and laborious process that involves a lot of trial and error. Creating BPMN diagrams or UML schematics can be very useful in understanding the broader functioning of a business, but they are fundamentally technical in nature and can exclude non-technical domain experts.
Domain-Driven Design
Domain-Driven Design is a methodology that establishes a technology-independent language that allows for a detailed understanding of business needs and processes. This allows stakeholders to communicate their domain knowledge to the rest of the team in a language-agnostic manner to develop a shared understanding of systems.
What is Event Storming?
Event storming is a workshop-based approach to Domain Driven Design that brings technical and non-technical stakeholders together to explore complex business domains. It focuses on domain events that are generated in the context of a business process or business application. It usually involves product owners, domain experts and developers.
The event storming method was introduced and publicized by Alberto Brandolini in Introducing EventStorming. It is used as a technique to rapidly capture a solution design and improve the team’s understanding of the design.
Event storming is a form of group learning and is a fun way to integrate development and product teams to create alternative solutions together. Event storming may also be useful for teams with mature products to order the process and find out about bottlenecks and areas of conflict.
An event storming session is usually conducted to:
Create a business model for the development of a project.
Gain a “big picture” awareness of the product model in all its complexity, highlighting its goals and needs.
Visualize the product model and brainstorm alternative solutions.
Find bottlenecks and areas of conflict on mature products.
The Benefits of Event Storming
While building a product it is important for the development team to be well-versed in the business domain the product operates in. It allows for a clearer initial analysis and a more focused build. A workshop like an event storming session can boost the overall co-operation between business and product teams.
Quick: Most other business process modeling techniques are an in-depth deep dive into the operations of the business. They involve using complex data models and can take weeks to depict an accurate picture. Event storming is a rapid approach to modeling domain-driven design. An event storm is usually a single-day event where a complete business process can be mapped in a few hours.
Shared Understanding Between Technical and Non-Technical Stakeholders: Unlike UML, an event storm creates a representation of a business process that can be easily understood without any prior technical knowledge.
Collaborative: The core concept of an event storm is to encourage participation and interaction between domain experts. It creates an engaging environment to create business models and results in the discovery of more valuable insights.
Effective: The greatest benefit of event storming is the conversations it starts. Teams can use the knowledge gained in the workshop to inform future modeling processes and build products, or can simply use event storming to better understand business processes and make better decisions going forward.
Conducting the Event Storm
To conduct an event storm you need to gather various stakeholders with specific domain expertise together. This can be done in a physical location or virtually using a collaborative whiteboard tool like Creately. It allows you to conduct the entire session remotely on a single, infinite canvas and can be used as a shared space where stakeholders can exchange thoughts and ideas in real-time.
Step 1: Domain Events
The first step is to identify domain events. They are factual statements about the things that happened in a business system. Participants brainstorm and list down all the things that happened in a system that triggered important reactions. Then they list down these events as colour-coded notes on the virtual canvas. It is important to phrase these statements in the past tense so participants can frame this as a ‘what happened’ statement. As participants add events to the canvas, you can begin to organize them according to the time frame in which they occurred.
Example of domain events
Step 2- Commands
The next step is to identify why the event occurred. In this stage, the team analyzes what triggered the events. While events are factual statements about the past, commands express our intent for something to happen in the future. Commands are usually listed down on blue notes. While events are captured as past tense statements, commands are listed down as present tense intentions. Commands may be documented as both user and system actions.
Event storming template (Click on the template to edit online)
Step 3- Aggregates
These are the things that happen in a system that generally take place in a group of events. They are higher-order business entities that should be represented as nouns.
For example, ‘Order Process’. An aggregate usually consists of a collection of notes on the canvas.
It is represented by a cluster of events with corresponding commands and the responsible actor. That aggregate can then be named and placed on a larger color-coordinated note on the canvas.
Step 4 – Bounded Contexts
This is a high-level structure that consists of categorizations of functionality that group related entities together. The team begins to group together modules within an element called bounded contexts by drawing a box or circle around the related modules. You can then begin context mapping by illustrating how modules within a bounded context interact with other contexts. Simply put, all related events would fall into the same bounded context. For example, all events related to shopping carts would fall into the shopping cart bounded context.
Event storming template with bounded context (click on template to edit online)
Tips for Conducting Your Event Storming Session
Participants: The key aspect of a successful event storm is organizing the right people. Participants should consist of key stakeholders with domain expertise across multiple domains. An effective event storm usually has a small group of stakeholders to ensure free-flowing conversation and a collaborative environment.
Plan Sessions: Set goals and intentions for the session. This allows you to be more focused on what should be involved in the session and what aspects should be left out.
Send Instructions Ahead of Time: Allow participants to understand what the point of the exercise is and what is expected of them. Send instructions of what the key is and what different colored notes represent, so participants have a clear understanding while conducting the session
Have Discussions in Nontechnical Language: Ensure conversations are not bogged down by the specifics of implementation. These conversations should be more conceptual in nature so that everyone can participate, regardless of their technical background.
Provide Examples: It is helpful to showcase a completed event storming canvas so participants know what they need to work up to.
Have Experience Conducting an Event Storming Session? Tell us About it.
Have you participated or conducted an event storming session before, we would love to hear about your experience and some of the learning you came away with. Let us know your thoughts in the comments section.
Most project managers know that creating the project plan is only the start of the project management journey. All the careful planning and forecasting don’t count for much if there isn’t a concrete way to execute the project plan. And with most projects having so many moving parts, creating a schedule that is actionable and takes into account all the realities of the project can become the most critical part of the project management process.
What is Project Scheduling?
A project schedule is your project’s timeline, it consists of all the sequenced tasks, activities and milestones that need to be completed in a certain timeframe.
Creating a project schedule is a way of communicating all the tasks that are needed to be performed, while clarifying what resources are needed, under what time frame.
Effective project scheduling leads to the success of a project, reduced cost, and increased customer satisfaction
Broadly speaking project scheduling consists of 3 steps
Determine what needs to be performed
Determine who needs to perform the work
Determine how long it will take to perform the work.
Creating the Project Schedule
Even large, complex projects need to be broken down into smaller manageable tasks that have clear objectives and timelines. Creating a project schedule can be done by following these steps:
1. Plan Schedule Management: This includes all the groundwork involved in setting up a schedule. It consists of establishing all the policies, procedures and guidelines that will govern your project. It identifies all the stakeholders in the project management process, identifies who must approve the schedule and who has the authority to make changes to it.
2. Define Project Activities: This consists of all the activities required to be finished to complete the project. This involves clearly stating the nature of each task, what the subtasks under them are, and determining milestones to track the project’s progress along the way. Activities should be measurable, easily estimated and related to both a project deliverable and a budgeted cost.
3. Determine Dependencies: Identifying dependencies involves listing down all the activities that rely on others to be completed. This helps you to structure your schedule based on which tasks need to be done parallelly and which need to be done sequentially.
4. Sequence Activities: After you have identified dependencies, you can begin to sequence the activities in a project. This does not involve assigning timelines to each task but involves creating an efficient workflow in which the order of the tasks is identified.
5. Estimate Resources: Every activity in your project requires resources. This could be in the form of personnel, software, workspace and much more. Estimating resources ensures that the optimal amount of resources are available at each stage of the project, so that you don’t encounter delays while executing your project.
6. Establish Durations: Accurately documenting how long each activity will take is key to ensuring the project as a whole stays on track. Underestimating how long a task would take can have cascading effects of the entire schedule, while overestimating how long a project will take can lead to the wasteful use of time and resources.
7. Monitor and Control: This process takes place throughout the length of the project. It involves running reports and assessing the progress of a project against the schedule, managing performance, and communicating with the team.
Techniques of Project Scheduling
Project scheduling typically includes various techniques, some of the most common techniques are:
Mathematical Methods:
These models calculate the start and end date of various tasks in the project based on their known scope.
Critical Path:
The Critical Path Method is a model that identifies the maximum and minimum required time to complete a project. It also helps to identify all the critical tasks that need to be completed in a project for it to stay on track. It also identifies other tasks in which the delivery time does not affect the schedule. CPM is implemented by listing down the tasks necessary for a project’s completion and noting the dependencies between them.
A critical path helps to visualize the project flow and calculate its duration when all dependencies and deliverables are known.
Crtitical Path Template (Click on template to edit online)
PERT Chart:
Just like a Critical Path Diagram, a PERT chart also helps visualize the task flow in a project and estimates a timeline based on their assumed duration. Like in CPM, you need to define tasks and order them based on project timelines. You can then create a network estimating different timelines of your project depending on various levels of confidence to create,
Optimistic timeline
Most-likely timeline
Pessimistic timeline
PERT Chart Template (click on template to edit it online)
PERT Charts use a weighted average duration to calculate possible timelines.
Duration Compression
These are techniques to shorten a schedule, it is used to adjust the schedule without changing the scope.
Fast-Tracking
This is another way to use a Critical Path. It helps you to find tasks that could be done simultaneously or be partially overlapped to speed up the project’s delivery. By analyzing the Critical Path, you can identify which tasks can be fast-tracked.
Crashing
This is a technique where additional resources are brought in to complete a project on time. This can be used in unique cases where a project has extra resources to spare. It can also be applied to situations where simply adding more resources can speed up the completion of a project. This technique significantly increases the cost of a project.
Task List:
This is the simplest technique of project scheduling and involves creating a spreadsheet or document of all the possible tasks involved in a project.
Gantt Chart
It is used by project managers most of the time to get an idea about the average time needed to finish a project. A project schedule Gantt chart is a bar chart that represents key activities in sequence on the left vs time. Each task is represented by a bar that reflects the start and date of the activity, and therefore its duration.
Tips To Master Project Scheduling
Input from Stakeholders: Creating a project schedule cannot be done in isolation. Consulting your team and other stakeholders allows you to identify tasks, resources and dependencies more accurately so you can estimate durations with realistic timelines.
Refer to Past Projects: Referring to previous projects with similar scope can help create a more comprehensive schedule with realistic estimates and a more exhaustive task list.
Identify Risks: Proactively identifying and documenting all the factors that could potentially derail your project allow you to create a risk management plan that could effectively mitigate risks if they occur without affecting the project schedule drastically.
Record Scheduling Assumptions: Clearly define your reasoning for calculating an estimate. A large part of scheduling is making predictions, this involves making assumptions based on the current information available. Listing down these assumptions makes it easier to identify how the entire schedule may change if some of your assumptions change along the way.
Tell us About Your Experience with Project Scheduling
Project scheduling techniques are constantly evolving. Do you have any experience with the implementation of project scheduling techniques, we’d love to hear from you. Tell us about your insights in the comments below.
Teams around the world are now well entrenched in the concept of remote work. Over the last year and a half, there have been learnings, frustrations, and some great breakthroughs in team dynamics, organizational culture, and overall productivity.
Companies have had varied success in their shift to remote work. But the most successful organizations have realized one thing, that remote work is not as simple as implementing a structure that existed when teams were co-located.
Distributed teams feel more empowered when they have greater flexibility and autonomy. The ability to make your own schedule and prioritize various tasks in a day according to what suits them best gives team members the ability to design their day and maximize their productivity.
More and more, the benefits of working asynchronously are becoming apparent. Organizations are creating and implementing structures that make the most use of all the benefits that come from working asynchronously.
What is Asynchronous Communication?
Asynchronous work is when members in a team can communicate with each other without having to be present at the exact same moment in time. This happens when the information can be exchanged independently of time. In asynchronous communication, team members usually present some information and there is some time lag before the recipient offers their response. Simply put, asynchronous work is any form of work that doesn’t happen in real-time and allows team members to coordinate their efforts across multiple schedules to work together on a project.
Asynchronous Work Is Not the Same as Remote Work
These two terms are often conflated but in reality they are distinctly different. Some companies who have gone remote, still expect employees to log in at a particular time and stay at their desk from 9 to 5 just like how they would if they were in an office.
Asynchronous work however, allows employees to complete tasks on their own time which may be very different from their colleagues. This assumes that communication is not meant to be immediate and people can respond when it is convenient to them. Online hubs and remote collaboration tools allow teams to access a common resource on their own. They complete tasks and send them to their colleagues who can then pick them up whenever their workday begins.
Meetings Are Horrible
Endless check-ins, daily stand-ups, and all-hand meetings can be extremely unproductive. Meetings have been identified to be one of the biggest time sinks in any organization. In a recent study conducted by the Harvard Business Review, 65% of managers said that meetings kept them from completing actual work, 71% said meetings are unproductive and inefficient, and 64% said they came in the way of deep thinking.
While some meetings are unavoidable, working asynchronously changes the way organizations approach meetings in general. In order to schedule a meeting while working asynchronously, you have to coordinate various people’s times which makes sure meetings take place only when they are absolutely necessary. This ensures clear agendas and more productive interactions.
The Era of Deep Work
As teams get more distributed, the value organizations place on the quantity of time spent at work has greatly reduced. Output and productivity have become the only important factors when evaluating employee performance.
“Non-cognitively demanding, logistical-style tasks are often performed while distracted. These efforts tend to not create new value in the world and are easy to replicate.”
– Cal Newport
Deep work refers to our ability to work in a state of deep concentration and focus for a long period of time, without distraction or interruption.
Working asynchronously removes employees from the daily distractions of a workplace so they can dedicate sections of their day to creating high-value, productive output.
Benefits of Working Asynchronously
More Flexibility: Working Asynchronously allows employees to become the masters of their time. They can create work schedules that fit into their lifestyle which leads to a more fulfilled work-life balance.
More Detailed Responses: When working asynchronously people are not expected to reply or respond immediately which means they can take their time to really think about an issue and analyze it before they offer their response or opinion. This leads to more thought-through decisions.
Fewer Distractions: Working asynchronously helps employees enter a flow state easier. By carving out some time dedicated to a particular task, they can truly engage in deep thinking without having to be worried about being interrupted by colleagues about other unrelated tasks.
Automatic Documentation: Most asynchronous communication is written communication. Whether through email, chat or on an online whiteboard there is usually a record of the communication that takes place. You can always go back and refer to this communication and it serves as a log that avoids communication redundancy.
Flattens Hierarchies: It creates an open forum for employees to add suggestions and thoughts. It takes away some of the intimidating factors that could exist during meetings or face- to face interactions.
Tools for efficient asynchronous communication
Email: The popularity of email seems to be fading out with the emergence of many new-age communication tools like Slack that claim to be built for remote collaboration. But email still translates very well to asynchronous communication. It does not expect an immediate response, so team members can reply on their own time with thoughtful, valuable inputs.
Video Communication: Video conferencing has been the default way of communication to replace face-to-face meetings. But it doesn’t translate very well to asynchronous work as it involves having to get people together at a common time. Tools like Loom fixes that and allows you to experience the benefits of verbal communication through recordings and screen sharing.
Online Whiteboard:
With tools like Creately you can visualize thoughts, ideas and plans just like you would in a conference room. Team members can then review your visualizations and add comments, thoughts and suggestions to it at their own time. This creates a flexible and intuitive virtual workspace that is great for your asynchronous teams.
Online Whiteboard From Creately ( Click on the image to know more)
Tips to Working Asynchronously
Focus on Goals: Many remote workers feel pressure to “look busy.” But asynchronous work is all about output, not activity. By focusing on clearly defined tasks you can cut down on unnecessary team chatter, do better work, and enjoy your new work-life balance.
Establish Core Hours. Working asynchronously doesn’t mean working without a routine. On the contrary, it sometimes involves creating a more structured and detailed plan that you stick to. Communicating what your core work hours are to the rest of the organization is important so everyone knows who is working on what schedule.
Set Timing Expectations: While collaborating asynchronously it is crucial to be clear about deadlines. Working on individual schedules cannot ignore the fact that larger timelines need to be adhered to. Setting expectations of when something is due is important to help employees organize the workday to prioritize urgent tasks first.
Async Does Not Mean Asocial. Working asynchronously does not mean working in isolation. It is still important to find ways to have team members connect with each other and have fun. Organizations need to prioritize ice-breakers and virtual parties or so coworkers can let their hair down and get to know their teammates on a personal level.
Tell us About your Experience Working Asynchronously
Organization-wide asynchronous work is still a relatively new concept and teams are still trying to work out all the kicks. Do you have any experience working asynchronously? We’d love to hear your thoughts on the matter, please feel free to share your insights in the comments below.
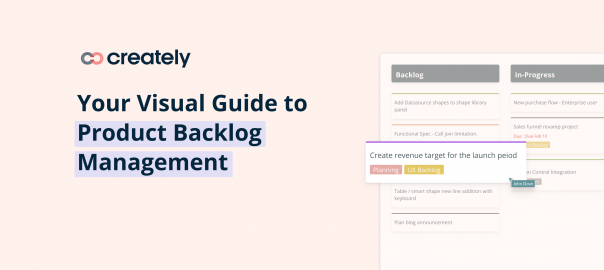
An essential part of the continuous delivery system of product development is the management and implementation of a product backlog. It is a critical component of the Agile process and is the core of the delivery cycle. It allows teams to deliver value in short, iterative increments which focus on the end-user.
What is a Product Backlog?
A product backlog is a prioritized set of desired functionality that contains all the necessary items to complete a product release. It contains everything from new features, enhancements, technology upgrades, and bug fixes. And while it’s easy to mistake a product backlog for a task sheet or just a product development ‘to-do’ list, it’s so much more than that.
It is essentially the development command center where Agile teams break down requests into a series of components which are prioritized based on importance and complexity. A properly managed product backlog is critical for the team to run like a well-oiled machine.
What Does a Product Backlog Include?
A product backlog is not a list of technical specifications that need to be completed to further the development process. On the contrary, it is a collection of tasks expressed in plain language, communicating how it will make the user experience better.
It consists of user stories, possible bugs and challenges, insightful research findings and much more.
An important thing to note is that a product backlog is never truly ‘complete’. It is continually evolving as more issues, challenges, and opportunities are identified. During the development, process teams are unable to do everything they want to do at once. A product backlog helps prioritize items based on importance and impact and creates a systematic workflow where teams address the most important items as they go.
Product Backlog Management
Backlog management is the process through which product owners add, adjust, groom, and prioritize the backlog to make sure the most valued features are shipped to users. Without proper backlog management, the backlog can become unreasonably large and complex. An oversized backlog affects innovation, slows your time to market, and can frustrate Agile teams.
Product backlog management is a discipline that ensures many of the core tenets of the Agile manifesto are preserved through the development process and is implemented to make sure the big picture is not lost during everyday tasks.
The core principles of backlog management are:
Ensure continual innovation
Focus on user experience
Maintain costs
Visualizing the Product Backlog
A lot of product backlog management has to do with the coordination of multiple efforts. In order to do that effectively, you need to see all the moving parts involved in a build. A great way to do that is by using visual tools to represent different aspects of the development process to keep teams aligned and effectively distribute work.
User Stories
User stories are a great way to make sense of your backlog, it helps you prioritize what needs to get done and makes sure you keep the product vision at the core of everything you do. This simple collaborative exercise helps you define where your users are with respect to your product, helps identify gaps and prioritize those features that will have the largest impact to the most number of people.
User Story Template ( Click on template to edit it online)
Kanban Boards
A Kanban board is a tool made popular in project management but can have great utility when implemented in the Agile process. It helps establish order into a team’s daily activities. You can visualize all the work that needs to be completed, limit work-in-progress and maximizes efficiency. It uses cards, columns, and continuous improvement to help teams commit the right amount of resources to each task and get the job done in the most efficient manner. A Kanban board software helps to create Kanban board easily.
Kanban Board Template ( Click on template to edit it online)
Retro Boards
Retrospective meetings are a great way to evaluate the progress a team is making at regular intervals during a build. A retro board helps teams list down the tasks completed, the wins and what challenges stood in their way. The backlog manager can then use this information to re-allocate resources, identify blockers, and more efficiently manage the backlog as a whole.
Retro Board Template ( Click on template to edit it online)
Backlog Grooming
One of the primary tasks of a backlog manager is to ensure that the product backlog stays as an effective tool for teams to plan and execute tasks around. When backlogs get too big or are filled with outdated or incomplete tasks, it can be hard for teams to properly prioritize work and maintain a continuous workflow.
Backlog grooming usually takes place as regularly scheduled sessions with the entire Agile team. The primary goal of backlog grooming is to keep the backlog up-to-date and ensure that backlog item are prepared for upcoming sprints
This regular refining of the backlog is done to ensure:
Outdated stories and tasks are removed
New users stories that reflect newly discovered insights are added to the backlog
Larger user stories are broken down into smaller items
User stories are reordered based on the current priority
Story-points or timelines are reassigned if required
Blockers are quickly identified and corrective action is taken.
Tips for Effective Backlog Management:
Start With the End User in Mind
Even the operational aspects of Agile development should focus on the value that will be delivered to the end user. You must align your product backlog with the product vision and tasks should be prioritized accordingly. Every decision should be made in context with the key benefits for the customer, and how the product is differentiated from the competition.
Improve Collaboration
Backlog management can never be done in isolation. It involves the consistent and frequent involvement of product managers and the development team. Encouraging people to participate in backlog discussions will increase the understanding of everyone in the team and result in a clear understanding of the project requirements.
Regularly Update Stakeholders
The product backlog is the single source of truth for the entire Agile team. The backlog manager needs to ensure the backlog is transparent and clearly communicates all the important information to everyone involved. Any change or update not reflected in the backlog needs to be communicated to all stakeholders.
Regularly Review Timelines
Fluidity is one of the core principles of the Agile Methodology. Adapting to changes and prioritizing tasks as new information arises is critical to keeping the user’s needs at the forefront.
As a result, original timelines are likely to change frequently. Regularly updating timelines is key to managing release cycles.
Set Priorities
Prioritization is the key point in backlog management and should be clearly aligned with the mutually agreed upon product vision and KPIs.
Using popular prioritization frameworks allows you to order ideas and plan iterations more easily.
Using the Impact Effort matrix template, you can prioritize the tasks better and choose the most important ones for immediate development.
Impact-Effort Matrix Template ( Click on template to edit it online)
Tell us Your Views on Product Backlog Management
Product backlog management is an emerging discipline that is constantly evolving. Do you have any experience with the implementation of backlog management in your development process? We would love to hear some of your insights and learnings along the way. Please feel free to tell us about it in the comments below.