An Excel workbook may already hold the figures behind a decision. If the team also needs to see what happens after each choice, a decision tree can make the paths easier to discuss. For example, a shipping policy might ask whether an order reaches a threshold, then check membership only if it does not.
You can draw that tree in Excel using Shapes or start with a SmartArt hierarchy. The steps below work best for a small decision tree in desktop Excel; ribbon labels may vary by version. For a tree that several people need to revise, you can build the editable diagram in Creately and place an exported image in the workbook.
What Is a Decision Tree in Excel?
A decision tree starts with a question, branches into possible answers, and ends each path with an outcome or another question. A tree drawn in Excel is a visual guide to the decision. Shapes and SmartArt do not turn the diagram into an automatically calculated model; if the result depends on spreadsheet values, keep the calculations in cells and check that the displayed branches still match them.
This guide focuses on a decision diagram. If you need the broader method of assigning probabilities or comparing expected values, see the decision tree guide. For a process in which choices route work to different steps, the decision flowchart guide may be a closer fit.
Plan the Branches Before Drawing
Write down the root question, the possible answers, and the outcome at the end of each path. Use one question per decision node and label branches with a specific answer such as “Yes” or “No.” Check that the answers cover every likely case and that no branch ends without an outcome.
For a shipping-policy example:
| Decision or answer | Next step |
|---|---|
| Is the order at least $100? Yes | Free shipping |
| Is the order at least $100? No | Is the customer a member? |
| Member? Yes | Discounted shipping |
| Member? No | Standard shipping |
This outline keeps the logic separate from the drawing. It also makes it easier to spot a missing branch before you spend time formatting shapes.
How to Make a Decision Tree in Excel Using Shapes
Use Shapes when the tree has uneven branches, needs labels on connecting lines, or may change during review. Microsoft’s Shapes instructions and connector instructions apply to supported desktop versions of Excel as well as other Office apps.
- Open a worksheet and allow room for the tree. Put the root question near the top or left side. Leave space between branches so their labels remain readable.
- Insert the decision nodes. Select Insert > Shapes, choose a shape, and drag it onto the worksheet. Use one style for questions and another for outcomes. You can use a diamond for a decision and a rectangle for an outcome, or keep all nodes as boxes if the labels make their roles clear.
- Add the text. Select a shape and type, or right-click and choose Edit Text if needed. Keep each node short; put supporting numbers or assumptions in nearby cells or notes rather than squeezing them into the shape.
- Connect the branches. Under Insert > Shapes, choose a straight or elbow connector from the Lines group. Attach its ends to connection points on the two shapes. A connector stays attached when you move a shape; a plain drawn line may not.
- Label and check each path. Add small text boxes for “Yes,” “No,” or another answer beside the connectors. Trace every path from the root to an outcome. In the shipping example, an order below $100 should reach the membership question, not the free-shipping outcome.
- Format and save. Use the Shape Format controls to make node types distinguishable, align the tree, and save the workbook. Review it at the zoom level your colleagues will use.
How to Make a Decision Tree in Excel Using SmartArt
For a small tree with a regular hierarchy, select Insert > SmartArt > Hierarchy and choose a layout with room for your branches. Microsoft’s SmartArt hierarchy guide confirms that hierarchy layouts can be used in Excel, and its layout guide lists decision trees as a use for them.
- Replace the placeholder text with the root question and answers. The Text Pane can make it easier to see the levels of the tree.
- Select a box and use SmartArt Design > Add Shape to add another choice or outcome. Use the Text Pane’s indentation controls to place a child beneath its parent.
- Read the result from the root to every end point. Add short labels in the boxes if the layout does not make the meaning of a branch obvious.
- Save the workbook. If the preset structure cannot show your actual paths clearly, rebuild the tree with individual Shapes instead of forcing the decision into the layout.
SmartArt keeps a neat hierarchy as you add boxes, but its preset arrangement can be restrictive for paths of different lengths or detailed branch annotations. Individual Shapes give you more control over those cases.
When Excel Becomes Hard to Maintain
Excel works for a compact tree that belongs with workbook data. As the tree grows, moving nodes and keeping connectors and labels tidy takes more manual work. Reviewers may also need a clear place to discuss why a branch exists. Keep the decision logic and source data documented whether you stay in Excel or move to a diagramming workspace.
An exported diagram inserted into Excel is an image, not a live view of the editable source. If you change the source tree later, replace the workbook image and check that both versions tell the same story.
Make an Editable Decision Tree in Creately
If you plan to place a Creately diagram in Excel as a PNG, check your plan first: PNG export is available on Pro, Business, and Enterprise, according to the current Creately plan comparison. If you do not have export access, use the native Excel Shapes or SmartArt steps above to keep the tree in the workbook.
Creately’s decision tree maker provides editable templates, connectors, a shared canvas, and comments for reviewing paths. Start with a template, replace its sample question and outcomes, and label each branch. Add notes or supporting references to the relevant nodes, then ask teammates to review missing cases on the diagram itself.
If the tree needs to appear in an Excel workbook, export it from Creately as a PNG. In Excel, choose Insert > Pictures and select the PNG from your device; the remaining menu labels may vary by version. Keep the Creately workspace link with the workbook so reviewers can find the editable version. The inserted PNG will remain static until you export and insert an updated copy.
Decision Tree Templates to Start With
These existing Creately templates cover different levels of detail. Choose one that resembles your decision, then replace its sample content rather than copying its logic unchanged.
Simple Decision Tree Template
Use this for a short sequence of questions and outcomes, such as the shipping-policy example.


Decision Tree Diagram Template
Use this layout when you need to map several possible paths before selecting an outcome.

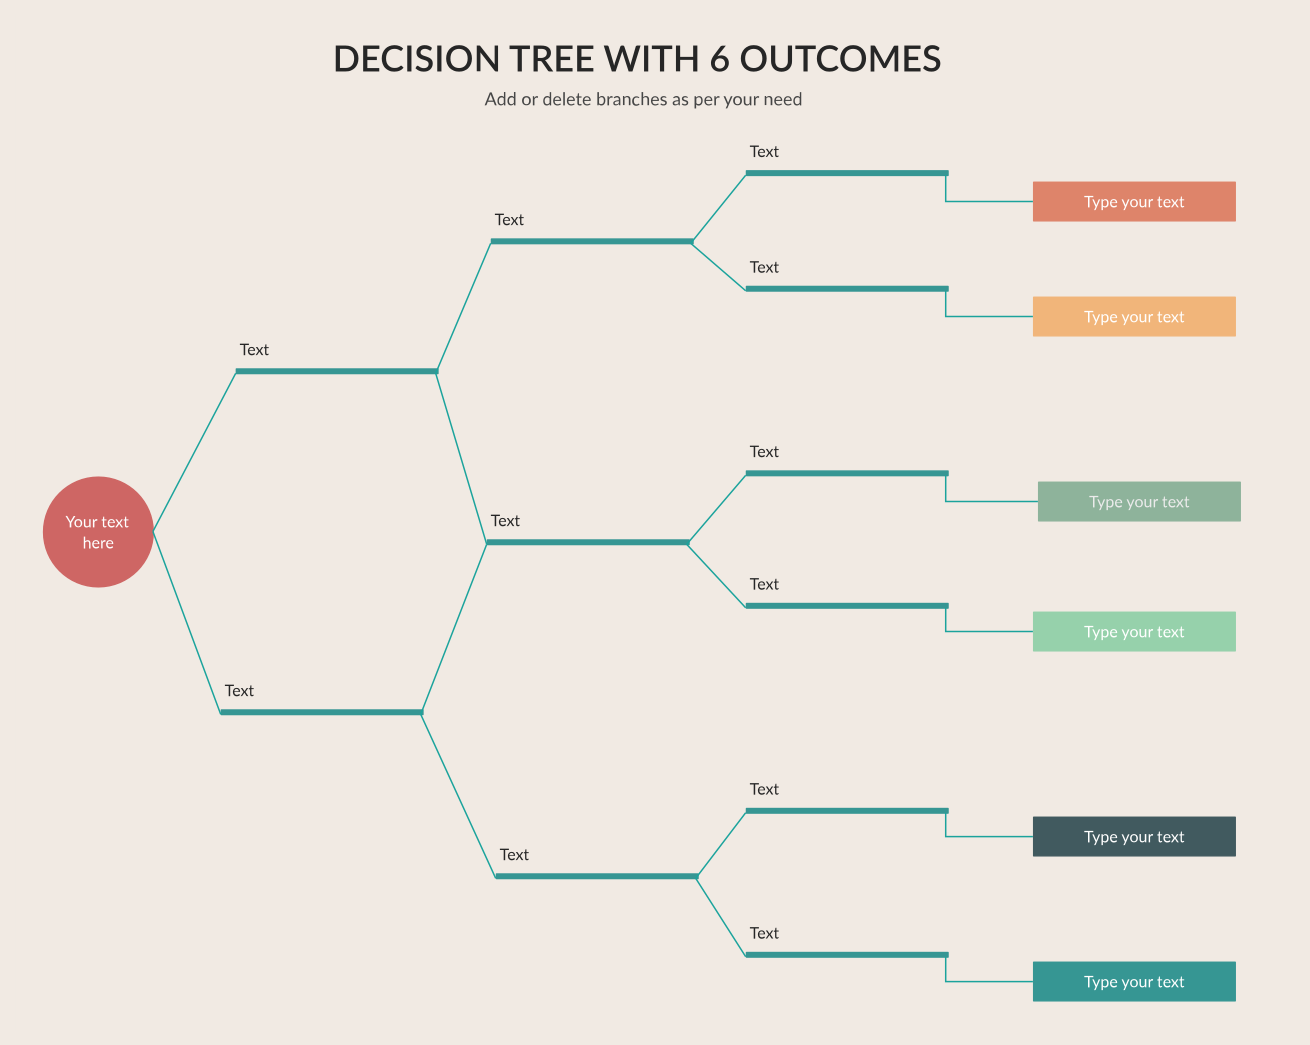
Decision Tree with Six Outcomes
This example offers more endpoints when a two-answer tree is too small for the decision you need to explain.
For more general examples and advice on choosing a tree structure, read how to create and read a decision tree.